
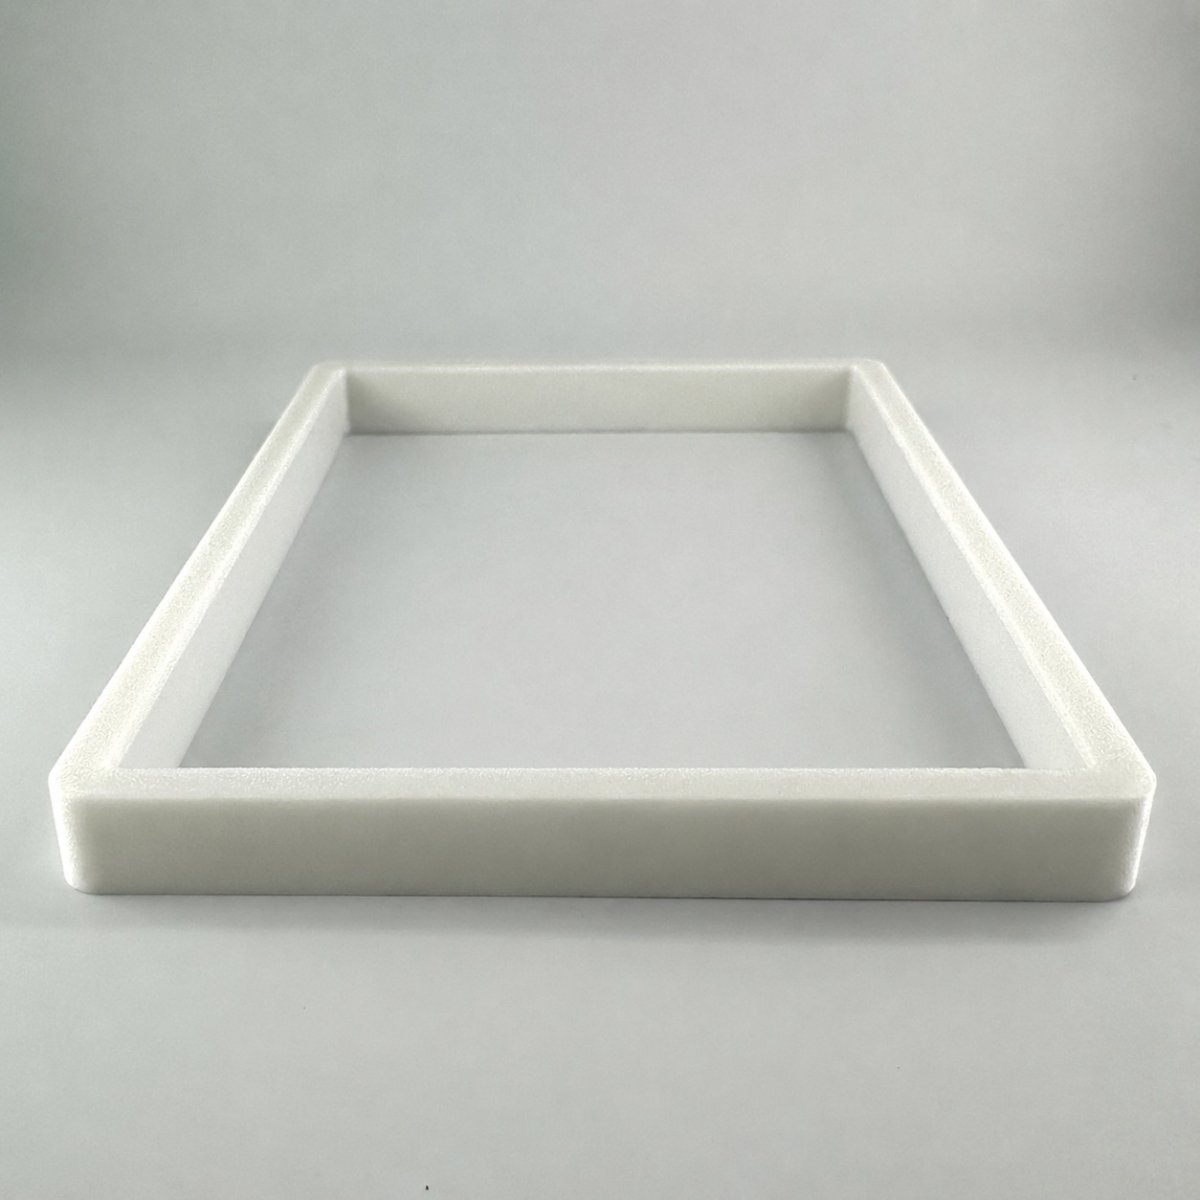
It is a common and frustrating moment for any DIY enthusiast or homeowner. The new kitchen tiles are gleaming, the fresh plaster is perfectly smooth, but when you go to refit your plug sockets, you discover a problem. The electrical backbox is now recessed deep into the wall, leaving the socket faceplate floating in mid air. This is more than just a cosmetic issue; it is a structural and safety concern that demands a proper socket too deep in wall solution.
Many turn to quick fixes found on internet forums, from stacking washers to cutting up plastic tubes. These DIY hacks, however, often create more problems than they solve, leading to cracked faceplates, wobbly fittings, and even potential electrical hazards. The real solution lies in understanding why these shortcuts fail and choosing a method that provides a solid, safe, and professional finish.
This guide debunks the common myths surrounding recessed backboxes. We will explore why a sunken socket is a structural failure, why common workarounds are unsafe, and how a bespoke, solid spacer provides the only reliable support for safe and long lasting operation. If you already know the depth you need to fix your socket, you can design the perfect part using our Build My Spacer configurator.
Table of Contents
What is a Sunken Backbox and Why Does it Happen?
A sunken or recessed backbox occurs when the metal or plastic housing for your electrical wiring is set further back than the finished wall surface. This housing, also known as a pattress box, is designed to sit flush with the final wall layer, allowing the socket or switch faceplate to be screwed on securely and sit neatly against the wall.
-
Common Causes: This issue typically arises during home renovations. Adding a layer of tiles in a kitchen, fitting new bathroom wall panels, or applying a thick skim of plaster can add several millimetres of depth to the wall, leaving the original backbox behind.
-
The "Floating Socket" Effect: When the faceplate has no solid surface behind it for support, it feels unstable. Plugging in an appliance causes it to wobble or push back, putting stress on the wiring connections and the faceplate itself.
-
Screws Are Too Short: The standard 3.5mm electrical screws supplied with sockets are designed for a flush fitting backbox. When the box is recessed, these screws are often too short to reach the threaded lugs inside the box, making it impossible to secure the faceplate.
The Aesthetic vs Functional Problem
A recessed socket is both a visual and a mechanical issue. A gap around the faceplate ruins the clean lines of a new wall finish, whether it is a tiled splashback or a freshly plastered living room. But the functional problems are far more significant.
-
Mechanical Stress: Without the wall to support it, the entire force of plugging and unplugging an appliance is transferred to the two small fixing screws and the plastic faceplate. This constant flexing can lead to the faceplate cracking or even snapping over time.
-
Debris Ingress: The gap created by a sunken backbox allows dust, debris, and moisture to get inside the electrical housing. This can interfere with the connections and create a potential safety hazard. A properly fitted socket creates a seal against the wall, protecting the internal wiring.

UK Electrical Standards and Sunken Sockets
Whilst specific regulations in BS 7671 (the UK wiring regulations) do not mandate a maximum depth for a backbox, established best practice and general safety principles dictate that the front edge should be flush with the finished wall surface. A flush finish ensures the enclosure is properly sealed and that the faceplate is mechanically stable.
-
The Ideal Finish: For optimal safety and stability, the backbox should be within 3mm of the finished surface. Anything more than this creates a noticeable gap that compromises the integrity of the installation.
-
Bridging the Gap Safely: When the gap is too large, the correct solution is to bridge it with a solid, non conductive, and fire resistant material. A socket spacer is an extension frame designed specifically for this purpose, providing a solid mounting surface and restoring the intended safety barrier of the enclosure. For a deeper dive into how professional solutions compare to DIY methods, see our guide on Professional Socket Spacers vs DIY Shims.
Myth: Plastic Tubing and Washers are Safe Solutions
A quick search online for a socket too deep in wall solution will reveal a host of DIY "hacks". Two of the most common are using small pieces of plastic tubing (sometimes called a "caterpillar spacer") over the screws or stacking metal washers behind the screw lugs. Whilst these might seem like clever, low cost fixes, they are fundamentally flawed and potentially dangerous.
-
Debunking the Myth: These methods fail because they only support the socket at two small points: the screw holes. They do not provide the continuous, solid support across the back of the faceplate that is required for stability.
-
Point Loading and Cracked Faceplates: By concentrating all the pressure on the two screw points, washers and tubing create stress points. When you plug something in, the force is not distributed across the wall but is instead focused on these two weak areas, making the faceplate highly susceptible to cracking.
-
Levelling Difficulties: Trying to get a socket level by stacking individual washers or cutting two pieces of tubing to the exact same length is incredibly difficult. The result is often a crooked socket that is impossible to align perfectly.
-
Unprofessional Finish: Even if you manage to get it level, the final result looks unprofessional. Glimpses of stacked washers or bits of plastic behind the socket betray a shortcut that detracts from the quality of your renovation work.
The Problem with Washers and Shims
Using individual shims or washers presents several practical challenges during installation that make them a frustrating and unreliable choice.
-
No Lateral Stability: Washers provide no side to side support. When you push a plug in, the socket can easily shift left or right, further stressing the electrical connections inside. A solid spacer creates a frame that locks the socket in place.
-
Dropping Parts in the Wall: Fumbling with tiny washers or shims whilst trying to align a socket and a screw is a recipe for disaster. It is incredibly easy to drop them into the wall cavity, where they are lost forever.
-
Uneven and Crooked Finish: Even a tiny difference in the height of the washer stacks on each side will cause the socket to sit at an angle. This is almost impossible to correct without taking it all apart and starting again.
Why Solid Spacers Win
A purpose built, solid socket spacer overcomes all of these issues by replicating the support of a correctly installed, flush backbox.
-
Continuous Mounting Surface: A solid spacer provides a stable, flat surface for the entire rear of the socket faceplate to rest against. This distributes the pressure evenly, just as a wall would, eliminating wobble and preventing cracks.
-
Increased Safety: By completely closing the gap between the wall and the backbox, a bespoke spacer restores the integrity of the fire resistant enclosure. It prevents dust and debris from entering and ensures there are no exposed gaps around the electrical housing.
-
Speed and Simplicity: Installing a single, solid spacer is far quicker and easier than fiddling with multiple small parts. You simply place one component over the backbox and screw the faceplate on. It is a one part solution for a perfect finish.
The Danger of Using Longer Screws Without Support
Another common but misguided solution is to simply buy longer screws. The logic seems simple: if the original screws do not reach, just get longer ones that do. However, this approach completely ignores the mechanical principles at play and introduces significant risks.
-
The Myth of Reach: The belief is that as long as the screw can reach the threaded lug in the backbox, the socket is secure. This is fundamentally incorrect. The screw is only one part of the system; the faceplate also needs support from behind.
-
The "Lever Effect": A long, unsupported screw acts like a lever. Every time you plug an appliance in, you are pushing on the faceplate, which puts a bending force on the screw. Over time, this can cause the screw to bend or even snap, leading to a complete failure of the fitting.
-
Fire Safety Compromised: A secure, enclosed frame is essential for fire safety. A faceplate held on only by long screws leaves a significant gap, breaking the fire barrier and potentially allowing sparks to escape in the event of a fault.
-
Damaging the Backbox: Over tightening a long screw without a spacer pulls the faceplate inwards. This immense pressure can crack the faceplate or, in the case of drywall installations, even pull the entire backbox forward, damaging the wall itself.
Mechanical Stress and Screw Fatigue
The forces involved in everyday use should not be underestimated. Repeatedly plugging and unplugging appliances creates a cycle of stress on the fixing screws.
-
Metal Fatigue: Just like bending a paperclip back and forth, this cyclical stress causes metal fatigue in the long, unsupported screws. Eventually, they can weaken and fail without warning.
-
Faceplate Strain: The faceplate, typically made from brittle plastic like urea formaldehyde, is not designed to be bent. Pulling it tight against a distant backbox puts it under constant tension, making it much more likely to snap.
-
Spacers as Shock Absorbers: A solid spacer absorbs this pressure. When you tighten the screw, the force is transferred through the spacer to the backbox lug, holding the faceplate securely against the spacer without bending or straining it.
Maintaining the Fire Barrier
Electrical backboxes are designed to contain any potential fire or sparks that might result from a fault in the wiring. They act as a crucial fire resistant enclosure.
-
The Role of the Enclosure: To be effective, this enclosure must be continuous. The faceplate should sit tightly against the box or a suitable extension, leaving no gaps.
-
A Broken Barrier: A gap between the wall and the socket, bridged only by screws, breaks this barrier. It creates a path for sparks to reach flammable materials within the wall cavity, such as timber studs, insulation, or plasterboard paper.
-
Restoring the Barrier: Using a bespoke extension frame or spacer maintains a continuous, safe barrier. It effectively extends the front of the backbox to meet the wall surface, fully enclosing the wiring as intended.

Bespoke Spacers vs Off-the-Shelf Extension Frames
Once you have decided against DIY hacks, you will find two types of professional solution: standard, off the shelf extension frames and bespoke, custom made spacers. Whilst off the shelf frames can work in some situations, they often lack the precision needed for a truly flawless finish.
-
The Problem with Standard Depths: Off the shelf frames are typically sold in fixed depths, such as 10mm or 15mm. However, the depth of your tiles plus the adhesive is unlikely to be exactly 10mm. This leaves you with either a small gap or a frame that protrudes from the wall.
-
The Instability of Stacking: Some people try to solve this by stacking multiple thin spacers. This is not recommended as it creates weak points and an unstable, messy looking installation. A single, solid spacer of the correct depth is always the superior choice.
-
Bespoke for Non Standard Fittings: Finding extension frames for multi gang or non standard sockets in local DIY shops is nearly impossible. Bespoke manufacturing allows you to create a spacer for any configuration, including triple gang sockets or fittings with unique dimensions.
-
Millimetre Perfect Finish: For high end renovation projects, "close enough" is not good enough. A bespoke spacer allows you to achieve a millimetre perfect finish that complements the quality of your workmanship. You can specify the exact depth you need for a truly integrated look.
The Limitations of Mass-Produced Parts
Mass produced extension frames are designed for common scenarios, but they fall short in custom installations. Their one size fits all approach often leads to compromises.
-
Flimsy Materials: Many standard frames are made from thin, flimsy plastic that can warp or deform when the faceplate screws are tightened, preventing a truly flat and flush finish.
-
Limited Availability: Whilst single and double gang frames are common, finding solutions for larger installations can be difficult. This is particularly true for items like media plates or triple sockets, which are rarely catered for. As double gang sockets are so common in UK homes, a custom solution is often the best path. For more on this, read The Ultimate Guide to Custom Double Gang Socket Spacers.
-
The Professional's Choice: Professional electricians and installers prefer bespoke spacers because they guarantee a perfect fit every time. This saves time on site and ensures a high quality result that clients will be happy with, avoiding call backs to fix wobbly sockets.
Custom Solutions for Modern Interiors
A bespoke approach offers a level of customisation that is essential for modern, design led interiors where every detail matters.
-
Colour and Style Matching: Bespoke spacers can be made in different colours and finishes to match your chosen faceplates, whether they are standard white plastic, brushed chrome, or black nickel. This allows the spacer to blend in seamlessly.
-
Solutions for Complex Walls: Walls with unique finishes, such as wooden panelling, bespoke cabinetry, or uneven stone, require a tailored solution. A custom spacer can be designed to match the specific contours and depths of these surfaces. Our Build My Spacer configurator allows you to input the precise measurements for any job.
-
Quality Assurance: Choosing a bespoke solution from a specialist manufacturer ensures you are getting a product engineered for the task. You can see the quality of finish expected by reading the reviews of bespoke socket solutions from other customers.
How to Measure and Fix Your Deep Socket Correctly
Fixing a recessed socket with a custom spacer is a straightforward process. The most critical part is taking an accurate measurement to ensure a perfect fit. Follow these steps for a professional result.
-
Isolate the Power: Before you touch any electrical fitting, always turn off the power at the consumer unit (fuse box). Use a voltage tester to confirm there is no power at the socket you are working on.
-
Measure the Gap: Carefully measure the distance from the front face of the metal or plastic backbox to the finished wall surface. This is the depth of spacer you will need.
-
Choose the Correct Gang Size: Identify whether you have a single gang (one socket or switch), double gang (two sockets), or a bespoke multi gang fitting.
-
Ensure Accuracy: For a precision fit, it is vital to be accurate to the millimetre. The easiest way to do this is to use a digital calliper or a small ruler held perfectly straight.
-
Install the Spacer: Once your custom spacer arrives, place it over the backbox. It should sit flush against the wall. Use new, longer 3.5mm screws that are the appropriate length for the spacer depth plus the standard screw depth. Feed them through the faceplate and spacer, and tighten them into the backbox lugs for a secure, wobble free finish.
Step-by-Step Measurement Guide
Accuracy is key. An incorrect measurement is the only thing that can go wrong when ordering a bespoke part.
-
Use a Straight Edge: Place a straight edge (like a ruler) across the hole in the wall, resting on the finished wall surface. Then, use another ruler or a tape measure to measure the distance from the underside of the straight edge down to the front face of the backbox lug where the screw goes in.
-
Measure Both Sides: It is good practice to measure the gap at both the top and bottom screw points (or left and right). Walls, plaster, and tiling are rarely perfectly flat, and you may find a small difference. It is usually best to use the smaller of the two measurements to ensure the spacer does not protrude.
-
Consider a Shadow Gap: For a high end architectural look, some designers prefer the spacer to be slightly recessed. If you want to create a small shadow gap, simply subtract 1mm from your measurement when ordering.
Ordering Your Custom Solution
Once you have your precise measurements, getting the perfect part is simple.
-
Use a Specialist Tool: Online tools are designed to remove guesswork and make the ordering process easy. Our dedicated Build My Spacer tool guides you through the process, allowing you to input your exact depth, gang size, and colour.
-
Select Your Options: Choose the material and colour that best matches your decor and faceplates. Whether you need a standard white spacer or one to match a specific metallic finish, a custom service can provide it.
-
Final Confirmation: Double check your measurements before placing your order to ensure you receive a spacer that provides a flawless, professional finish for your project.
Frequently Asked Questions
Here are answers to some common questions about using socket spacers to fix recessed backboxes.
-
Can I use a socket spacer if my wall is uneven? Yes. If your wall is uneven, measure the gap at both screw holes and order a spacer with a depth that matches the shallowest point. This ensures the spacer will not protrude. The small remaining gap at the deeper point will be hidden by the faceplate's overlap.
-
Are socket spacers legal and safe to use in the UK? Yes, when made from appropriate materials. Purpose built spacers made from materials with suitable electrical and fire resistance properties (like those used in our products) are a safe and accepted way to solve the problem of a recessed backbox. They are far safer than DIY hacks like washers or plastic tubing.
-
What is the maximum depth a socket spacer can bridge? Bespoke spacers can be manufactured to almost any depth required, from a few millimetres to 50mm or more. For very deep recesses, such as those found in media walls, a custom extension frame is the ideal solution.
-
Do I need a different spacer for a light switch versus a plug socket? No. In the UK, most standard single and double gang light switches and plug sockets use the same size backbox and faceplate screw positions. Therefore, the same single or double gang spacer will work for both. For more details on light switch spacers, see The Essential Guide to Custom Depth Light Switch Spacer Plates.
-
Can I stack multiple socket spacers to reach the required depth? Whilst technically possible, stacking spacers is not recommended. It creates potential points of weakness and instability between the layers. A single, solid spacer of the correct depth provides a much more robust and professional solution.
-
How do I know if I need a single or double gang spacer? This is determined by the size of your faceplate. A single gang fitting has one switch or socket. A double gang fitting has two. Simply match the spacer to the fitting you have.
-
Will a socket spacer work with smart home switches like Hive or Nest? Yes. Most smart switches are designed to fit standard UK backboxes. However, they often have a larger electronic module on the back, which requires more wiring space. A deep spacer not only solves the recess issue but also provides valuable extra room behind the faceplate, making installation easier.
-
Do I need to hire an electrician to fit a socket spacer? If you are not confident or competent in carrying out electrical work, you should always hire a qualified electrician. However, fitting a spacer is a straightforward task. The process involves unscrewing the faceplate, placing the spacer, and screwing the faceplate back on with longer screws. The key is to always ensure the power is safely isolated before you begin.
Electrical Safety
Always isolate the circuit and confirm it is dead before removing a socket or switch faceplate. Only carry out the work if you are competent to do so. If you find damaged wiring, signs of overheating or anything unsafe, stop and contact a qualified electrician.