
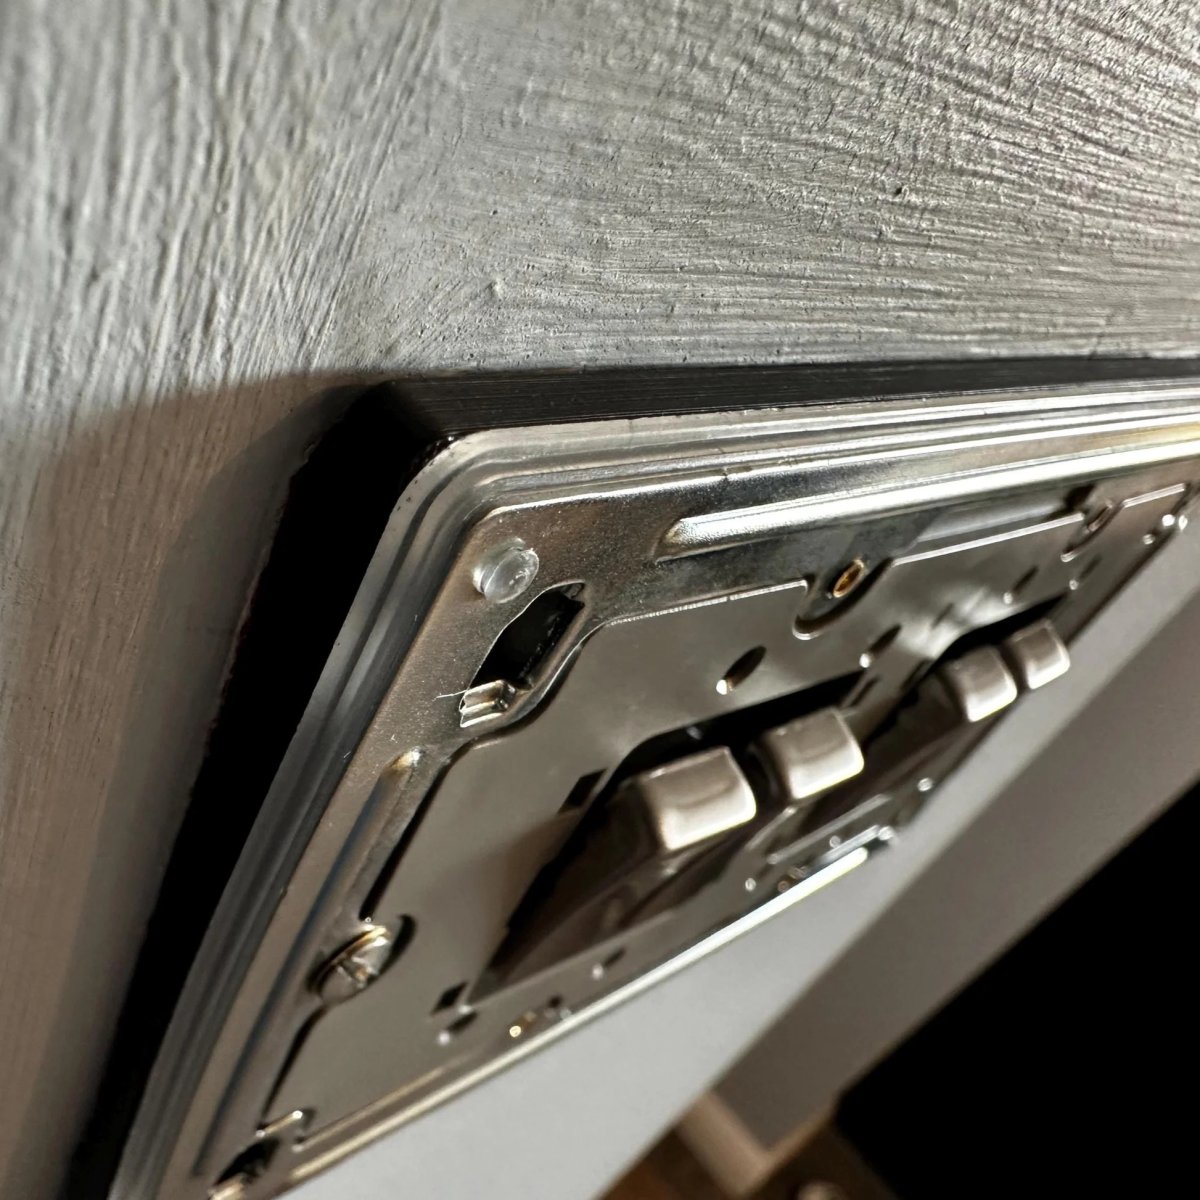
That stack of washers or scrap of plastic gathering dust in your toolbox might look like a quick fix for a recessed backbox, but it is often the very thing preventing a high-quality finish. Most homeowners and even some tradespeople have faced the frustration of a spongy socket that flexes every time a plug is inserted, or a faceplate that leaves an unsightly gap against a newly tiled splashback. It is tempting to reach for a makeshift solution when you are struggling to find screws long enough to reach a sunken box, yet these temporary fixes rarely provide the stability required for long-term safety.
In this guide, we explore the critical differences in the professional socket spacer vs diy shim debate, demonstrating why a bespoke component is essential for a stable and secure installation. You will discover how a tailored approach solves depth issues for non-standard walls and ensures your electrical fittings remain perfectly flush. For those dealing with unique dimensions, our Build My Spacer configurator provides a precise, professional alternative to unreliable DIY methods. We will examine the structural benefits of using purpose-made spacers to achieve a result that is both aesthetically pleasing and compliant with modern standards.
Key Takeaways
- Understand why a sunken backbox leads to mechanical instability and how a solid bridge prevents damage to electrical terminals during regular use.
- Compare the structural integrity of a professional socket spacer vs diy shim to see why single-piece components provide a safer, more permanent result for UK homes.
- Learn the precise method for measuring the distance between your finished wall surface and the backbox lug to ensure a perfectly flush faceplate.
- Discover how bespoke spacers accommodate non-standard depths and various colours to maintain the professional aesthetic of your renovation project.
- Utilise the Build My Spacer configurator at https://socketspacers.com/build to design a custom-fit solution that eliminates the need for temporary or unsafe shimming.
Table of Contents
The Challenge of the Sunken Backbox
A sunken backbox occurs when the internal electrical housing sits too far behind the finished wall surface. This is a common byproduct of modern home improvements, such as installing a metro-tiled splashback or adding MDF wall panelling. Whilst the aesthetic goal of these projects is a high-end look, the practical result is often a socket that no longer aligns with its mounting points. Understanding what a pattress or backbox is helps illustrate why this alignment is so vital; the box is intended to provide a rigid, secure anchor for the faceplate.
When a gap exists, the faceplate lacks the necessary rear support. This creates mechanical instability. You might find that the socket moves or flexes when you insert a plug, which is more than just a minor annoyance. It is a sign that the installation is structurally unsound. This situation often leads to the professional socket spacer vs diy shim dilemma. Whilst a DIY shim might seem like a quick fix, it rarely offers the uniform support needed to prevent the plate from tilting or cracking under pressure. A bespoke spacer provides a continuous surface, ensuring the faceplate sits perfectly flush against the new wall finish.
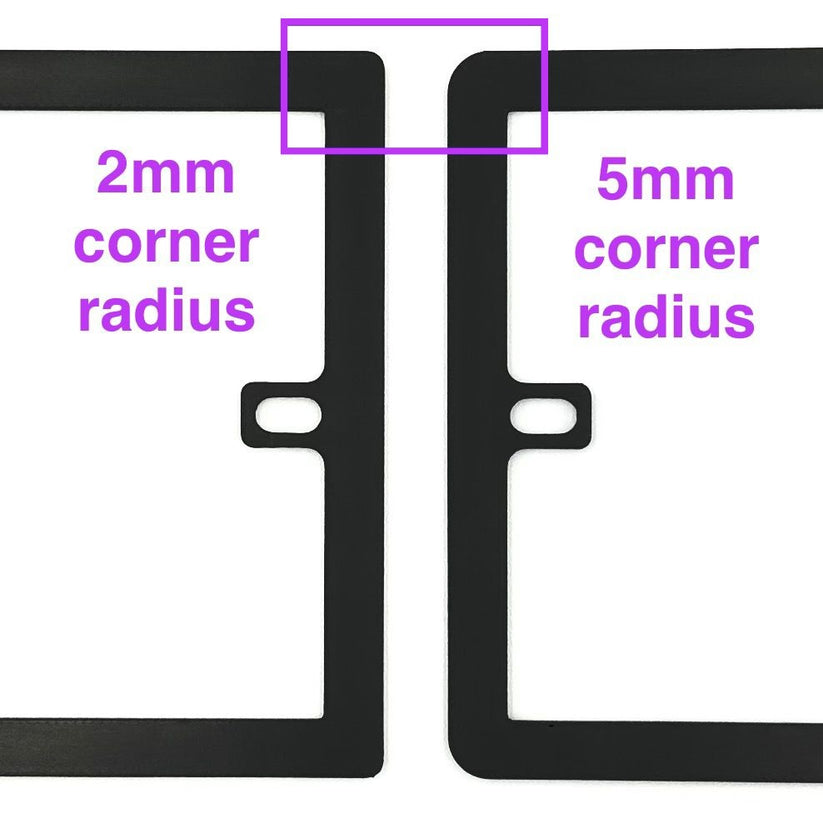
Why Sockets Become Recessed
Most recessed sockets are caused by increasing the wall depth without relocating the backbox. Projects like kitchen tiling, bathroom over-boarding, or the installation of decorative acoustic panels can add anywhere from 5mm to 30mm to a wall thickness. In some instances, the original box may have been installed too deep into the masonry from the start, leaving the lugs recessed even before any redecoration began. Regardless of the cause, the standard screws provided with most UK faceplates will fail to reach the lugs, leading to a frustrating and incomplete finish.
The Consequences of a Poorly Supported Faceplate
A faceplate that "floats" over a gap is subject to constant stress. Every time a plug is inserted or removed, the plastic plate is pushed and pulled against an empty void. This lack of support can lead to several problems:
-
Material Failure: The plastic faceplate can crack under the pressure of being screwed into a void without a solid backing.
-
Aesthetic Damage: Movement causes the surrounding plaster, paint, or grout to chip and crumble over time.
-
Wiring Strain: Constant shifting can loosen the terminal screws, potentially leading to arcing or overheating within the box.
-
Dust Ingress: Gaps between the plate and the wall allow debris to enter the electrical housing, which can be a fire safety concern.
Using our Build My Spacer configurator ensures that you can create a solid, continuous bridge that eliminates these risks entirely. By providing a stable foundation, you protect both the electrical integrity of the circuit and the visual quality of your home renovation.
Professional Socket Spacer vs DIY Shim: A Comparative Analysis
When deciding between a professional socket spacer vs diy shim, the choice often comes down to the difference between a permanent structural fix and a temporary workaround. Whilst both might initially appear to bridge the gap between a backbox and a faceplate, their performance over time varies significantly. A makeshift solution might fix the immediate problem of a screw not reaching, but it rarely addresses the underlying need for a stable, rigid mounting surface.
Common DIY hacks frequently involve using plastic tubing, stacks of washers, or even offcuts of wood and cardboard. These methods present several practical challenges. Stacking washers is a tedious process that requires balancing multiple small parts whilst trying to thread a long screw. Plastic tubing often compresses unevenly, leading to a socket that sits at an angle rather than flush with the wall. Perhaps most concerning is the use of organic materials like wood or cardboard; these can degrade or compress over time, eventually reintroducing the very instability you were trying to solve. In the context of the professional socket spacer vs diy shim debate, these hacks fail because they are not designed to withstand the repeated mechanical pressure of daily use.
The Limitations of DIY Shims and Hacks
Most DIY methods require multiple attempts to get the socket level. Because shims like washers or tubing are individual pieces, they don't provide a uniform surface area for the faceplate to rest against. If one side is slightly more compressed than the other, the faceplate will tilt. This often results in a "spongy" feel when using the switch, as the plate flexes into the void behind it. Over time, this movement can cause the surrounding plaster or grout to crack, ruining the finish of your newly decorated room.
The Benefits of a Professional Bespoke Spacer
In contrast, a bespoke professional spacer is manufactured as a single, solid unit. This design provides a continuous, rigid bridge that transfers the force of plug insertion directly to the backbox. Because these components are custom-made to the exact depth required, they eliminate the trial and error associated with stacking shims to find the right height. This level of precision is particularly important for multi-gang configurations where alignment must be perfect across a larger surface area.
Maintaining this level of structural integrity is a core component of competent electrical work. Ensuring a stable mounting surface aligns with the safety expectations outlined in the UK government's electrical safety regulations, which emphasise the need for installations to be safe and durable. A loose or moving socket is a mechanical failure that can lead to electrical hazards. For those working with non-standard depths or unique wall finishes, the Build My Spacer configurator at https://socketspacers.com/build offers a way to specify exact dimensions. This ensures a professional result without the compromises inherent in makeshift shimming. If you want to achieve a high-quality finish for your project, choosing UK socket spacers designed for the task is the most efficient route.

Why Structural Integrity Matters for Electrical Fittings
Interaction with a wall socket involves more force than many realise. A standard UK plug requires a specific amount of pressure to insert and a firm pull to remove. When a faceplate is properly supported, this force is transferred through the mounting screws directly into the backbox. However, if a gap exists behind the plate, the plastic or metal material must absorb that kinetic energy. This physical reality is a central point in the professional socket spacer vs diy shim debate. A shim typically provides support only at the screw points, whereas a professional spacer creates a uniform foundation across the entire rear surface of the plate.
This structural support is vital in high-traffic areas like kitchens or utility rooms where appliances are frequently swapped. A "floating" socket, held only by the tension of the screws, will eventually move. This movement is a mechanical failure that can have serious implications. Over time, the repeated flexing can cause the internal wire terminations to loosen. Loose connections are a primary cause of electrical arcing and heat build-up. By using a solid spacer, you ensure the installation remains static and safe for the lifetime of the building.
Preventing Faceplate Flex and Cracking
Modern plastic faceplates are designed for rigidity, but they can be brittle. If you tighten the screws onto a void, the plate can snap instantly. Even if it survives the initial installation, the daily pressure of plug insertion will eventually cause stress fractures. Metal faceplates present a different challenge. Whilst they will not snap, they can bend into the recess. This often pulls the edges of the plate away from the wall, damaging the surrounding plaster or paintwork. A bespoke spacer supports the entire perimeter, ensuring the plate remains flat and the wall finish stays intact.
Compliance and Professional Standards
For tradespeople, achieving a premium finish is about more than just aesthetics; it is about meeting professional standards that prevent future maintenance issues. Using high-quality, fire-retardant materials in electrical zones is a fundamental safety requirement. Makeshift shims, especially those made from offcuts of wood, plastic tubing, or cardboard, often fail to meet these material standards. A professional solution provides peace of mind that the installation is both compliant and durable.
When dealing with non-standard depths or multi-gang installations, the precision of your components is non-negotiable. You can specify exact requirements using our Build My Spacer configurator to ensure your project meets these high structural standards. This approach removes the guesswork and provides a solid, professional foundation that a simple DIY shim cannot match. It ensures that every socket feels as solid as the wall it is mounted on, regardless of the depth of the backbox.

How to Measure for a Professional Socket Spacer
Measuring correctly is the fundamental difference between a professional result and a frustrating installation. Whilst some online forums suggest "eye-balling" the gap or using trial and error with long screws, these approaches often lead to stripped screw threads or damaged backbox lugs. To achieve a flush finish, you need a precise measurement of the void created by your new wall covering. This precision is why the professional socket spacer vs diy shim debate always favours bespoke manufacturing over makeshift alternatives.
To begin, you will need a standard ruler or, for greater accuracy, a digital calliper. Ensure the power is safely isolated before placing your measuring tool against the finished wall surface (the face of your tiles or panelling). Measure the distance from this surface down to the threaded lug of the backbox. This figure represents the exact depth your spacer needs to fill. It is also important to identify your gang size correctly. UK installations typically use single or double gang boxes, but modern kitchens often feature multi-gang configurations that require a single, continuous support frame rather than multiple individual shims.
Consistency is another factor that DIY shims fail to address. Walls are rarely perfectly flat, especially in older UK homes or after a heavy application of tile adhesive. Check the depth at all four corners of the backbox. If you find a variance of more than 1mm, use the measurement from the shallowest point. This ensures the faceplate can sit flat against the wall without being forced or tilted by an oversized spacer. Taking these multiple readings prevents the "wonky" socket look that often occurs when using generic, off-the-shelf shimming products.
Calculating the Required Depth
When calculating your depth, remember to account for every layer added during your renovation. This includes the tile thickness, the adhesive bed, and any plaster skim or over-boarding used to level the room. The ideal depth is the precise distance that allows the spacer to sit flush with the finished wall. If your measurement is 12mm, a 12mm spacer will provide the solid bridge needed to support the faceplate without leaving any visible gaps.
Using the Build My Spacer Tool
Once you have your measurements, our interactive configurator simplifies the process of getting a perfect fit. Instead of trying to stack multiple plastic shims to reach a non-standard depth, you can input your exact requirements for a bespoke installation. We encourage users to Build My Spacer for a precision-engineered fit that addresses the specific challenges of your project. This tool ensures you receive a component that matches your measurements exactly, providing a level of stability that generic shims cannot provide. For a truly professional result, you can also browse our full range of UK socket spacers to find the right configuration for your home.
Achieving a Bespoke Finish with SocketSpacers.com
Standard retail solutions often fail when a project moves beyond basic single-gang boxes. Whilst mass-produced items might work for a standard 10mm gap, they cannot account for the variety of depths and configurations found in modern UK home renovations. This is where the distinction in the professional socket spacer vs diy shim debate becomes most apparent. A DIY shim is a compromise, but a bespoke spacer is a precision tool designed for a specific spatial requirement. By choosing a made-to-order solution, you eliminate the aesthetic and structural flaws inherent in makeshift methods.
Our manufacturing process focuses on providing a clean, professional finish that matches your interior decor. We offer a variety of colours and materials to ensure that the spacer remains a subtle, integrated part of the wall rather than a noticeable addition. Whether you are installing a new kitchen splashback or adding decorative panelling to a living area, having a component that matches the footprint of your faceplate is essential. This attention to detail is what separates a high-end renovation from a standard DIY job.
Beyond the Standard Single Gang
Modern electrical installations frequently involve Custom Double Gang Socket Spacers or Multi-Gang Socket Spacers that must align perfectly across a wide surface. In these scenarios, stacking individual shims is not just inefficient; it is practically impossible to achieve a level finish. Bespoke Large Extension Frames provide a single, continuous support structure for complex setups, including smart home hubs and non-standard light switch plates. If you are working with unique dimensions, you can use the Build My Spacer configurator to specify the exact height, width, and depth needed for your specific fittings.
The Professional Choice for UK Trades
For electricians, time is a critical resource. High-end kitchen fit-outs often involve deep tiled splashbacks that require multiple custom components to achieve a safe, flush result. Having access to a reliable UK-based manufacturer for custom parts allows tradespeople to maintain a high standard of work without the need for improvised shimming on-site. This reliability builds trust with clients who expect a premium finish for their investment. Using professional spacers reduces the likelihood of future maintenance call-outs caused by loose or moving sockets.
Choosing a professional solution ensures that every electrical point in your home is stable, safe, and visually perfect. To see how our manufacturing process supports your next project, visit the SocketSpacers.com homepage to explore the full range of bespoke options available. From single light switches to complex multi-gang frames, we provide the exact tools needed to solve the challenge of the sunken backbox once and for all.
Secure Your Perfect Electrical Finish
Achieving a flush, stable finish for your electrical fittings is a matter of precision and structural integrity. Whilst makeshift shims might seem convenient, they lack the durability and safety provided by a purpose-built component. The choice in the professional socket spacer vs diy shim comparison is clear: a single, solid unit ensures your faceplates remain secure and your wall finish stays intact. By using bespoke UK manufacturing, you can address non-standard depths with professional-grade materials that provide a permanent solution for any renovation project.
Precision fitment eliminates the mechanical instability that leads to cracked plates and loose connections. You can easily create your custom solution with our Build My Spacer tool to ensure every socket and switch in your home is perfectly aligned. This tailored approach provides the exact depth required for a professional result, giving you peace of mind that your electrical installation is safe and visually seamless. Take the final step in your renovation with a solution designed for accuracy and longevity.
Frequently Asked Questions
Can I use plastic washers instead of a professional socket spacer?
Whilst you can technically use plastic washers, they are not recommended for a permanent installation. Washers only provide support at the screw points, which leaves the rest of the faceplate unsupported and prone to flexing or cracking when a plug is inserted. A professional spacer provides a continuous, solid foundation across the entire rear surface of the plate.
What is the maximum depth a socket spacer can bridge?
Our custom spacers can bridge depths ranging from 2mm up to 30mm. This range covers almost all residential renovation scenarios, from thin plaster skims to deep kitchen splashbacks. You can use the Build My Spacer tool at https://socketspacers.com/build to specify the exact millimetre depth required for your specific wall thickness.
Are DIY shims safe to use behind a kitchen socket?
DIY shims are generally not considered safe for high-traffic areas like kitchens. In the professional socket spacer vs diy shim debate, safety is the primary factor. Kitchen sockets often handle high-load appliances, and using makeshift shims like cardboard or plastic tubing creates a risk of compression, rot, or fire hazard. Professional spacers are made from non-conductive, durable materials designed for electrical zones.
How do I fix a socket that is too deep after tiling?
The most reliable way to fix a deep socket is to install a purpose-made extension frame that bridges the gap between the backbox and the new tile surface. Measure the distance from the tile face to the backbox lug and install a spacer of that exact depth. This ensures the socket sits flush and remains stable during use.
Do I need a different spacer for a light switch versus a plug socket?
You must use a spacer that matches the specific footprint of your fitting. Light switch faceplates are often smaller than single gang plug sockets, and using the wrong size will result in an unsightly overlap or insufficient support. We provide specific plates for both light switches and sockets to ensure a seamless, professional finish.
Can I get a bespoke spacer for a multi-gang switch plate?
Bespoke spacers are available for multi-gang switch plates to ensure perfect alignment across several switches. These installations are particularly difficult to shim manually because each switch must be at the same depth to prevent the plate from tilting. A single, continuous multi-gang frame provides the rigid support needed for these complex setups.
Will a socket spacer help if my wall is uneven?
A spacer provides a rigid foundation that helps compensate for minor wall irregularities by giving the faceplate a flat surface to sit against. If your wall is significantly uneven, we recommend using the measurement from the shallowest point of the recess. This prevents the spacer from protruding beyond the wall surface and allows the faceplate to sit as flat as possible.
Is it difficult to install a bespoke socket spacer myself?
Installing a bespoke spacer is a simple process that requires only basic tools and a safe isolation of the power supply. Once the power is off, you simply unscrew the faceplate, slide the spacer over the wiring, and secure everything back into the lugs using longer screws. It is a much faster and more reliable method than trying to balance multiple DIY shims whilst tightening screws.
Electrical Safety
Always isolate the circuit and confirm it is dead before removing a socket or switch faceplate. Only carry out the work if you are competent to do so. If you find damaged wiring, signs of overheating or anything unsafe, stop and contact a qualified electrician.