
Table of Contents
Solving the Challenge of Recessed Double Gang Sockets
Modern UK renovations often uncover a common and frustrating problem: the sunken or recessed electrical backbox. After adding a fresh layer of plasterboard, elegant kitchen tiles, or stylish media wall panelling, the metal backbox that houses your socket wiring ends up too deep inside the wall. This leaves an unsightly and potentially unsafe gap when you try to reinstall the faceplate.
-
Defining the "sunken backbox" problem in modern UK renovations. This issue occurs when the finished wall surface is built up, causing the front edge of the backbox to sit far behind it, making a standard installation impossible.
-
Why double gang sockets are more prone to movement than single units. A double gang socket is wider and subject to greater leverage. When not secured firmly against a solid surface, inserting and removing plugs can cause it to rock, placing strain on the internal wiring.
-
The aesthetic impact of a recessed socket on feature walls and splashbacks. A floating socket with a visible gap around its edges undermines the clean, professional finish of a new wall. It creates shadows and disrupts the smooth lines of your design.
-
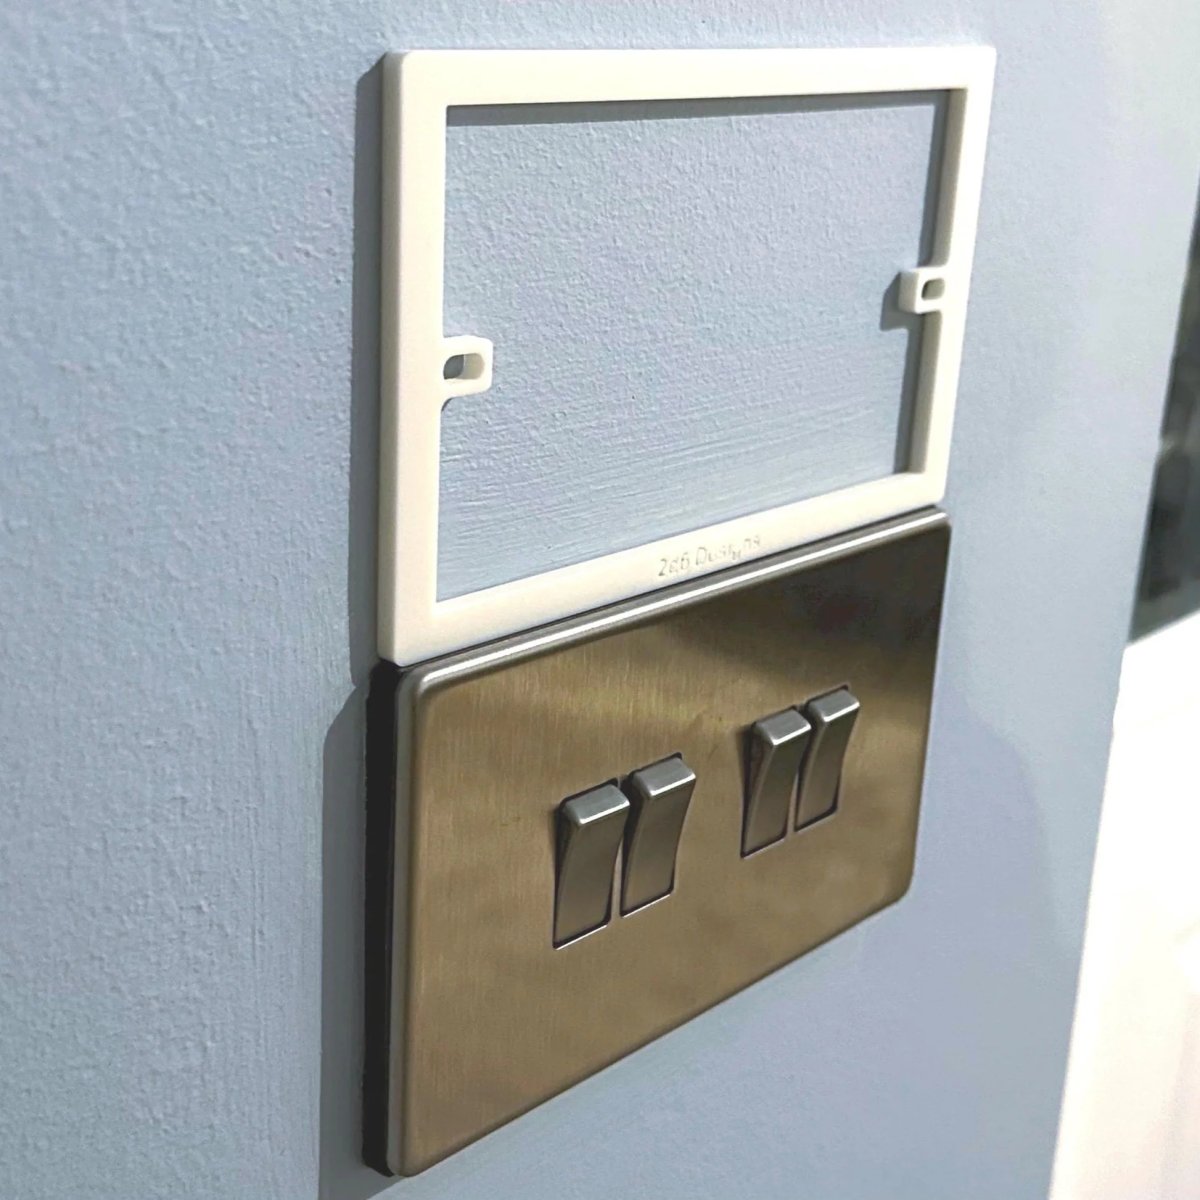
How bespoke spacers provide a solid bridge between the backbox and faceplate. A custom double gang socket spacer is a precisely engineered frame that fills the exact gap between the backbox and the rear of the faceplate, creating a rigid and secure mounting surface.
Common Causes of Recessed Fittings
Understanding why your sockets are recessed is the first step to finding the correct solution. This problem is rarely a mistake; it is usually a consequence of improving or altering a room. The most frequent causes include:
-
Over-boarding with plasterboard during drylining. Adding an extra layer of plasterboard for insulation or to smooth over old walls is a primary cause of sunken backboxes.
-
Adding thick porcelain or natural stone tiles in kitchens. The combined thickness of tile adhesive and the tile itself, especially with materials like slate or marble, can easily create a recess of 10mm or more.
-
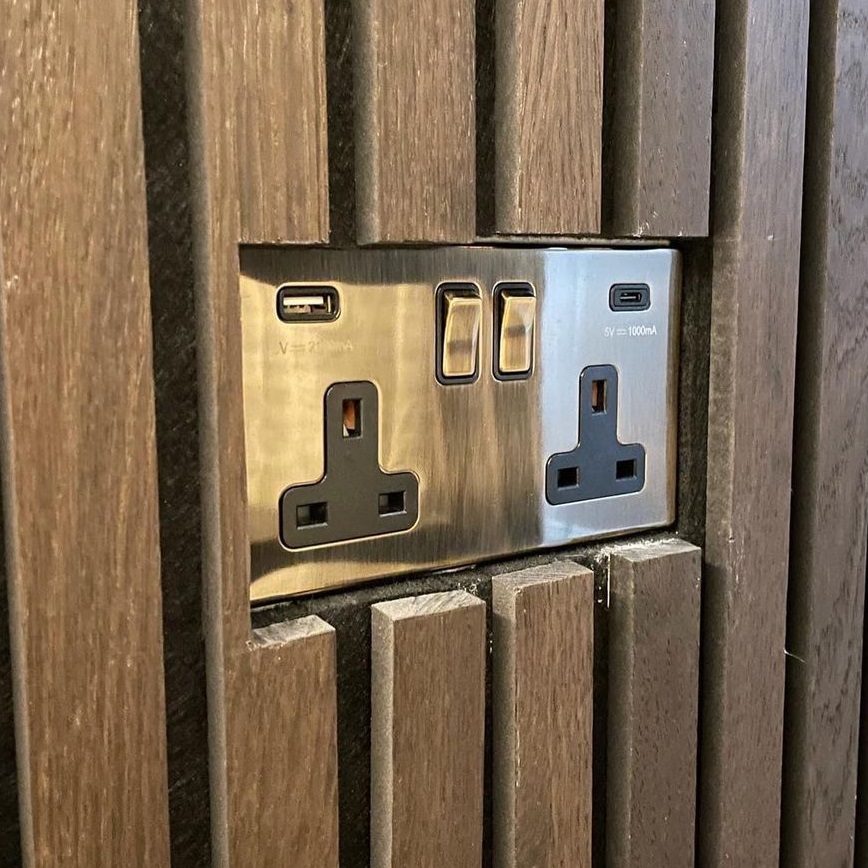
Installing decorative acoustic panelling or media walls. Modern interior design trends involving wood slat panels or custom-built media units frequently result in electrical fittings being set back from the final surface.
The Mechanical Risk of Floating Sockets
A wobbly socket is more than just a cosmetic issue; it presents a genuine mechanical and electrical risk. Without a solid mounting, the entire fitting is left "floating" on the screws, leading to several problems that compromise safety and longevity.
-
Why loose sockets lead to internal wire fatigue over time. Every time the socket moves, it flexes the stiff copper wiring connected to its terminals. Over months and years, this repeated movement can cause the conductors to fatigue, work loose from the terminals, or even break, creating a serious electrical hazard.
-
The importance of a rigid mounting surface for plug insertion force. A securely mounted socket withstands the force of inserting and removing plugs. A floating socket transfers that force directly to the wiring and the screw lugs on the backbox, risking damage to both.
-
Achieving a professional look whilst maintaining electrical integrity. A custom spacer ensures the faceplate is mechanically sound and perfectly flush. This not only looks professional but also upholds the safety principles of electrical installations by preventing undue stress on components.
The Engineering Behind Bespoke Double Gang Extension Frames
Not all solutions for recessed sockets are created equal. Whilst generic hardware might seem like a quick fix, a bespoke spacer is engineered for a precise purpose: to provide a perfect fit, uncompromising stability, and a flawless aesthetic. This is achieved through careful consideration of material, design, and customisation. To design your own custom spacer, check out our Build My Spacer tool.
-
Material matters: Why high-quality bespoke plastic is the preferred choice. Our spacers are manufactured from durable, high-grade plastic that provides excellent electrical insulation and will not corrode like metal alternatives. It is rigid enough to resist compression but will not crack under the pressure of tightened screws.
-
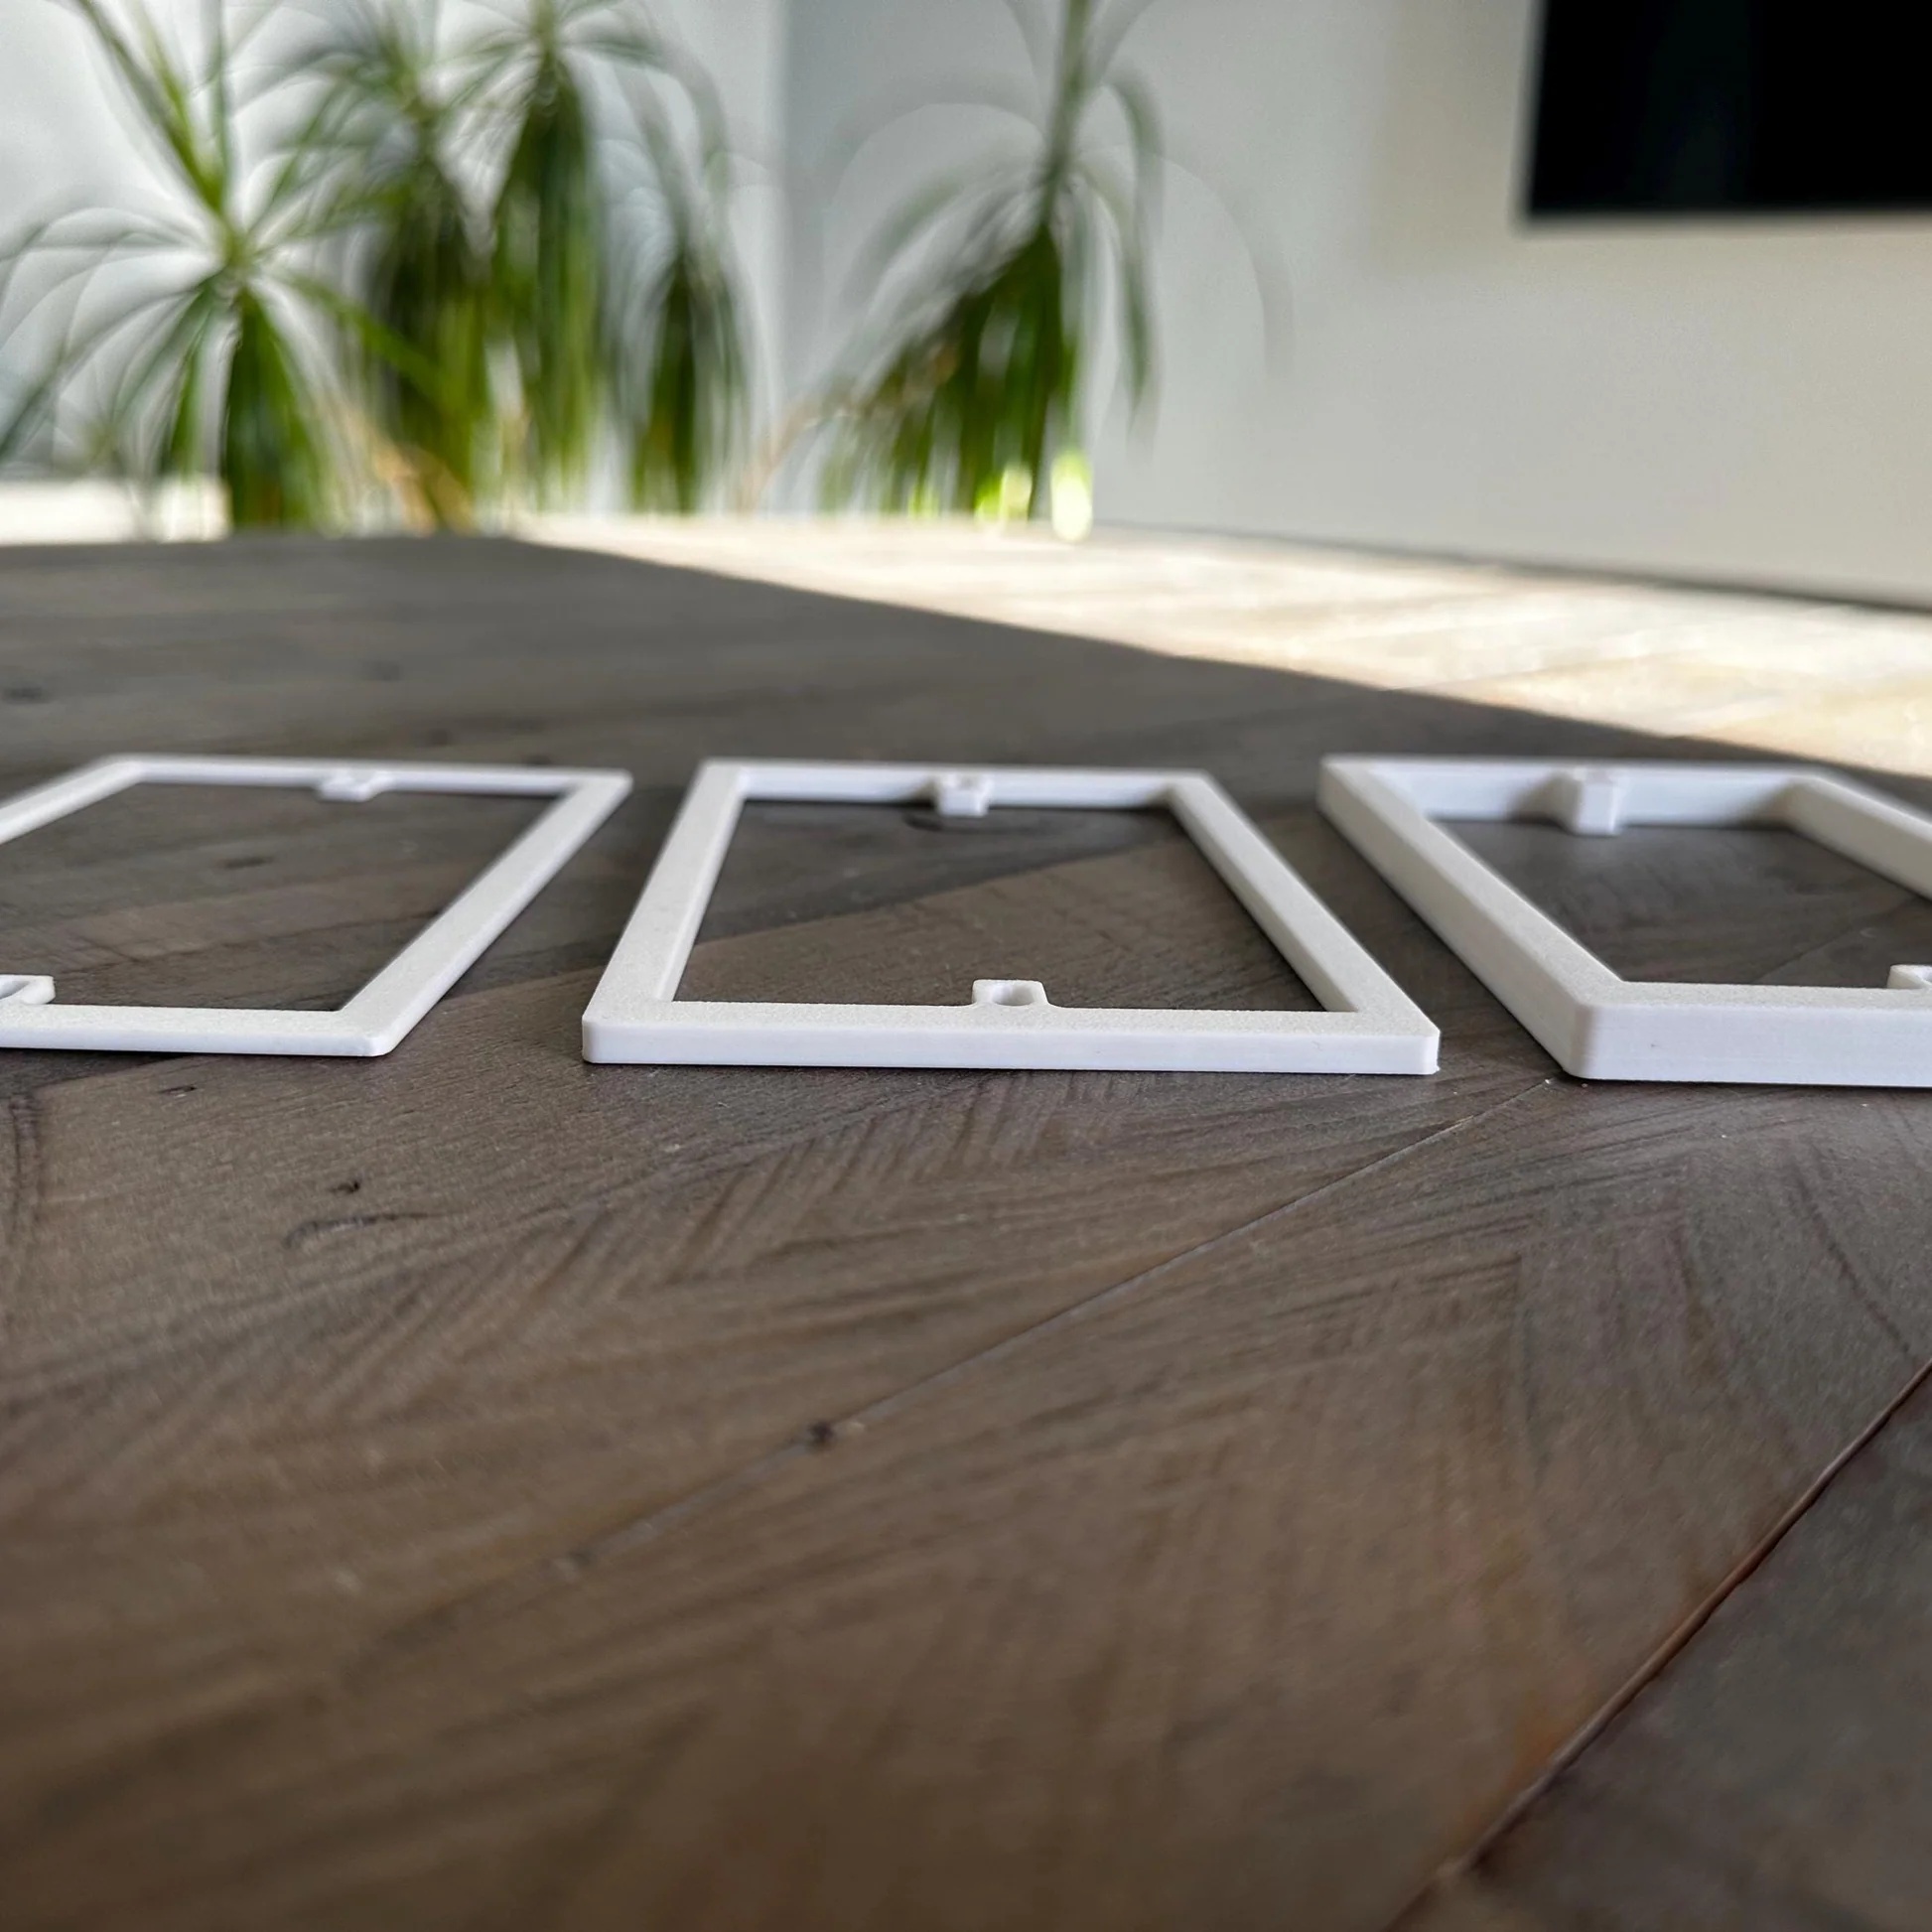
The precision advantage: Measuring in 1mm increments from 2mm to 20mm. The key to a truly flush finish is precision. Off-the-shelf solutions come in fixed sizes, but a bespoke spacer can be made to the exact millimetre depth your installation requires, eliminating all gaps.
-
Structural design: How custom frames support the entire perimeter of a 2-gang socket. Unlike washers or small packers, a custom frame provides continuous support around the entire rear of the faceplate. This distributes the pressure evenly, prevents the faceplate from flexing or cracking, and creates a rock-solid installation.
-
Customisation options: Colour matching for black, white, or grey electrical accessories. To ensure a seamless look, spacers can be produced in colours that match the most common electrical fittings, making them virtually invisible once installed.
Bespoke vs Standard Depth
The temptation to use a "good enough" solution from a hardware store can be strong, but these often introduce new problems. Stacking generic packers or using a single, ill-fitting spacer compromises the stability and safety of the fitting.
-
The problem with stacking multiple 5mm spacers (the "tower" effect). Piling up multiple thin spacers or washers creates a tower that can easily shift or compress unevenly when the faceplate screws are tightened. This leads to a wobbly socket and places stress on the faceplate.
-
How a single bespoke frame improves structural rigidity. A single, solid frame of the exact required thickness provides a stable, unified platform. It cannot shift or compress, ensuring the socket remains rigid and secure for its entire lifespan.
-
A single bespoke frame is safer than stacked washers because it creates one solid, non-compressive surface, eliminating the risk of movement that can loosen electrical connections over time.
Increased Wiring Space for Smart Sockets
The rise of smart home technology has introduced a new challenge: bulky hardware. Smart sockets and switches often contain extra electronics that require more depth than a standard backbox can provide.
-
How extension frames provide the extra depth needed for smart home modules. A custom spacer not only bridges a gap but also effectively extends the depth of the backbox. This creates the crucial extra space needed to house the larger modules of smart devices without cramming or damaging wires.
-
Managing heat dissipation amongst crowded wiring in deep frames. By providing more volume for wiring, a spacer helps to improve air circulation around components. This can assist with heat dissipation, which is an important consideration for smart devices that generate a small amount of heat during operation.
-
Ensuring the faceplate sits flush whilst housing bulky smart hardware. With a bespoke spacer, you no longer have to choose between a flush finish and installing your desired smart technology. The spacer provides the necessary depth while ensuring the faceplate can be tightened securely against a solid surface.
Custom Spacers vs Generic Hardware: A Comparison
When faced with a recessed double socket, DIYers and even some professionals reach for common hardware store items. However, these generic solutions fall short when compared to a purpose-built, bespoke spacer, especially in terms of safety, aesthetics, and long-term performance.
-
Comparing bespoke spacers against rubber washers and generic extension rings. Washers provide uneven support, whilst generic plastic rings come in limited sizes. A bespoke spacer offers a perfect fit and total perimeter support, making it structurally superior.
-
The cost-benefit analysis of buying once vs adjusting multiple times. Whilst a bespoke spacer may have a higher initial cost than a handful of washers, it saves significant time and frustration. It guarantees a perfect result on the first attempt, avoiding the need for future adjustments or repairs.
-
Aesthetic differences: Slimline bespoke frames vs bulky surface pattress boxes. A surface pattress box is a functional but visually intrusive solution that sits on top of the wall. A slimline bespoke spacer is concealed entirely behind the faceplate, preserving the intended low-profile look of modern sockets.
-
Safety compliance: Meeting the spirit of BS 7671 for secure accessory mounting. The UK's wiring regulations (BS 7671) require electrical accessories to be securely fixed. Bespoke spacers help achieve this by providing a solid foundation, preventing strain on wiring and terminals in a way that makeshift solutions cannot.
Why "Good Enough" Fails in Luxury Renovations
In a high-end renovation where every detail matters, a poorly fitted socket can ruin the overall effect. The difference between a professional finish and a DIY bodge is often found in these small but crucial details.
-
The visual tell-tale signs of a poorly fitted socket. Gaps around the edges, a faceplate that is not parallel with the wall, or a slight wobble when touched are all signs that a generic solution has been used.
-
How bespoke spacers protect your paint and tile edges from cracking. By creating a solid, flush mounting surface, a spacer prevents the faceplate from being over-tightened against the wall. This avoids creating pressure points that can crack fragile tile edges or damage the surrounding paintwork.
-
For a deeper look into the common issues with generic solutions, you can find more information on our blog.
Durability and Long-Term Performance
An electrical installation should be built to last. A bespoke spacer is an investment in the long-term safety and appearance of your fittings, designed to perform flawlessly for decades.
-
Resistance to compression over years of plug use. The high-quality material used in our spacers is engineered to resist the compressive forces of tightened screws and the repeated mechanical stress of plug use, ensuring the socket never becomes loose.
-
Maintaining the "as-new" look of high-end metal faceplates. Premium faceplates made from materials like brushed chrome or black nickel are easily bent or damaged if not supported correctly. A full-frame spacer provides the even support needed to keep them looking perfect.
-
Ensuring the spacer does not yellow or degrade behind the fitting. Our spacers are made from UV-stable and durable plastic, so they will not become brittle, discolour, or degrade over time, even when installed behind fittings in sunny rooms.

How to Measure and Install Your Custom Socket Spacers
Achieving a perfect fit starts with an accurate measurement. The process is straightforward, but it requires care and attention to detail. Always prioritise safety before starting any work on an electrical fitting.
-
Safety first: Isolating the circuit before any measurement or adjustment. Before you touch any electrical fitting, ensure the corresponding circuit is turned off at the consumer unit (fuse box). Use a voltage tester to confirm there is no power to the socket.
-
The "Straight Edge" method for calculating precise depth requirements. Place a straight edge (like a ruler or spirit level) across the socket opening, resting on the finished wall surface. Measure the distance from the back of the straight edge to the front edge of the metal backbox. This measurement is the exact thickness of the spacer you need.
-
Choosing the right thickness: Should you round up or down? Always aim for the exact measurement. If you are between millimetres, rounding down by 1mm is generally safer than rounding up. An overly thick spacer will create a gap, defeating the purpose.
-
Installation guide: Fitting the spacer between the backbox and the faceplate. Once you have your custom spacer, installation is simple. It sits directly over the backbox, and the socket faceplate is then placed on top. The longer screws pass through the faceplate and spacer and into the screw lugs on the backbox.
Measuring for Tiled Surfaces
Tiled surfaces present a unique challenge due to their texture and the variable thickness of the adhesive. A few extra considerations will ensure a flawless result.
-
Accounting for adhesive thickness and tile variation. When measuring on a tiled wall, make sure your straight edge rests on the highest point of the tile surface around the socket, not in a grout line or on a low spot in a textured tile.
-
How to ensure a flush finish on bevelled or textured tiles. For tiles with uneven surfaces, take measurements at several points (top, bottom, left, and right) and use the smallest measurement. This ensures the faceplate can pull tight against the highest points of the tile for a stable fit.
Installation Tips for a Perfect Finish
With the right spacer and a little care, you can achieve a finish that looks like it was installed by a professional electrician. These final tips will help you get it right.
-
Selecting the correct screw length for extended depths. You will need longer fixing screws. To calculate the required length, add the thickness of your spacer to the length of your original screws (typically 25mm or 40mm). For example, a 10mm spacer fitted to a socket with 40mm screws will now require 50mm screws.
-
Centring the spacer to avoid visible edges. Before fully tightening the screws, ensure the spacer is perfectly aligned behind the socket faceplate. This prevents any part of the spacer from being visible from the side.
-
Before applying the final torque to the screws, gently press on the faceplate to feel for any rocking or movement against the spacer.
Achieving a Professional Finish with SocketSpacers.com
When off-the-shelf products fail to deliver the required precision, a bespoke solution is the only way to guarantee a perfect outcome. At SocketSpacers.com, we provide the exact component you need to solve your recessed socket problem permanently.
-
The SocketSpacers.com difference: UK-based bespoke manufacturing. All our spacers are precision-manufactured in the UK, allowing us to maintain complete control over quality and offer a truly custom service tailored to the specific needs of UK homes and trades.
-
Ordering made easy: Choosing your gang size, thickness, and colour. Our straightforward process allows you to specify the exact dimensions and colour you need for a seamless, professional installation.
-
Supporting UK trades and DIYers with precision-fit components. We are proud to supply everyone from professional electricians and interior designers working on high-end projects to dedicated DIY enthusiasts aiming for a flawless finish in their own homes.
-
Final checklist for a professional, safe, and aesthetic installation. Ensure the power is off, your measurement is accurate, you have the correct length screws, and your spacer is centred for a perfect, secure, and visually appealing result.
Bespoke Solutions Beyond the Double Gang
Our custom manufacturing capabilities extend to all types of electrical fittings, ensuring you can achieve a consistent, high-quality finish across your entire project.
-
Custom single gang and multi-gang options for consistent looks. We produce spacers for single sockets, light switches, and larger multi-gang configurations, so every fitting in a room can have the same perfect, flush appearance.
-
Large bespoke extension frames for non-standard fittings. If you have a non-standard or oversized electrical fitting, we can create a custom extension frame to meet your specific requirements.
-
Why specialists choose SocketSpacers.com for high-end UK projects. For projects where compromise is not an option, discerning tradespeople and designers rely on our precision-fit products to achieve the immaculate finish their clients expect.
Get Started with Your Custom Order
Fixing your recessed sockets is easier than you think. With the right measurements, you can order the exact component you need for a secure and professional finish.
-
How to use our online customisation tool for 2mm to 20mm depths. Simply measure the depth you need and use our online spacer configurator to select the precise thickness, size, and colour for your project.
-
Bulk order benefits for large renovation projects. For tradespeople and developers, we offer benefits on bulk orders to help you deliver a consistently high-quality finish across an entire property.
-
CTA: Browse our range of Custom Double Gang Socket Spacers and order the perfect solution for your project today.
Frequently Asked Questions (FAQs)
Are custom double gang socket spacers safe to use in the UK?
Yes, they are completely safe when installed correctly. Our spacers are made from a high-grade, electrically non-conductive plastic. Their primary function is mechanical, providing a solid mounting surface that helps meet the safety requirement for securely fixed accessories, as outlined in the BS 7671 wiring regulations.
What thickness of spacer do I need after tiling a kitchen splashback?
This depends entirely on the thickness of your tiles and the adhesive bed. It can range from 8mm to 20mm or more. The only way to know for sure is to measure using the "Straight Edge" method described in our guide above after the tiles have been installed.
Do I need longer screws when using a socket spacer?
Yes, you will almost certainly need longer screws. The new screw length should be the length of your original screws plus the thickness of your spacer. For example, if your spacer is 12mm thick and your original screws were 40mm, you will need 52mm screws (M3.5 50mm or 60mm screws would be suitable).
Can I use these spacers for light switches as well as plug sockets?
Absolutely. We manufacture custom spacers for single gang fittings, which are standard for most UK light switches, as well as for double gang and multi-gang configurations. This allows you to achieve a consistent, flush finish for all electrical accessories in a room.
What material are the bespoke spacers made from?
Our spacers are made from a high-quality, durable plastic chosen for its excellent electrical insulation properties, structural rigidity, and long-term stability. It will not crack under pressure, degrade over time, or conduct electricity.
How do I fix a socket that is wobbly because the backbox is too deep?
A custom socket spacer is the ideal solution. By measuring the gap between the wall surface and the backbox and ordering a spacer of that exact thickness, you create a solid platform for the socket faceplate to be tightened against, completely eliminating any wobble.
Are these spacers compatible with smart sockets like Nest or Hive?
Yes, they are an excellent partner for smart sockets. Many smart devices are deeper than standard sockets and require extra space for wiring. Our spacers not only fix recessed backboxes but also create that essential extra depth, allowing you to install bulky smart hardware and still achieve a flush finish.
Can I paint the spacers to match my wall colour?
Whilst our spacers are designed to be hidden behind the faceplate, if a small edge were to be visible, they can be painted. We recommend lightly sanding the surface with fine-grit sandpaper and using a suitable plastic primer before applying your wall colour for the best adhesion and a durable finish.
Electrical Safety
Always isolate the circuit and confirm it is dead before removing a socket or switch faceplate. Only carry out the work if you are competent to do so. If you find damaged wiring, signs of overheating or anything unsafe, stop and contact a qualified electrician.