
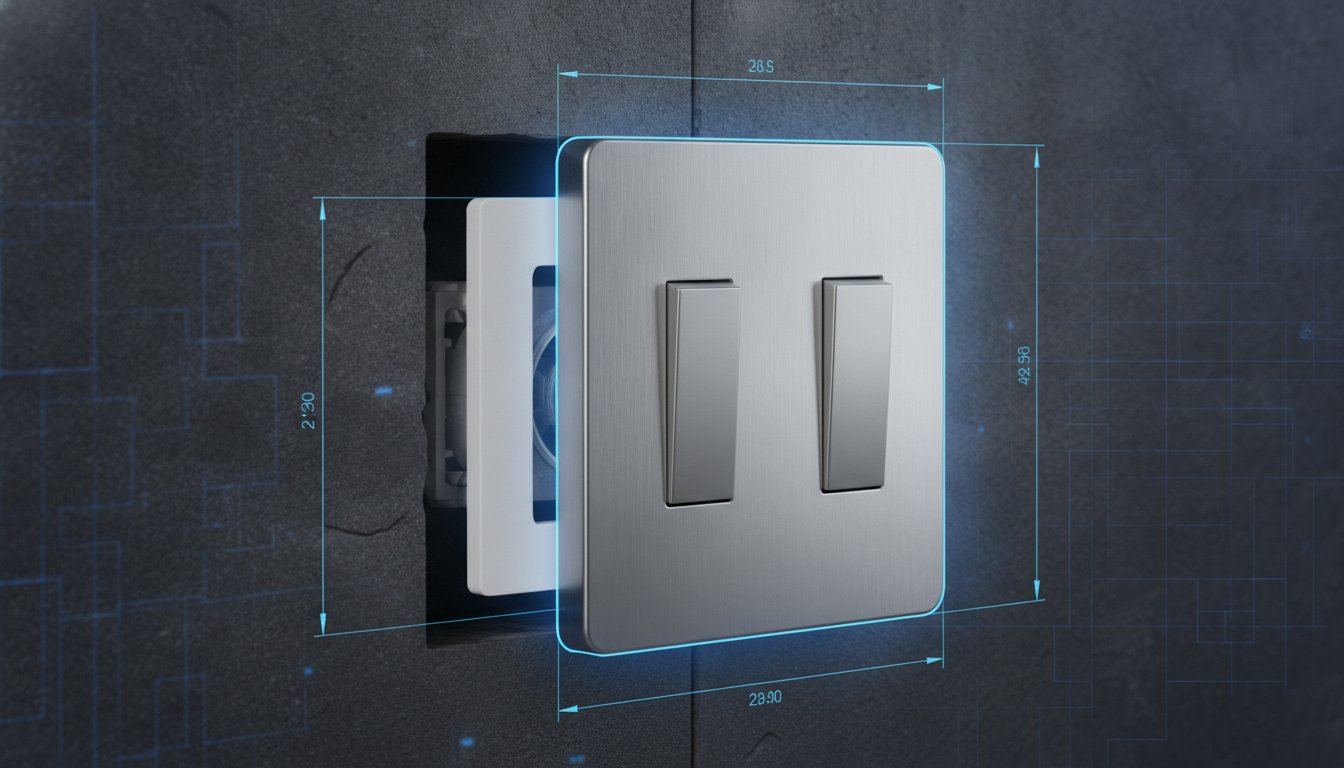
You've spent weeks selecting the perfect tiles or bespoke wood panelling, but the final result is marred by light switches that sit deep within the wall. It's a common frustration for both DIY enthusiasts and professionals when a new surface creates a "sunken" look that feels unfinished and unprofessional. Using a custom depth light switch spacer is the most effective way to bridge this gap, ensuring your fittings sit perfectly flush against the finished wall without compromising on safety.
We understand the difficulty of trying to reach screws in deep backboxes or dealing with unsightly gaps behind a faceplate. This guide provides a clear path to a safer, more aesthetic installation that meets UK standards. You'll learn how to measure your requirements accurately and how to order the precise size for your project. If you already have your measurements ready, you can use our "Build My Spacer" configurator to create a solution tailored to your specific wall depth and avoid the compromises of off-the-shelf alternatives.
Key Takeaways
- Understand how a bespoke frame bridges the gap between a recessed electrical backbox and your new decorative wall surface for a professional result.
- Identify why renovation projects, such as kitchen tiling or wood panelling, create specific depth requirements that only a custom depth light switch spacer can solve with precision.
- Learn about the critical safety benefits of a flush finish, including the prevention of dust ingress and ensuring your faceplate is correctly earthed to UK standards.
- Discover the accurate method for measuring the distance from your backbox to the wall surface to ensure your installation is both secure and aesthetically pleasing.
- Access the "Build My Spacer" configurator at https://socketspacers.com/build to order a plate manufactured to your exact millimetre requirements.
Table of Contents
-
What is a Light Switch Spacer Plate and Why is Depth Critical?
-
Common Scenarios Requiring a Custom Depth Light Switch Spacer
What is a Light Switch Spacer Plate and Why is Depth Critical?
A light switch spacer plate is a bespoke frame designed to sit between the electrical backbox and the decorative faceplate. It acts as a bridge to bring the switch forward when the wall surface has been built out during a renovation. While it might seem like a minor accessory, the depth of this plate is critical for both the structural integrity of the fitting and the final aesthetic of your room. Using the correct depth prevents the switch from looking recessed or unfinished, providing a flush finish that matches the quality of your new wall material.
To understand why these components are necessary, it's helpful to look at the foundation of the installation. If you are wondering What is a Pattress Box?, it is the metal or plastic container recessed into the wall that houses the electrical connections. When you add layers to your wall, this box remains fixed in place, creating a gap that the switch must span. A custom depth light switch spacer fills this void precisely, ensuring the faceplate sits on a firm, level surface rather than hovering over a hole in the plaster.
Proper depth ensures the switch is physically supported against the wall rather than hanging by the screws. Without this support, the switch often feels "spongy" when pressed. Over time, this lack of stability can cause the faceplate to crack or the screws to pull out of the lugs. A tailored spacer provides a solid foundation, ensuring the fitting feels as firm as it would on a standard flat wall. This is particularly important for high-traffic switches, such as those in kitchens or hallways, where frequent use puts constant pressure on the assembly.
The Problem of the Sunken Backbox
Backboxes are often installed flush with the original brickwork or plasterboard. Adding tiles, cladding, or panelling increases the wall thickness significantly, often by 10mm to 30mm. This results in a sunken backbox. In these scenarios, even standard 75mm screws may struggle to reach the lugs securely. If they do reach, the gap between the plate and the wall remains a safety and hygiene concern, as it allows dust and debris to enter the electrical enclosure. It also makes it nearly impossible to keep the switch level, as there is no solid surface to tighten the screws against.
Fixed vs Custom Depth Solutions
Standard spacers are typically sold in fixed sizes. This often forces you to stack multiple plates to reach the correct height, which looks untidy and lacks structural stability. In contrast, custom depth plates provide a single, solid piece of material for a cleaner, professional look. Precision manufacturing allows for depths as thin as 2mm or as thick as 40mm. This ensures that whether you are dealing with thin wallpaper or heavy stone cladding, the finish remains seamless. You can easily specify the exact size needed for your project using our "Build My Spacer" tool, ensuring a perfect fit without the need for stacking or guesswork.
Common Scenarios Requiring a Custom Depth Light Switch Spacer
Modern renovations frequently introduce wall layers that standard electrical fittings were never designed to accommodate. Whilst a standard installation assumes a thin layer of plaster over a backbox, contemporary interior design often adds significant thickness to the wall surface. This is where a custom depth light switch spacer becomes an essential component for a safe and professional result. Identifying the specific requirements of your project early prevents the frustration of a recessed switch once the decorating is complete.
Tiling and Splashbacks
Kitchen and bathroom renovations are the most frequent scenarios where wall depth increases unexpectedly. A standard subway tile combined with a layer of adhesive can easily add between 10mm and 15mm of depth to a wall. If a faceplate is installed directly over this gap, the pressure from the mounting screws can easily crack the edge of the tile or cause the plate to sit at an angle. A custom spacer provides a solid, level surface that sits flush with the tile face. This ensures the switch is physically supported, preventing damage to your expensive new splashback whilst maintaining a clean aesthetic.
Wall Panelling and MDF Cladding
Decorative panelling has seen a massive resurgence in UK homes, yet it presents a unique challenge for electrical safety. Modern MDF panelling is typically sold in thicknesses of 9mm or 12mm, measurements that rarely align with standard, off-the-shelf spacer sizes. When adding wood panelling or wainscoting, the gap created between the backbox and the new surface can expose combustible materials to electrical sparks. It is vital to maintain a fire-resistant box for safety by using an appropriate extender that seals this void. A bespoke spacer fills this exact gap, preventing the switch from feeling spongy or loose when pressed. This provides a professional finish that matches the high-end look of the panelling.
Plastering and Smart Home Upgrades
In older UK properties, walls are rarely straight or uniform. Deep-fill plastering is often required to level out uneven masonry, which can leave backboxes buried far deeper than intended. Similarly, the installation of smart switches often requires additional internal wiring space. These units are frequently deeper than traditional switches, leaving little room for cables within a standard 25mm backbox. A custom depth light switch spacer can provide that vital extra clearance, allowing cables to sit comfortably without being crushed against the back of the box.
In commercial environments, the use of multiple layers of fire-rated plasterboard can also create wall depths that exceed standard specifications. Regardless of the material, if your wall thickness has changed, you can use our Build My Spacer configurator to ensure your fittings sit perfectly flush. This tool allows you to specify the exact dimensions required for any unique renovation scenario, ensuring your project meets both aesthetic and safety standards.
Safety and Aesthetic Benefits of a Flush Finish
Achieving a flush finish is often viewed as the final touch in a room's decor, yet its importance extends far beyond aesthetics. A switch that isn't properly seated creates a physical gap that exposes the internal wiring to dust, moisture, and debris. Over time, this accumulation can lead to poor connectivity or even pose a fire risk within the wall cavity. By using a custom depth light switch spacer, you seal this enclosure effectively, ensuring that the installation remains as safe as the day it was first wired.
Safety standards across the globe emphasise the necessity of flush electrical fittings to mitigate these risks. For instance, the National Electrical Code (NEC) mandates that electrical boxes must be flush with combustible surfaces, or set back by no more than a fraction of an inch for non-combustible materials. In a UK context, following these principles ensures your faceplate is properly earthed and secured according to local regulations. A bespoke spacer provides the necessary bridge to maintain this safety barrier, regardless of how much you have built out your wall surface.
Structural Integrity of the Installation
When a switch is not flush against the wall, the mounting screws are forced to take the full force of every press. This creates a lever effect that, over time, can loosen the screws or even snap the lugs inside the backbox. A custom spacer transfers that pressure directly to the wall surface, which is a much more stable foundation. This solid backing prevents the faceplate from flexing or snapping, which is a common issue with cheaper, hollow plastic alternatives. The result is a fitting that feels robust and permanent, providing the same tactile feedback as a standard installation.
Creating a Seamless Interior Design
From a design perspective, gaps behind switches are magnets for grime and immediately signal a DIY mistake. These shadows break the clean lines of a room and distract from high-quality finishes like marble tiling or bespoke panelling. Bespoke spacers eliminate this "floating switch" look entirely. Because they are manufactured to your specific dimensions, they can be colour-matched to your faceplates or wall for a discreet, integrated appearance. This attention to detail significantly increases the perceived value of your renovation project, making the electrical work look as intentional as the furniture.
If you want to ensure your switches aren't just beautiful but also structurally sound, you can specify your exact requirements using our "Build My Spacer" configurator at https://socketspacers.com/build. This tool helps you move away from unstable, stacked solutions and towards a single-piece frame that provides a perfect, safe finish for any room in your home.

How to Measure for Your Bespoke Light Switch Spacer
Measuring for a custom depth light switch spacer is a straightforward task, but precision is vital to ensure a professional finish. If your measurement is out by even a few millimetres, the faceplate may not sit flush or could feel unstable when pressed. It is always better to measure twice than to deal with an ill-fitting component during the final stages of your renovation. Before you begin, ensure the power is safely isolated at the consumer unit if you need to loosen the switch to access the backbox lugs.
Before taking your final readings, check the area for any obstructions. Protruding screw heads, clumps of dried plaster, or uneven masonry around the backbox can prevent a spacer from sitting flat. If the wall surface is particularly uneven, such as with natural stone tiling, take measurements from all four corners of the opening. This helps you identify an average depth or determine if the wall needs slight levelling before the spacer is fitted. You should also examine the back of your faceplate. Some decorative plates have a recessed rear profile, whilst others are entirely flat. If your plate has a deep recess, you might require a slightly thinner spacer to ensure the plate doesn't stand too proud of the wall.
Step-by-Step Measurement Guide
-
Hold a straight edge, such as a sturdy ruler or a spirit level, flat across the opening in your new wall surface.
-
Using a second ruler or a depth gauge, measure the distance from the underside of the straight edge down to the screw lugs of the electrical backbox.
-
Ensure the measuring tool is perpendicular to the backbox for an accurate reading.
-
Write this measurement down in millimetres. Standard UK increments usually fall between 5mm and 30mm, but bespoke manufacturing can accommodate any specific depth you require.
Choosing the Right Gang Size
The configuration of your custom depth light switch spacer depends on the type of fitting you are extending. Single gang spacers are designed for standard square switches, whilst double gang spacers are required for wider rectangular plates or double sockets. If your project involves a more complex setup, such as a triple switch or a bespoke control panel, a multi-gang extension frame may be necessary to provide a uniform support structure. Identifying the correct gang size ensures the spacer matches the footprint of your faceplate exactly, leaving no visible gaps around the edges.
Once you have recorded your measurements and confirmed your gang size, you can use our Build My Spacer configurator to place your order. This tool allows you to specify the exact millimetre depth needed for your project, ensuring a perfect, safe, and professional fit every time.
The SocketSpacers Solution: Precision Bespoke Manufacturing
SocketSpacers.com specialises in made-to-order solutions specifically for UK electrical fittings. We understand that standard, off-the-shelf components often fail to meet the rigorous requirements of high-end renovations. By providing a custom depth light switch spacer manufactured to your exact millimetre requirements, we eliminate the need for makeshift fixes. Our products are designed to bridge the gap between the backbox and the faceplate with a single, solid piece of hardware. This approach ensures a perfect fit that is both durable and easy to install, regardless of your wall material.
Our manufacturing process focuses on accuracy and reliability. We use high-quality materials that are designed to withstand the pressure of daily use without flexing or degrading. This is particularly important for modern UK homes where decorative finishes like tiling or panelling require a stable foundation for electrical switchgear. By choosing a precision-engineered part, you ensure that your installation meets the highest professional standards from the moment it is fitted.
Using the Build My Spacer Tool
Our interactive tool simplifies the ordering process for homeowners and tradespeople alike. Instead of searching through hardware stores for a "near enough" size, you can design your exact requirement in seconds. The configurator allows you to specify the required depth, gang size, and even custom corner radii if your project demands a specific profile. You can access the tool directly at build to start your order. By entering your precise measurements, you remove the risk of human error and ensure that the finished product integrates seamlessly with your interior design.
Why Choose Made-to-Order Over DIY Shims?
Many people attempt to solve sunken switches using DIY shims or by stacking multiple thin plates. These methods are often flimsy and do not provide a full seal around the switch enclosure. Stacking plates can result in a visible, stepped edge that looks unprofessional and traps dust. In contrast, bespoke spacers are a single piece of hardware. This makes them much easier to align during installation and provides superior structural rigidity. A custom part from SocketSpacers.com saves time on-site and ensures a professional result on the first attempt.
Investing in a custom depth light switch spacer ensures that your electrical fittings are as well-crafted as the rest of your home. Whether you are a professional electrician looking for a reliable supplier or a DIY enthusiast finishing a home project, our solutions provide the precision needed for a flush finish. By choosing a bespoke extension frame, you are opting for a safe, compliant, and aesthetically perfect installation that stands the test of time.
Achieving a Professional Finish for Your Renovation
A successful renovation relies on the precision of the final details. A recessed switch is not merely an aesthetic flaw; it can compromise the structural integrity and safety of your electrical installation. Using a custom depth light switch spacer ensures that your faceplates are firmly supported against the wall surface. This prevents the plate from flexing and keeps the backbox effectively sealed against dust and debris. By addressing these gaps correctly, you maintain compliance with safety standards whilst achieving a seamless interior design.
We are a specialist UK manufacturer dedicated to providing pragmatic solutions for complex renovation challenges. Our made-to-order approach allows for custom depths available to the millimetre, ensuring your project doesn't have to rely on unstable, stacked alternatives. If you have your measurements ready, you can Create your perfect fit with our Build My Spacer configurator. Taking the time to specify the exact size you need will result in a clean, professional finish that stands the test of time.
Frequently Asked Questions
Can I stack multiple light switch spacers to reach the desired depth?
You can stack multiple spacers, but it is not recommended for a professional finish. Stacking creates multiple seams that trap dust and can lead to instability when the switch is pressed. A single custom depth light switch spacer provides a far more robust foundation and a much cleaner aesthetic. It's always better to use our configurator to order the exact millimetre depth required for your specific wall surface.
What is the maximum depth available for a custom spacer plate?
The maximum depth we typically manufacture for our standard range is 40mm. This is sufficient for the vast majority of UK renovation projects, including heavy timber cladding or deep-set tiles. If your project requires an even greater depth, we can often accommodate this through a bespoke request. Our goal is to provide a single-piece solution that avoids the compromises of stacking thinner, off-the-shelf plates.
Do I need longer screws when using a light switch spacer?
Yes, you will almost certainly require longer M3.5 electrical screws to complete your installation. Most standard light switches are supplied with 25mm or 30mm screws, which are too short to reach the backbox lugs once a spacer is added. Depending on the thickness of your spacer, you may need 50mm or 75mm screws. Ensuring the screw has at least 5mm of thread engagement in the lug is vital for safety.
Are these spacers compatible with all UK light switch brands?
Our spacers are fully compatible with all major UK light switch brands that adhere to standard BS 4662 dimensions. This includes popular manufacturers like MK Electric, BG Electrical, and Schneider. Because our spacers are designed to match the standard footprint of UK backboxes, they work seamlessly with any faceplate that uses standard 60.3mm screw centres for single gang or 120.6mm for double gang fittings.
Is it safe to use plastic spacers behind a light switch?
It's entirely safe to use plastic spacers as long as they are manufactured from high-quality, durable materials. Our spacers are designed to provide a solid bridge between the backbox and the faceplate, which actually improves safety by sealing the enclosure. This prevents dust and debris from entering the electrical box. A solid spacer also ensures the faceplate is properly earthed and secured, meeting the necessary UK standards for electrical installations.
How do I install a spacer if my wall is slightly uneven?
For slightly uneven walls, you should measure the depth at the shallowest and deepest points to find an average or use the deepest measurement for full support. Any minor gaps between the custom depth light switch spacer and the wall can be filled with a small amount of decorator's caulk for a seamless look. If the wall is significantly crooked, we recommend levelling the area around the backbox before you finalise your measurements.
Can I get a custom spacer for a triple or quadruple gang switch?
We can certainly provide solutions for triple, quadruple, or even larger multi-gang configurations. These larger plates are particularly prone to flexing if they aren't supported by a solid frame. You can specify these non-standard sizes using our "Build My Spacer" tool at https://socketspacers.com/build. This ensures that even the widest switch plates in your home have a professional, flush finish without any sponginess when the buttons are pressed.
What happens if I order the wrong thickness for my spacer?
If you order a spacer that is slightly too thick, you can often sand the back down to the correct depth using a fine-grit sandpaper. However, if the spacer is too thin, it won't provide the flush finish you need. We encourage all customers to use a straight edge and measure in millimetres as accurately as possible. If you discover an error shortly after ordering, please contact us quickly to see if we can adjust the specification.
Electrical Safety
Always isolate the circuit and confirm it is dead before removing a socket or switch faceplate. Only carry out the work if you are competent to do so. If you find damaged wiring, signs of overheating or anything unsafe, stop and contact a qualified electrician.