
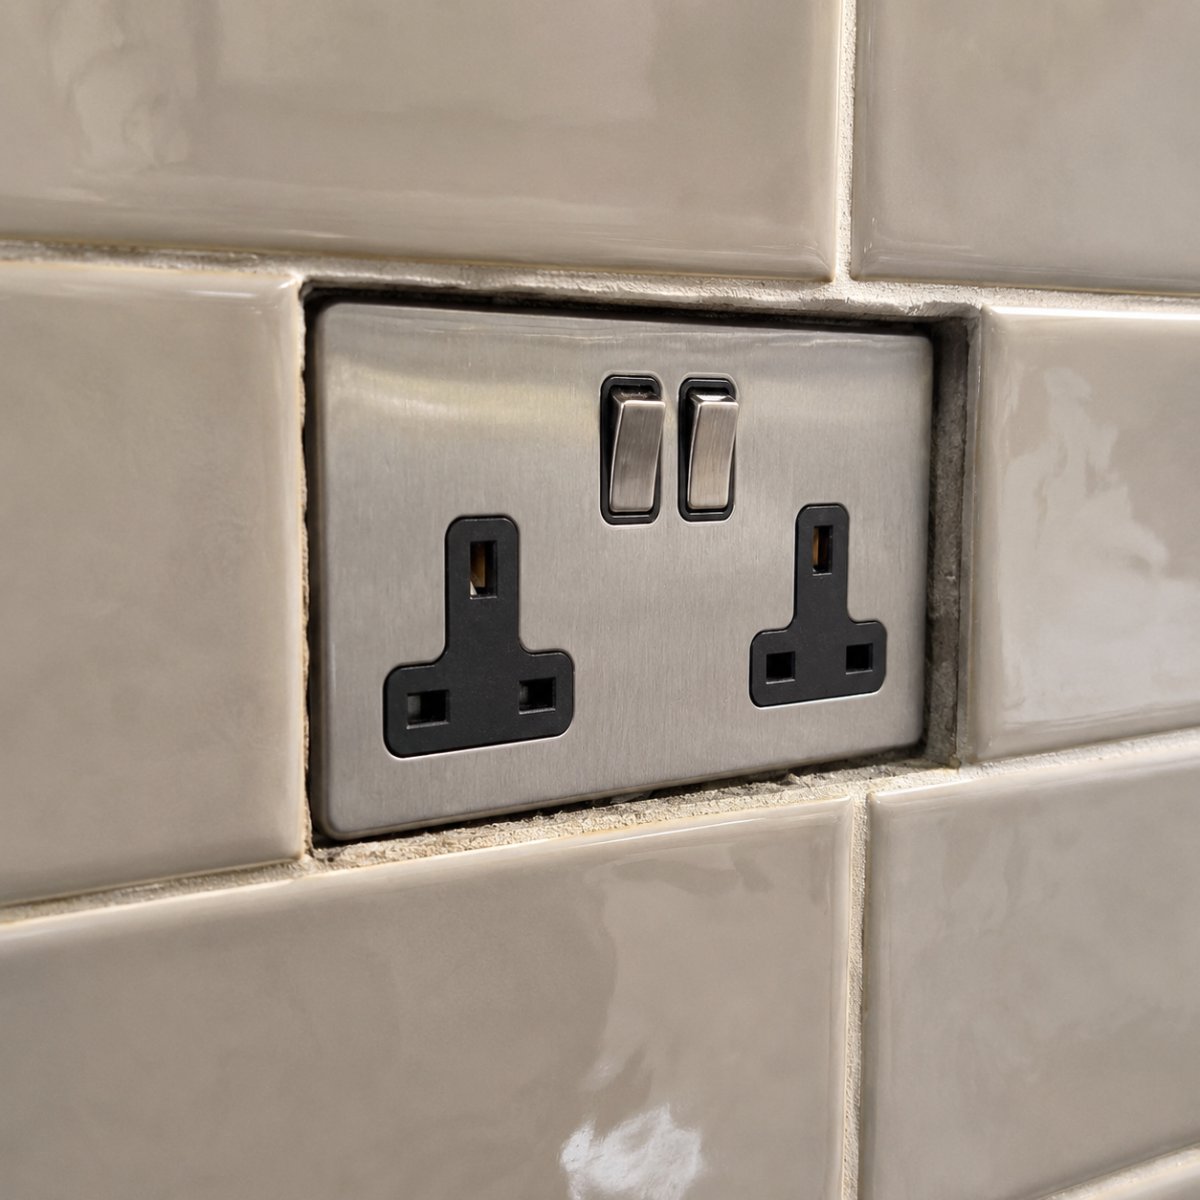
Installing a new kitchen splashback is an excellent way to refresh your space, but it often creates an unexpected problem: your electrical sockets now sit too deep in the wall. This leaves an unsightly gap and can result in a wobbly, unsafe fitting. Learn how to achieve a professional, flush finish for your kitchen sockets using bespoke spacers designed for any splashback thickness, from sleek 6mm glass to substantial 20mm stone.
This guide explains why this issue occurs and compares the professional solution of a custom-made spacer against common DIY fixes. We will walk you through choosing the right material, measuring accurately for a perfect fit, and using an online tool to design the exact component you need for a safe, secure, and aesthetically pleasing result.
Table of Contents
- Why Kitchen Splashbacks Cause Recessed Sockets: The Need for a Bridge
- Comparing Bespoke Socket Spacers to Standard DIY Fixes
- Aesthetics and Material Choice for Your Kitchen Finish
- How to Measure Your Kitchen Splashback for a Precision Spacer
- Designing Your Solution with the Build My Spacer Tool
Why Kitchen Splashbacks Cause Recessed Sockets: The Need for a Bridge
When you add a new layer of material to your wall, such as tiles, glass, or stone, the original electrical backbox becomes recessed. This means the front face of the socket no longer sits flush with the new wall surface. A socket spacer for kitchen splashback applications is a precision-engineered plate that fits between the electrical backbox and the socket faceplate. Its primary function is to act as a solid, structural bridge, filling the exact void created by the thickness of your new splashback and any adhesive.
Using a correctly sized spacer is crucial for several reasons. It provides essential support to the socket faceplate, preventing it from flexing, moving, or cracking when you plug and unplug appliances. This stability is not just about looks; it is a fundamental aspect of a safe electrical installation. Because kitchen splashbacks vary so widely in thickness, from 4mm acrylic panels to 20mm granite slabs, bespoke solutions are essential. A standard, off-the-shelf part simply cannot provide the millimetre-perfect fit required for a high-end finish.
The Problem with Floating Sockets
A "floating socket" occurs when an installer tries to fix a recessed socket by using extra-long screws, leaving an unsupported gap behind the faceplate. This is a common but dangerous shortcut. The long screws are placed under significant mechanical strain, as they are the only thing holding the socket in place. This can lead to the faceplate cracking under pressure or the screws bending over time, causing the socket to become loose.
More critically, a wobbly socket can cause the wiring connections at the back to loosen. Loose connections can lead to arcing, a phenomenon where electricity jumps across a small air gap, generating intense heat. This creates a serious potential fire hazard, hidden behind the wall. Aesthetically, a floating socket never sits flush or level, undermining the clean lines of a premium tiled or glass splashback and creating a noticeably unprofessional finish.
UK Electrical Standards and Splashback Depth
In the UK, electrical backboxes are typically installed to be flush with the final wall surface. During a kitchen renovation, this "final surface" changes. Once a 10mm tile and a 3mm layer of adhesive are added, the backbox is suddenly 13mm too deep. This is a common scenario that standard electrical components are not designed to handle.
Using a solid, non-conductive spacer is key to maintaining a safe and compliant installation. It restores the structural integrity of the fitting, ensuring the faceplate is properly supported as intended by manufacturers. This principle of maintaining correct depth and support is fundamental to professional electrical work. For a more detailed look at how depth standards apply to other fittings, you can explore our guide on custom depth light switch spacer plates.
Comparing Bespoke Socket Spacers to Standard DIY Fixes
When faced with a recessed socket, many turn to off-the-shelf solutions or DIY methods, but these often fall short in a kitchen environment. Standard spacers sold in hardware stores are typically a fixed depth, such as 32mm, which is designed for deep-set backboxes in stud walls, not for the shallow gaps created by splashbacks. This makes them far too deep for the common 8mm to 15mm void found after tiling.
DIY shims, such as stacks of washers or folded pieces of plastic, are another common but flawed approach. These makeshift solutions lack the large, flat surface area needed to provide stable and even support, particularly for a double gang socket. This can lead to the faceplate warping or cracking. In contrast, bespoke manufacturing allows you to specify the exact depth you need, for example 12mm or 14mm, for a perfectly flush finish. These custom spacers are produced as a single, solid piece, which is stronger, safer, and far easier to install than trying to align multiple small parts. To see how a custom solution can solve your specific problem, you can specify your exact requirements with the Build My Spacer configurator.
The Limitations of Stacking Spacers
Some manufacturers offer thin, stackable spacer plates, but this method presents its own set of problems. Stacking multiple plates together makes it difficult to achieve perfect alignment, often resulting in a messy, uneven edge that is visible around the socket. This completely undermines the clean, high-end look you want in a new kitchen.
During installation, keeping multiple stacked parts level whilst trying to thread long screws through them and into the backbox can be incredibly frustrating. The plates can shift, making it hard to secure the faceplate correctly. A single, solid bespoke plate eliminates these issues entirely. It provides a clean, professional look that is essential for modern kitchen designs where attention to detail is paramount.
Precision Manufacturing for Modern Kitchens
The key advantage of a bespoke approach is the level of precision available. You can order spacers for any configuration, whether it is a single socket, a double socket, or a more complex multi-gang setup for a media station. This ensures a consistent and professional finish across all your kitchen's electrical fittings.
Furthermore, customisation extends to finer details like the corner radius. Many decorative sockets have a specific corner profile, and a bespoke spacer can be manufactured to match it perfectly, ensuring it remains hidden behind the faceplate. This level of detail is impossible to achieve with generic parts and is the hallmark of a truly professional installation.
Aesthetics and Material Choice for Your Kitchen Finish
In modern interior design, kitchen sockets are no longer just functional items; they are often decorative features chosen to complement taps, handles, and lighting. When a spacer is required, it must blend seamlessly with both the faceplate and the splashback to avoid disrupting the overall design scheme.
Bespoke spacers can be manufactured in a range of core colours, such as black, white, or grey, allowing you to select an option that complements your interior. A black spacer, for instance, will disappear behind a matt black or brushed brass socket, whilst a white one works perfectly with traditional white plastic fittings. The material itself is also important. High-quality plastics like PETG provide the necessary electrical insulation and are durable and easy to clean, which is essential in a kitchen environment. When fitted correctly, a well-chosen spacer becomes virtually invisible, ensuring the focus remains on your premium tiles or stone splashback.
Matching Spacers to Decorative Faceplates
Choosing the right spacer colour is key to making it disappear. For dark or metallic faceplates, such as brushed steel, matt black, or antique brass, a black spacer is almost always the best choice as it mimics a natural shadow in the small gap. For standard white sockets, a white spacer provides a clean, integrated look.
The perimeter match is just as important. A bespoke spacer is cut to the precise dimensions of a standard UK socket, so it does not overhang the edge of the faceplate. This is especially critical for modern slimline or flat-plate sockets, which have very little tolerance for error and will instantly reveal a poorly fitting spacer. The precision of a custom-made part ensures a flawless result with these demanding designs.
Increased Wiring Space for Smart Sockets
Modern kitchens often feature sockets with integrated USB ports, Wi-Fi extenders, or other smart technology. These advanced fittings are often deeper than standard sockets and contain more complex wiring, which can be a tight squeeze in a standard backbox. Crowded wiring is not just an inconvenience; it can lead to pinched or damaged cables, creating a safety risk.
A spacer can provide a simple and effective solution. By adding an extra 5mm or 10mm of depth, it creates vital extra room for wiring without you having to replace the backbox or chisel into the wall. This makes installation quicker, safer, and easier, ensuring there is sufficient space for all connections. For those interested in this topic, our article on managing plug socket wiring space offers further insights.

How to Measure Your Kitchen Splashback for a Precision Spacer
Accurate measurement is the most critical step in ordering a bespoke spacer. Taking a few moments to get this right will guarantee a perfect fit. Before you begin, remember that safety is paramount. Always isolate the power to the relevant circuit at your consumer unit (fuse box) and use a voltage tester to confirm there is no power at the socket before you touch any wiring or unscrew the faceplate.
Once you have safely removed the faceplate, you need to measure the distance from the front edge of the buried backbox to the finished surface of your splashback. It is also wise to check the dimensions of your faceplate and confirm whether it is a standard single or double gang fitting. If your splashback surface is uneven, such as with rustic tiles, take measurements at the top and bottom of the socket opening and use the average measurement for your order.
A Step-by-Step Measurement Guide
- Isolate Power: Turn off the power at the consumer unit and verify it is off. Unscrew and carefully pull the socket faceplate away from the wall.
- Measure the Gap: Use a depth gauge or a small, rigid ruler. Place the end of the ruler on the front edge of the metal or plastic backbox in the wall. Read the measurement where the ruler meets the outer face of the tile or glass. This is the exact depth of spacer you need for a flush finish.
- Consider a Tighter Seal: For a slightly compressed fit, some installers prefer to subtract 1mm from the total measurement. This makes the socket sit very slightly recessed into the splashback, creating a tight seal against the surface.
- Verify Screw Centres: Whilst not usually necessary for standard fittings, it is good practice to confirm your screw hole centres. Standard UK double sockets are 120.6mm apart, and single sockets are 60.3mm apart. All our spacers are made to these standards.
Ordering for Multi-Gang Kitchen Stations
Many modern kitchens feature multi-gang panels that combine several switches and sockets in one unit. Measuring for these is a similar process, but requires careful attention to the overall dimensions. You will need a bespoke large extension frame that covers the entire aperture.
When measuring for these larger installations, check for any nearby obstructions. Ensure there is enough clearance from kitchen cupboards, upstands, or end panels that might interfere with a wider spacer. It is also important to record the corner radius of your multi-gang faceplate if it is not a standard rectangle. Providing this detail ensures the custom spacer follows the exact contour of your switch for a completely integrated look. This level of customisation is particularly important for achieving a professional finish on custom double gang socket spacers and larger arrays.
Designing Your Solution with the Build My Spacer Tool
Ordering a bespoke component for your kitchen might sound complex, but our online tool is designed to take the guesswork out of the process. The Build My Spacer tool allows you to customise every aspect of your spacer, including the precise depth, gang size, and colour, to perfectly suit your project.
This approach ensures your part is made to order in the UK for a precision fit that off-the-shelf products simply cannot deliver. By specifying your exact requirements online, you can achieve a professional finish that resolves the issue of recessed sockets permanently. Bespoke manufacturing provides the perfect bridge between your backbox and faceplate, resulting in a solid, safe, and visually flawless installation.
Using the Configurator for Kitchen Projects
Getting the perfect spacer for your kitchen splashback is a straightforward process with our online configurator. Simply follow these steps:
- Navigate to the Build My Spacer tool to begin your custom specification.
- Input the exact splashback depth you measured. This will create a plate that brings your socket perfectly flush with the tile or glass surface.
- Select the gang size (e.g., single, double, or a custom multi-gang configuration) and choose from a range of colours to ensure the spacer integrates seamlessly with your kitchen design.
- Finalise your order, and your custom part will be manufactured and dispatched to you.
Professional Results for DIY Prices
A custom-made spacer provides a high-end, professional result that was previously only achievable through complex electrical work. You can see how other homeowners and kitchen fitters have solved their splashback issues by reading our SocketSpacers.com reviews. Once your bespoke spacer arrives, installation is as simple as placing it behind the faceplate and using slightly longer screws to secure it.
With custom depths available from 2mm to 20mm and beyond, our spacers are precision-engineered in the UK to fit all standard UK kitchen faceplates. Eliminate wobbly sockets and unsightly gaps in your new kitchen today. Start your custom build here.
Frequently Asked Questions
Can I use a socket spacer on a glass splashback?
Yes, absolutely. Our spacers are ideal for glass splashbacks. Because glass is typically thin (around 6mm), a bespoke spacer of the correct depth is essential to provide a solid, flush finish without putting any pressure on the glass itself.
What is the best way to fix a wobbly socket after tiling?
The best and safest way to fix a wobbly socket is to use a single, solid spacer that matches the depth of the tile and adhesive. This provides complete structural support behind the faceplate, eliminating any movement and ensuring the wiring remains secure.
Do I need longer screws when using a 15mm socket spacer?
Yes. You will need to replace the standard 25mm screws with longer ones. To calculate the required length, add the depth of your spacer to the standard screw length. For a 15mm spacer, you would typically need screws that are at least 40mm long (15mm + 25mm).
Are bespoke socket spacers safe to use in kitchens?
Yes, they are completely safe. Our spacers are made from high-quality, non-conductive materials like PETG, which provides excellent electrical insulation. They are designed to restore the structural integrity of the fitting, making the installation safer than a "floating" socket.
What depth of spacer do I need for a standard metro tile?
A standard metro tile is often around 7mm to 8mm thick. When you add a 2mm to 3mm layer of tile adhesive, you will typically need a spacer with a depth of between 9mm and 11mm. It is always best to measure the exact gap for a perfect fit.
Can I get a bespoke spacer for a triple gang socket?
Yes. Our "Build My Spacer" tool allows you to specify custom configurations, including triple gang, quad gang, and even larger bespoke extension frames for complex media plates or kitchen control stations.
How do I hide the gap between my socket and the wall?
A socket spacer is designed to do exactly this. It fills the gap between the backbox and the faceplate, allowing the socket to sit flush against the splashback surface. By choosing a matching colour, the spacer becomes virtually invisible.
Are these spacers made from non-flammable materials?
Our spacers are manufactured from PETG, a thermoplastic polymer that is self-extinguishing. This means it will not sustain a flame if the ignition source is removed, providing a safe and reliable component for use in electrical installations.
Electrical Safety
Always isolate the circuit and confirm it is dead before removing a socket or switch faceplate. Only carry out the work if you are competent to do so. If you find damaged wiring, signs of overheating or anything unsafe, stop and contact a qualified electrician.