
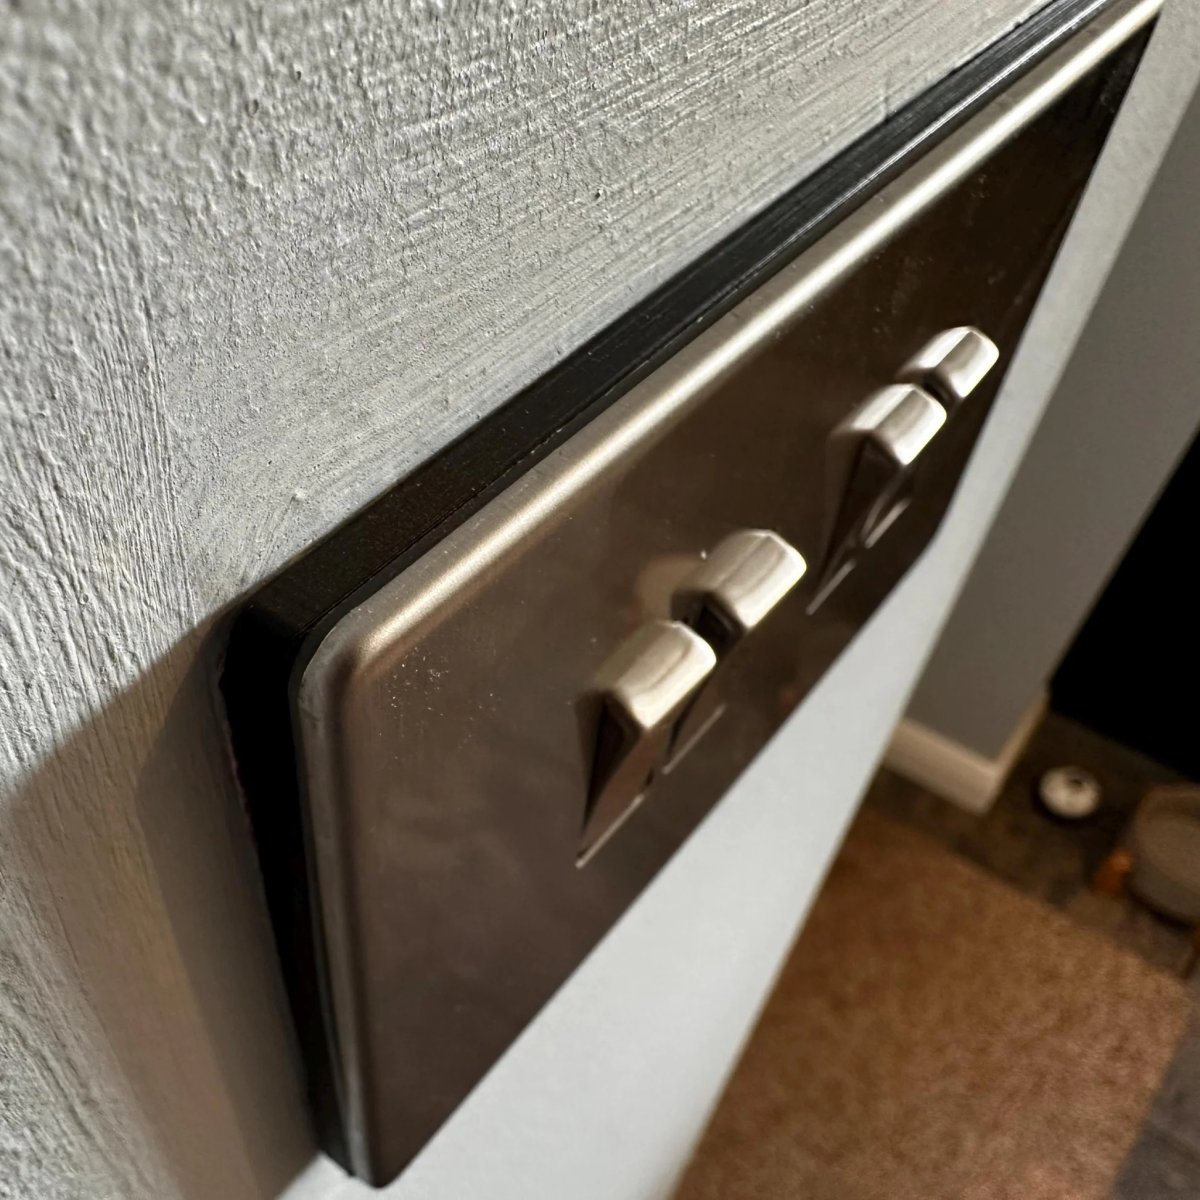
Completing a renovation project, such as tiling a kitchen splashback or fitting new plasterboard, brings a great sense of satisfaction. Yet, this feeling can quickly fade when you discover a common but frustrating problem: the original socket screws are too short after tiling. The electrical backbox, once flush with the wall, is now deeply recessed behind the new surface, leaving your sockets and switches looking unfinished and feeling unstable.
This issue is more than just cosmetic. A "floating" socket faceplate is not only unsightly but can also be unsafe, putting strain on the wiring and creating a potential hazard. Whilst the immediate thought might be to find longer screws, this is often a temporary fix that fails to address the underlying structural problem. The professional solution is an electric socket collar extender, a component specifically designed to bridge the gap and provide a secure, flush foundation for your electrical fittings. Simply enter your dimensions into our Build My Spacer configurator to create a spacer tailored to your exact needs.
This guide explains why your socket screws have become too short, compares the safety of different solutions, and shows you how a custom-fit collar extender is the key to achieving a flawless, professional finish.
Table of Contents
Understanding the Electric Socket Collar Extender
An electric socket collar extender, often called a socket spacer or extension frame, is a simple yet crucial component in modern electrical installations. It is a rigid frame designed to fit precisely between a sunken electrical backbox and the new, thicker wall surface. Its primary function is to bring the mounting points for the socket faceplate forward, ensuring that standard screws can be used to create a secure and perfectly flush fitting.
-
Definition: At its core, a socket collar extender is a frame that bridges the gap created by new wall coverings like tiles, plaster, or panelling. It effectively extends the depth of the backbox to meet the new wall line.
-
Structural Integrity: These components are essential for maintaining the structural integrity of the electrical outlet. Without a solid surface to tighten against, a faceplate can bend, warp, or even crack under the pressure of having a plug inserted and removed.
-
A Solid Foundation: The extender provides a firm, continuous surface for the faceplate to sit against. This prevents the "spongy" or wobbly feeling associated with sockets that are held in place only by overly long screws spanning an empty void.
-
Materials: Quality extenders are typically made from durable, fire-retardant plastics. This ensures they meet UK safety standards for domestic use, providing a safe and reliable enclosure for electrical connections.
When is a Collar Extender Necessary?
Identifying the need for a collar extender is straightforward. If you have recently renovated a room and find your sockets are no longer flush with the wall, an extender is almost certainly required. Key situations include:
-
After Tiling: This is the most common scenario. Once kitchen or bathroom tiles and adhesive have been applied, the backbox can become recessed by 10mm or more, making original screws useless.
-
New Plasterwork or Panelling: Adding wall panelling, particularly with decorative MDF, or applying thick coats of plaster can add significant depth to a wall surface, burying the backbox. For more detailed advice on this, see our guide to choosing a socket spacer for panelled walls.
-
"Floating" Sockets: If your socket faceplate moves or flexes when you use it, it indicates a lack of a firm foundation. This unsupported void behind the plate is precisely what a collar extender is designed to fill.
Key Components of a Quality Extender
Not all extenders are created equal. A high-quality, reliable extender will have specific features that guarantee a safe and professional finish. When choosing a solution, look for the following:
-
Rigid Construction: The extender must be made from a strong, rigid material that will not compress or deform when the socket screws are tightened. This ensures the faceplate remains stable and secure over time.
-
Precise Dimensions: For a perfect fit, the extender must match the standard dimensions of UK single gang or double gang backboxes. A custom-manufactured spacer offers the most precise fit for your exact depth requirement.
-
Faceplate Compatibility: A well-designed extender works with all styles of faceplate, from standard moulded plastic to slimline decorative metal options, ensuring it remains hidden while providing essential support.
Why Sockets Become Recessed After Renovation
The problem of recessed sockets is a frequent side effect of home improvement projects. Even with careful planning, it is easy to underestimate how much depth new wall coverings can add. When an electrician first installs a backbox, they typically fit it flush with the original wall structure, such as brickwork or studwork. Any subsequent layers added on top will push the final wall surface further out.
-
Cumulative Thickness: The combination of tile adhesive and the tile itself can easily add 10mm to 15mm of depth to a wall. This is a significant gap that standard socket screws cannot bridge.
-
Modern Plasterboarding: The "dot and dab" method of attaching plasterboard to a wall can create an uneven void, often leaving backboxes set further back than intended once the wall is skimmed.
-
Socket Screws Too Short After Tiling: This is the critical issue. The faceplate screws are designed to catch the threaded lugs on the backbox. If the backbox is too deep, the screws simply cannot reach, making it impossible to secure the faceplate.
-
Uneven Surfaces: In older UK properties, walls are rarely perfectly flat. This can result in a backbox being level on one side but sunken on the other, leading to a lopsided and unstable electrical fitting that requires a custom-tapered solution.
The Tiling Challenge
Tiling is a primary cause of recessed backboxes. The process introduces several variables that contribute to the final depth of the wall, creating a challenge for electrical fittings.
-
Thick Adhesive Beds: To ensure large format tiles are level, tilers often use a thick bed of adhesive. This, combined with the thickness of the tile, creates a significant void behind the socket area.
-
Cutting Around Backboxes: It is difficult to cut a tile perfectly around a backbox. Often, a slightly larger hole is cut for tolerance, leaving an unsupported gap around the edges of the box where the faceplate needs to rest.
-
Insufficient Screw Length: Standard 25mm screws supplied with most sockets are rarely long enough to cope with a tiled splashback. Even 35mm or 40mm screws may not be sufficient for thicker tiles.
Plastering and Panelling Issues
It is not just tiling that causes problems. Other popular renovation techniques can also leave your backboxes too deep within the wall.
-
Thick Plaster Coats: When re-plastering, a thick backing coat followed by a finishing skim can add substantial depth, effectively burying the original backbox far from the new surface.
-
Decorative Wall Panelling: The trend for MDF wall panelling, whether shaker style or tongue and groove, presents a unique depth challenge. The thickness of the panels and the method of fixing them can recess a socket by 20mm or more.
-
Maintaining Electrical Safety: In all these scenarios, it is vital to ensure the socket remains properly enclosed and accessible for future maintenance, a requirement that is difficult to meet without a proper extension solution.
Longer Screws vs. Collar Extenders: Which is Safer?
When faced with socket screws that are too short after tiling, many people assume the simplest solution is to buy longer screws, perhaps 50mm or even 75mm. Whilst this may seem like a quick fix, it is a common misconception that fails to address the core issues of stability and safety. Using a dedicated collar extender is a far superior and safer method.
-
The Myth of Longer Screws: Simply using longer screws might allow you to attach the faceplate, but it does not provide any support. The screws will be spanning an empty gap between the faceplate and the backbox.
-
The "Spongy" Socket Problem: This lack of support leads to a "spongy" or wobbly socket that moves every time you plug an appliance in or out. This constant movement places stress on the electrical connections at the back of the socket.
-
Risk of Damage: Over-tightening long screws into a void can easily crack the plastic faceplate or, worse, damage the threaded lugs on the backbox. Once a lug is stripped or snapped, the backbox may need to be replaced entirely.
-
The Extender Solution: A collar extender provides a solid, continuous path of support. The faceplate is tightened against the extender, which is in turn braced against the backbox, creating a single, rigid unit with no flexing or movement.
Stability and Durability
The mechanical difference between these two approaches is significant. A long screw is a thin metal stem under tension, whereas a collar extender is a solid frame designed to handle compressive force.
-
Mechanical Support: A solid frame offers vastly superior mechanical support compared to the thin stem of a screw. It distributes the pressure evenly across the entire surface of the faceplate.
-
Heavy-Duty Use: In kitchens and utility rooms, where heavy-duty appliances with stiff cables are used, a stable socket is essential. The force required to plug in a washing machine or kettle can easily damage an unsupported socket.
-
Protecting Wiring: Over time, the movement of a "floating" socket can loosen the terminal screws holding the internal wiring. Loose connections can lead to arcing, a serious fire hazard.
Safety and Compliance
Using a dedicated spacer is not just about achieving a better finish; it is also about adhering to electrical safety standards. UK wiring regulations are designed to ensure all electrical connections are properly enclosed and protected.
-
Enclosure of Connections: Regulations like BS 7671 require that all electrical connections are contained within a suitable enclosure. A collar extender helps maintain this enclosure, preventing gaps where dust, moisture, or foreign objects could enter. If you're unsure about the best approach, our article comparing a professional spacer vs a DIY shim offers further insight.
-
Cable Organisation: An extender helps to contain and protect the cables within the backbox area, preventing them from being pinched or damaged between the faceplate and a rough wall edge.
-
Fire Safety: By ensuring a secure, stable fitting and preventing loose connections, a dedicated electrical spacer plate contributes to the overall fire safety of the installation.

How to Measure for a Bespoke Socket Extension Frame
Off-the-shelf socket spacers come in standard depths, such as 5mm or 10mm, which may not match the unique requirements of your wall. For a truly professional and perfectly flush finish, a bespoke, custom-manufactured extension frame is the ideal solution. Measuring for one is a simple process that guarantees a perfect fit.
-
Calculate the Gap: The first step is to accurately calculate the depth of the gap between the front edge of the backbox and the finished wall surface. This measurement is the exact depth your spacer needs to be.
-
Measure All Four Corners: It is crucial to measure the gap at multiple points, ideally near all four corners of the backbox. Walls, especially after tiling or plastering, are rarely perfectly flat. These measurements will reveal if you need a uniform or a tapered spacer.
-
Choose Your Configuration: Identify whether you need a spacer for a single gang (one switch or socket) or double gang (two sockets) fitting. Custom solutions can also be made for multi-gang setups.
-
Input Your Requirements: Once you have your precise measurements, you can easily order a made-to-measure solution. Simply enter your dimensions into our Build My Spacer configurator to create a spacer tailored to your exact needs.
Tools Required for Measurement
You do not need specialist equipment to get an accurate measurement. A few simple tools are all that is required for the job.
-
Depth Gauge or Ruler: A digital depth gauge provides the most accurate reading, but a simple ruler and a straight edge (like another ruler or a spirit level) work perfectly well. Place the straight edge across the opening and measure down to the backbox edge.
-
Isolate the Power: Before you begin, it is absolutely essential to turn off the power to the relevant circuit at your consumer unit. Use a socket tester to confirm there is no power before unscrewing the faceplate.
-
Record in Millimetres: For the most precise result, record your measurements in millimetres. This is the standard unit used for manufacturing custom spacers and ensures maximum accuracy.
Selecting the Right Profile
Beyond the depth, you may need to consider the overall size and style of the extender to ensure it complements your installation.
-
Standard vs. Extension Frame: For most situations, a standard spacer that sits neatly behind the faceplate is sufficient. For larger gaps or multi-gang setups, a larger extension frame may provide better coverage and support.
-
Check for Clearance: Ensure the extender will be completely hidden by your chosen faceplate. Most are designed to be slightly smaller than a standard faceplate, but it is worth checking if you are using particularly slim or unusually shaped fittings.
-
Colour and Finish: Custom spacers are often available in different colours, such as white, black, or grey. You can choose a colour that best matches your socket faceplates for a seamless appearance.
Achieving a Flush Finish with Custom Manufacturing
After investing time and money into creating a beautifully tiled or panelled wall, the last thing you want is an electrical fitting that looks like an afterthought. A wobbly, recessed socket with a strained, bending faceplate undermines the quality of your work. Custom manufacturing offers a definitive solution that off-the-shelf products and DIY hacks cannot match.
-
Superior to Shims and Washers: A bespoke, single-piece spacer is far superior to stacking multiple plastic shims or washers. A custom spacer provides uniform, solid support, whereas stacked items can shift and compress unevenly.
-
A Consistent, Professional Look: Using custom-fit spacers ensures that every socket and switch in a room has the same high-quality, flush appearance. This consistency is a hallmark of professional craftsmanship.
-
Ease of Installation: When an extender is manufactured to the exact depth of your wall, installation is quick and straightforward. There is no need for guesswork or adjustments; it simply fits perfectly first time.
-
A Long-Term Solution: Investing in a tailored solution saves time during installation and prevents future maintenance issues. A securely fitted socket is a safe socket that will last for years without needing to be retightened or adjusted.
The Bespoke Advantage
Opting for a made-to-measure solution elevates your project from a simple repair to a high-end installation. It is about choosing precision over approximation.
-
Eliminate DIY Hacks: Say goodbye to improvised solutions like cutting plastic tubing or stacking layers of cardboard. A bespoke spacer is an engineered component designed specifically for the job.
-
Add Value to Your Renovation: Attention to detail adds significant value to a home renovation. Perfectly flush electrical fittings are a small but noticeable sign of a high-quality project.
-
Support UK Manufacturing: By choosing a bespoke solution, you are often supporting specialist UK-based manufacturers who produce high-quality, made-to-measure electrical components.
Next Steps for Your Project
A flush finish is the final, critical step in completing your wall renovation. It ensures your new sockets are not only aesthetically pleasing but also safe, stable, and compliant with regulations.
-
Summary: Do not let recessed backboxes compromise your project. When your socket screws are too short after tiling, a custom collar extender is the professional choice for a flawless result.
-
Get a Perfect Fit: Take the guesswork out of your installation. Use the Build My Spacer tool today to order a solution manufactured to your exact specifications.
-
Further Advice: For more technical guides and installation tips, please feel free to browse the articles on the SocketSpacers.com blog.
Frequently Asked Questions (FAQs)
Is it safe to use a socket spacer if my screws are too short?
Yes, it is not only safe but recommended. A quality socket spacer made from fire-retardant material is the correct and safe way to solve the problem of recessed backboxes. It provides essential structural support and ensures the electrical connections remain properly enclosed, which is safer than leaving a void behind the faceplate.
Can I use a collar extender for both light switches and plug sockets?
Absolutely. Collar extenders are designed based on standard UK backbox sizes, which are the same for most light switches and 13A plug sockets. You can order them in single gang, double gang, or even custom multi-gang configurations to suit any fitting.
Do I need a qualified electrician to fit an electric socket collar extender?
UK law allows for like-for-like replacement of sockets and switches as a DIY task, provided the work is done safely. Fitting an extender is a straightforward part of this process. However, if you are not completely confident working with electrics, you must always hire a qualified electrician. Your safety is the top priority.
What is the maximum depth a socket spacer can bridge?
Off-the-shelf spacers are typically limited to depths of around 10mm to 15mm. The major advantage of a bespoke service like SocketSpacers.com is that there is no practical maximum depth. Spacers can be manufactured to any depth required, whether it is 18mm for panelling or 50mm for a media wall.
Will a spacer plate be visible once the faceplate is installed?
No. A correctly sized spacer is designed to have a slightly smaller profile than the socket faceplate. This ensures that once the faceplate is screwed on, the spacer is completely hidden from view, providing invisible support for a clean, professional finish.
Are these extenders compatible with smart sockets and USB outlets?
Yes. As long as the smart socket or USB outlet is designed to fit a standard UK single or double gang backbox, a corresponding extender will be fully compatible. These modern sockets often have deeper bodies, making the extra space provided by an extender even more beneficial for managing wiring.
How do I fix a socket that is lopsided because of uneven tiling?
This is a perfect scenario for a bespoke spacer. By measuring the gap at all four corners of the backbox, you can order a custom-tapered spacer. For example, it might be 12mm deep on one side and 10mm on the other. This tapered frame will compensate for the uneven wall, allowing the faceplate to sit perfectly straight and flush.
What is the difference between a spacer and an extension frame?
The terms are often used interchangeably. Generally, a "spacer" or "collar extender" refers to a frame that sits directly behind the faceplate to bridge a depth gap. An "extension frame" or "box extender" sometimes refers to a larger unit that screws directly onto the existing backbox to make the entire box deeper, though this is a less common application for post-renovation fixes.
Electrical Safety
Always isolate the circuit and confirm it is dead before removing a socket or switch faceplate. Only carry out the work if you are competent to do so. If you find damaged wiring, signs of overheating or anything unsafe, stop and contact a qualified electrician.