
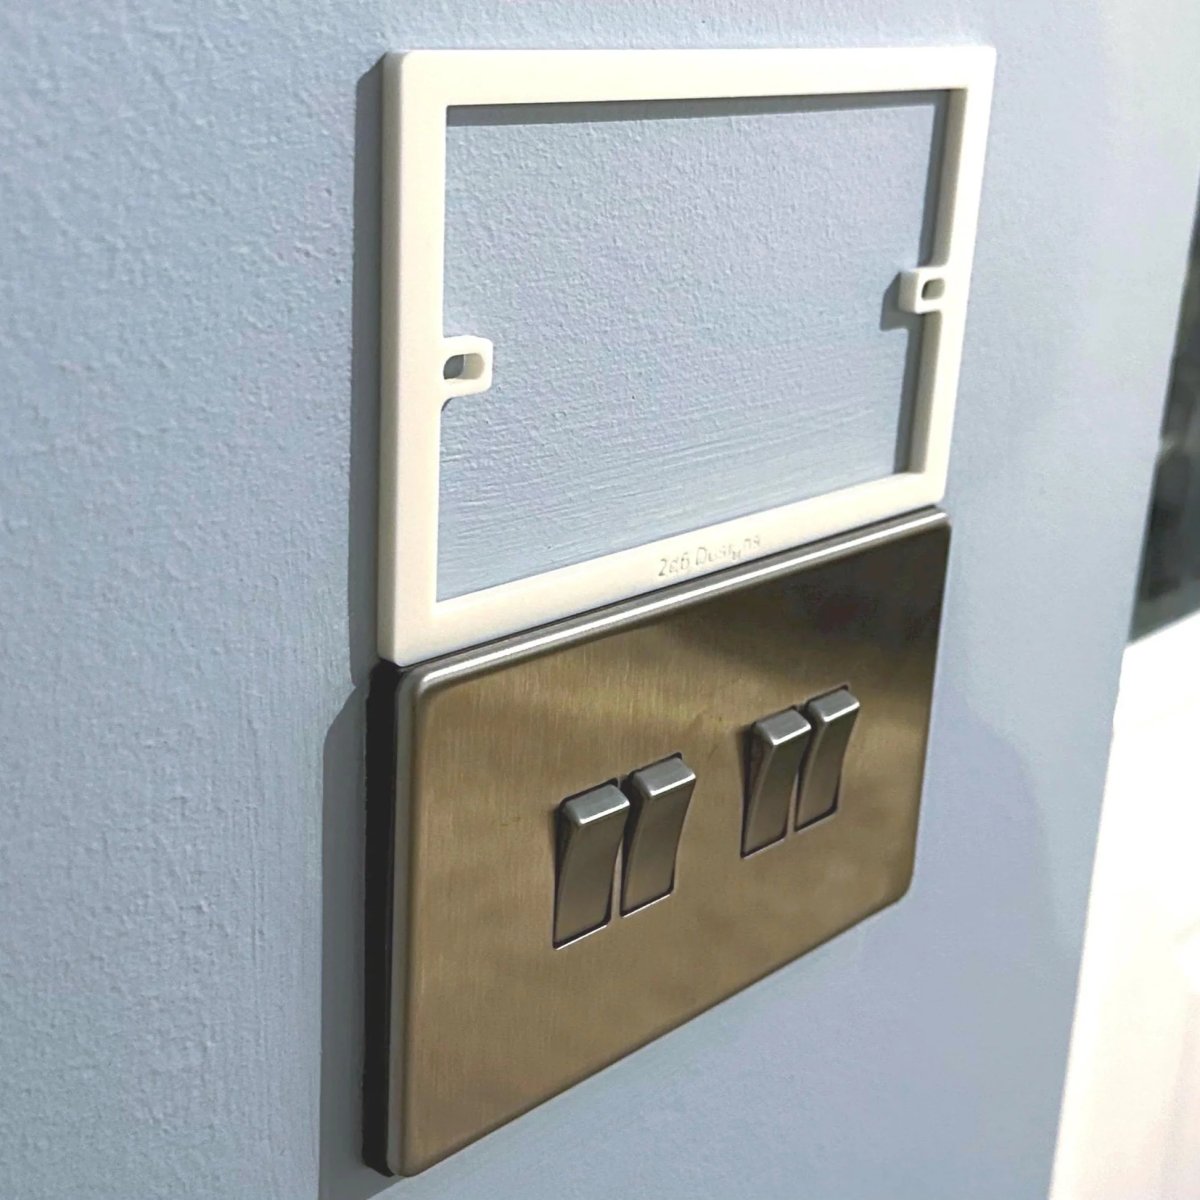
You have spent hours perfecting a new tiled splashback or decorative wall panel, only to find that your double gang socket sits recessed and won't tighten flush against the surface. It's a common frustration to discover that standard, off-the-shelf spacers are either too thick or too thin for your specific project. We understand that a professional finish relies on precision, and a generic shim often fails to provide the stability or aesthetic quality required for high-end renovations. By using our Build My Spacer configurator tool, you can eliminate these gaps and ensure your faceplates sit perfectly every time.
This guide will show you how to select a bespoke double gang socket spacer that matches your exact wall depth, providing a secure and safe foundation for your electrical fittings. You'll learn how to achieve a clean finish with no visible gaps, whilst also ensuring you have sufficient space for wiring behind modern smart sockets. We will cover everything from measuring your recess depth to choosing materials that meet current safety standards, helping you move from a frustrating installation to a flawless, professional result.
Key Takeaways
- Understand how a bespoke double gang socket spacer provides a structural bridge between a recessed backbox and your new wall surface for a secure, flush finish.
- Learn why custom-manufactured depths are superior to standard off-the-shelf spacers when matching specific tile or panel thicknesses.
- Discover the correct method for measuring the gap between your wall surface and the electrical backbox to ensure a precision fit.
- Identify how increasing internal depth can resolve issues with tight wiring behind modern smart sockets and USB faceplates.
- Explore how to use the Build My Spacer configurator to specify the exact dimensions and depth required for your project.
Table of Contents
- What is a double gang socket spacer and why is it essential?
- Technical specifications of bespoke double gang spacers
- Bespoke vs off-the-shelf: why custom depth matters
- How to measure for your double gang socket spacer
- Ordering your custom spacer from SocketSpacers.com
What is a double gang socket spacer and why is it essential?
A double gang socket spacer is a bespoke frame designed to bridge the gap between a recessed electrical pattress box and the finished wall surface. During renovations, it is common for the original electrical housing to become sunken as new layers of material are added to the wall. This creates a physical void that makes it impossible to secure the socket faceplate correctly. A spacer acts as a structural extension, ensuring the fitting sits flush and remains stable.
Using the Build My Spacer configurator tool allows you to specify a depth that matches your project exactly. This provides a professional alternative to "floating" sockets, which are only held in place by the tension of the fixing screws. Without a physical support frame, the socket is structurally unstable and prone to movement, which can lead to damaged plasterwork or compromised electrical connections.
The problem of the sunken backbox
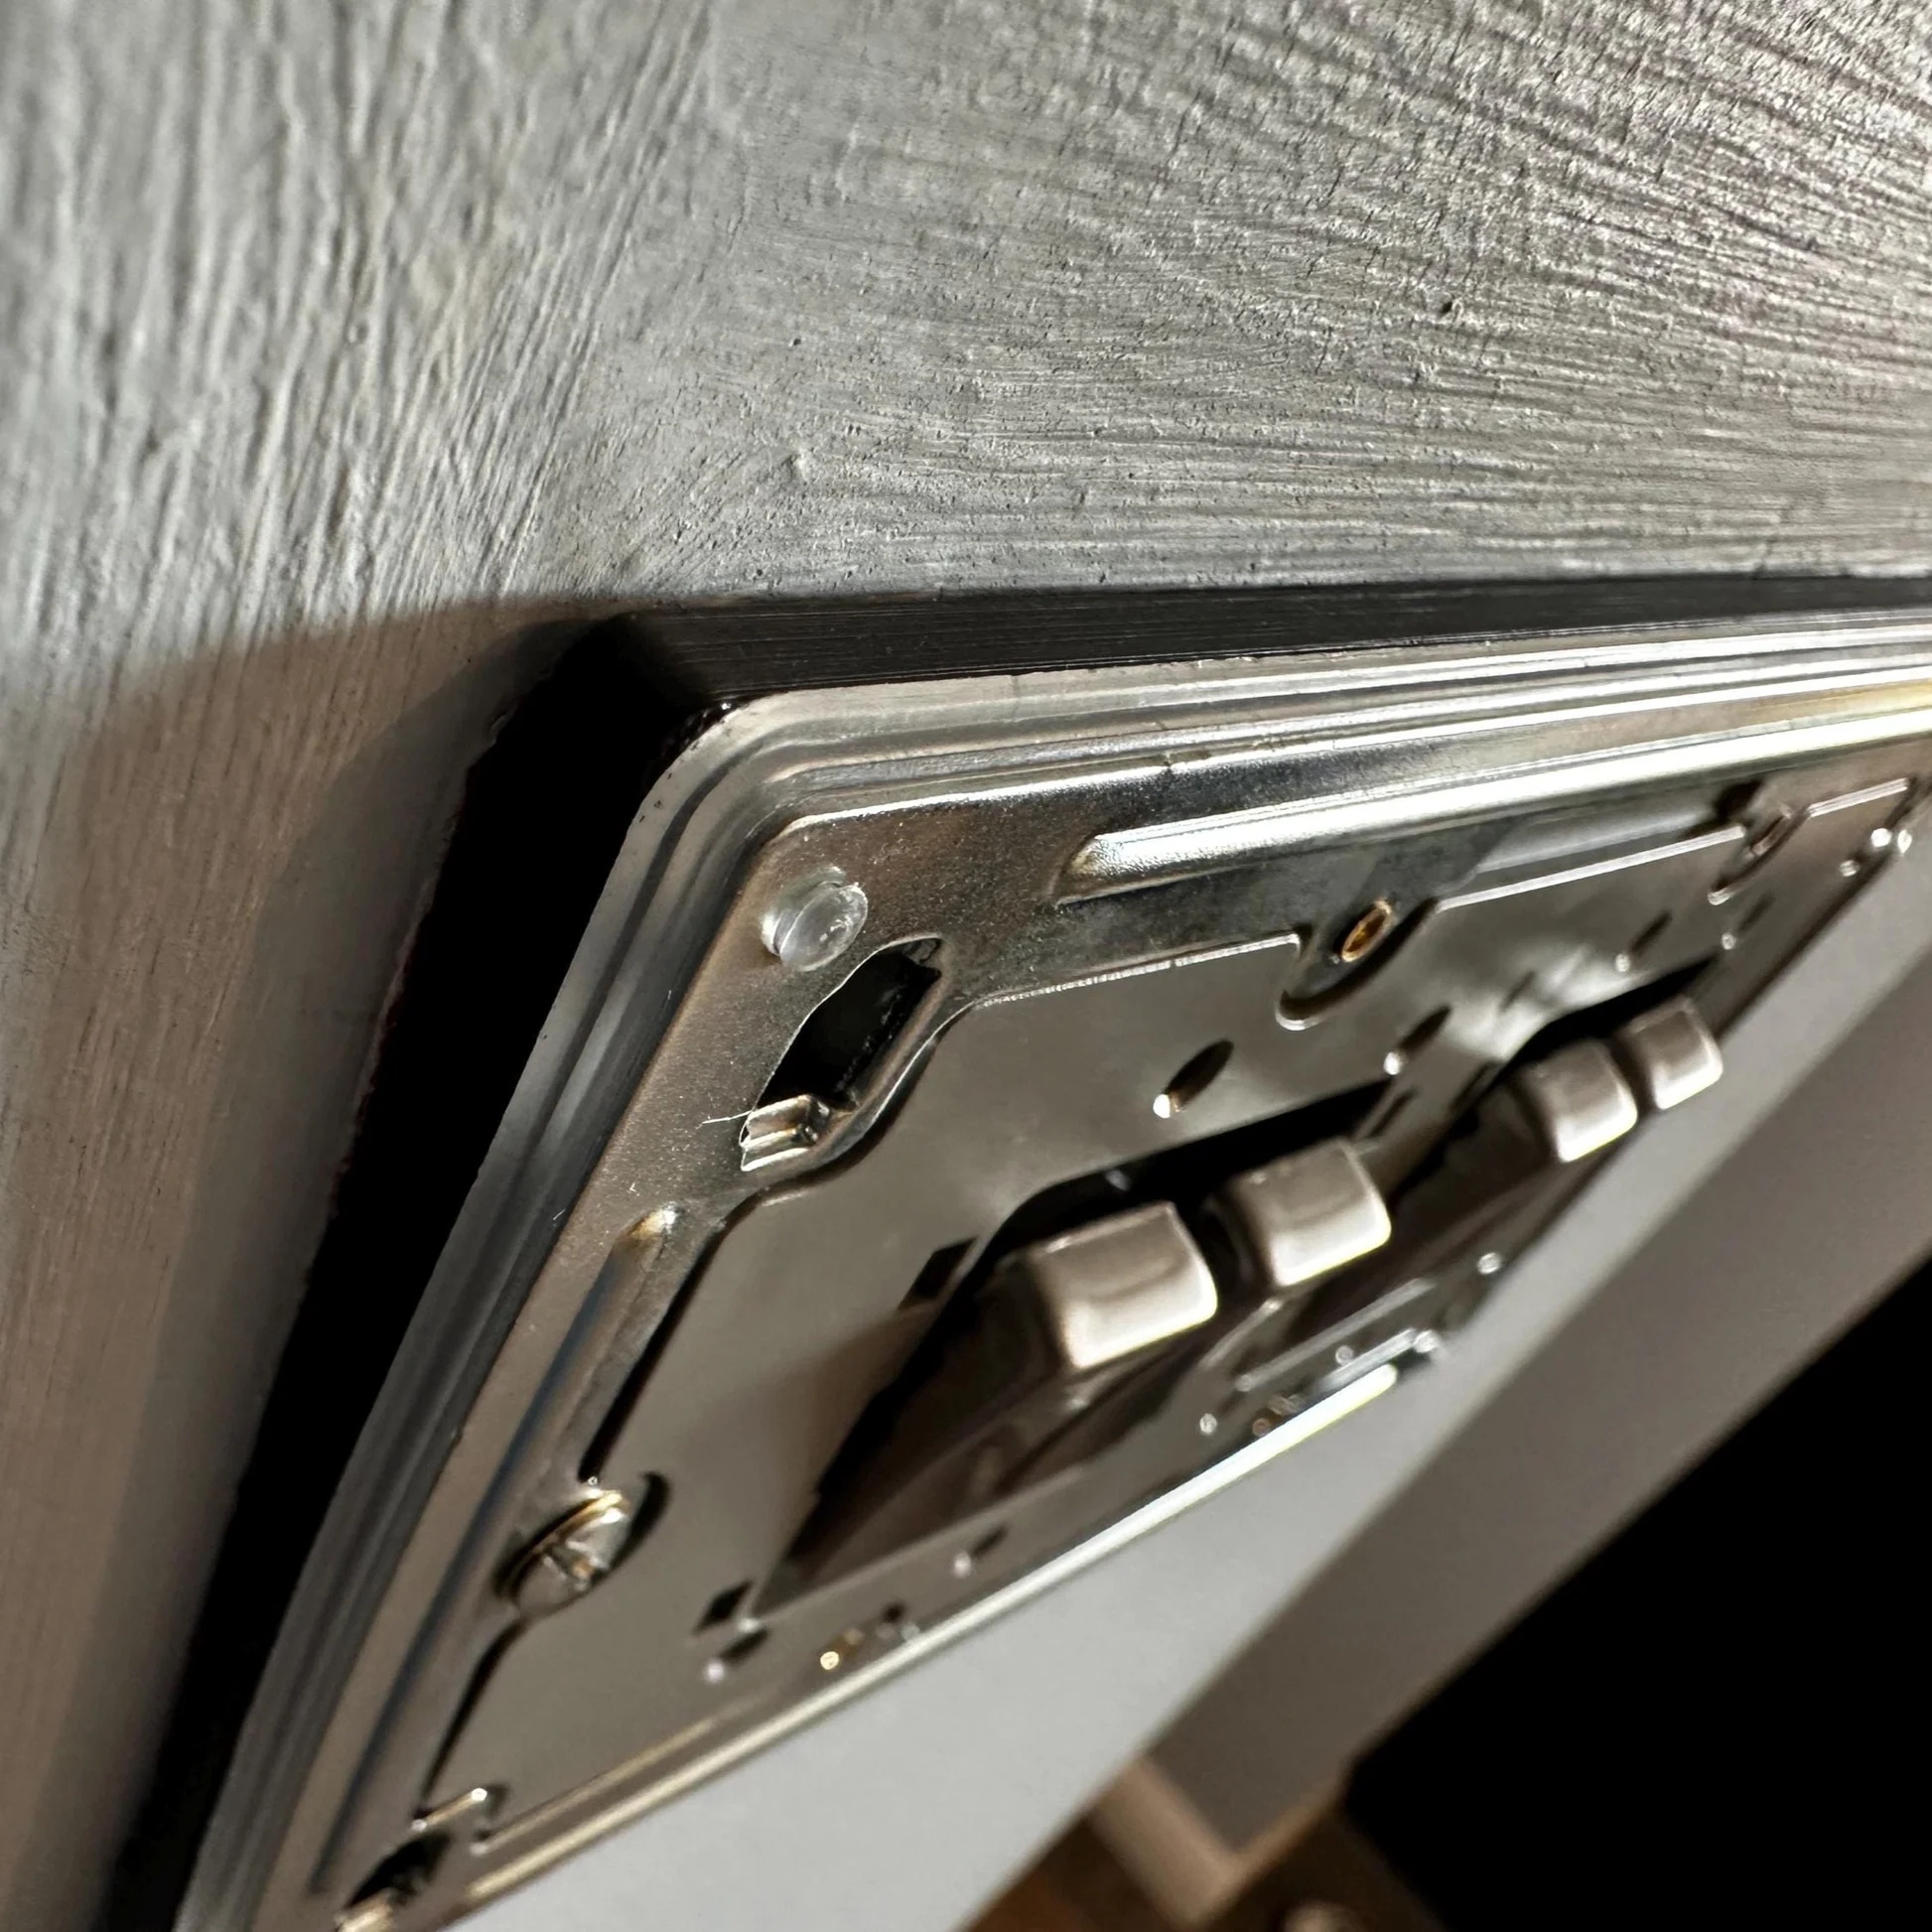
Most UK homes have backboxes set into the brickwork or stud walls. When you add wall tiles, stone splashbacks, or decorative wood panels, you often increase the wall thickness by anything from 3mm to 20mm. This leaves the backbox too deep for the faceplate to rest against. If you attempt to tighten the fixing screws against an unsupported gap, the faceplate will likely bow or crack under the pressure. A solid mounting surface is essential to ensure the socket remains static during the physical force of plugging and unplugging appliances. This is especially important for heavy-duty kitchen appliances where the frequency of use is high.
Aesthetic and safety benefits
A bespoke spacer eliminates the need for unsightly layers of decorators' caulk or mismatched plastic shims that never quite fit. It provides a clean, continuous edge that looks like an intentional part of the original installation. Beyond the visual finish, safety is the primary concern. A firmly mounted socket prevents the internal wiring from being disturbed or strained. If a socket moves every time it's used, the electrical terminals can loosen over time, which increases the risk of electrical arcing. By providing a stable platform, you ensure the long-term integrity of the connection whilst achieving a high-quality finish that meets professional standards.
Technical specifications of bespoke double gang spacers
Standard UK twin-socket faceplates typically measure approximately 146mm x 86mm. Whilst mass-market spacers often assume a one-size-fits-all approach, a high-quality double gang socket spacer must account for the specific profile of your chosen faceplate. Material choice is critical for long-term performance. Our spacers are manufactured using durable, precision-engineered materials that resist compression, ensuring the socket remains secure even after years of use. If you're working with non-standard dimensions, using the Build My Spacer tool allows for fine-tuned adjustments that off-the-shelf products simply cannot provide.
Understanding gang sizes and dimensions
It's vital to distinguish between single and double gang requirements before ordering. A standard double gang socket uses a screw centre distance of 120.6mm, whereas a single gang is 60.3mm. Beyond these basics, many modern decorative plates feature oversized footprints or unique profiles. For these installations, bespoke large extension frames are often necessary to provide a seamless transition between the wall and the accessory. Choosing a frame that matches the exact footprint of your plate prevents the spacer from being visible from the side.
One often overlooked technical detail is the corner radius. Traditional faceplates frequently have sharp, square corners, whilst modern slimline or screwless designs feature softer, rounded edges. A bespoke double gang socket spacer can be manufactured with specific corner radii to match your faceplate perfectly. This prevents the spacer from protruding beyond the edge of the socket or leaving unsightly gaps at the corners. Precision in these small details is what separates a standard DIY attempt from a professional-grade finish.
The role of fixing lugs and screw guides
The structural integrity of the installation depends heavily on the fixing lugs. These components serve as guides for the long M3.5 screws required to reach a sunken backbox. Our bespoke spacers feature reinforced screw holes that prevent the frame from distorting as you tighten the fittings. Unlike generic plastic shims that can slip or compress unevenly, these integrated guides ensure the screw enters the backbox lug at a perfectly perpendicular angle. This reduces the risk of cross-threading and provides a much firmer anchor for the faceplate. If you need a specific configuration for a complex project, you can explore our custom fit options to find a solution that meets your exact technical requirements.
Bespoke vs off-the-shelf: why custom depth matters
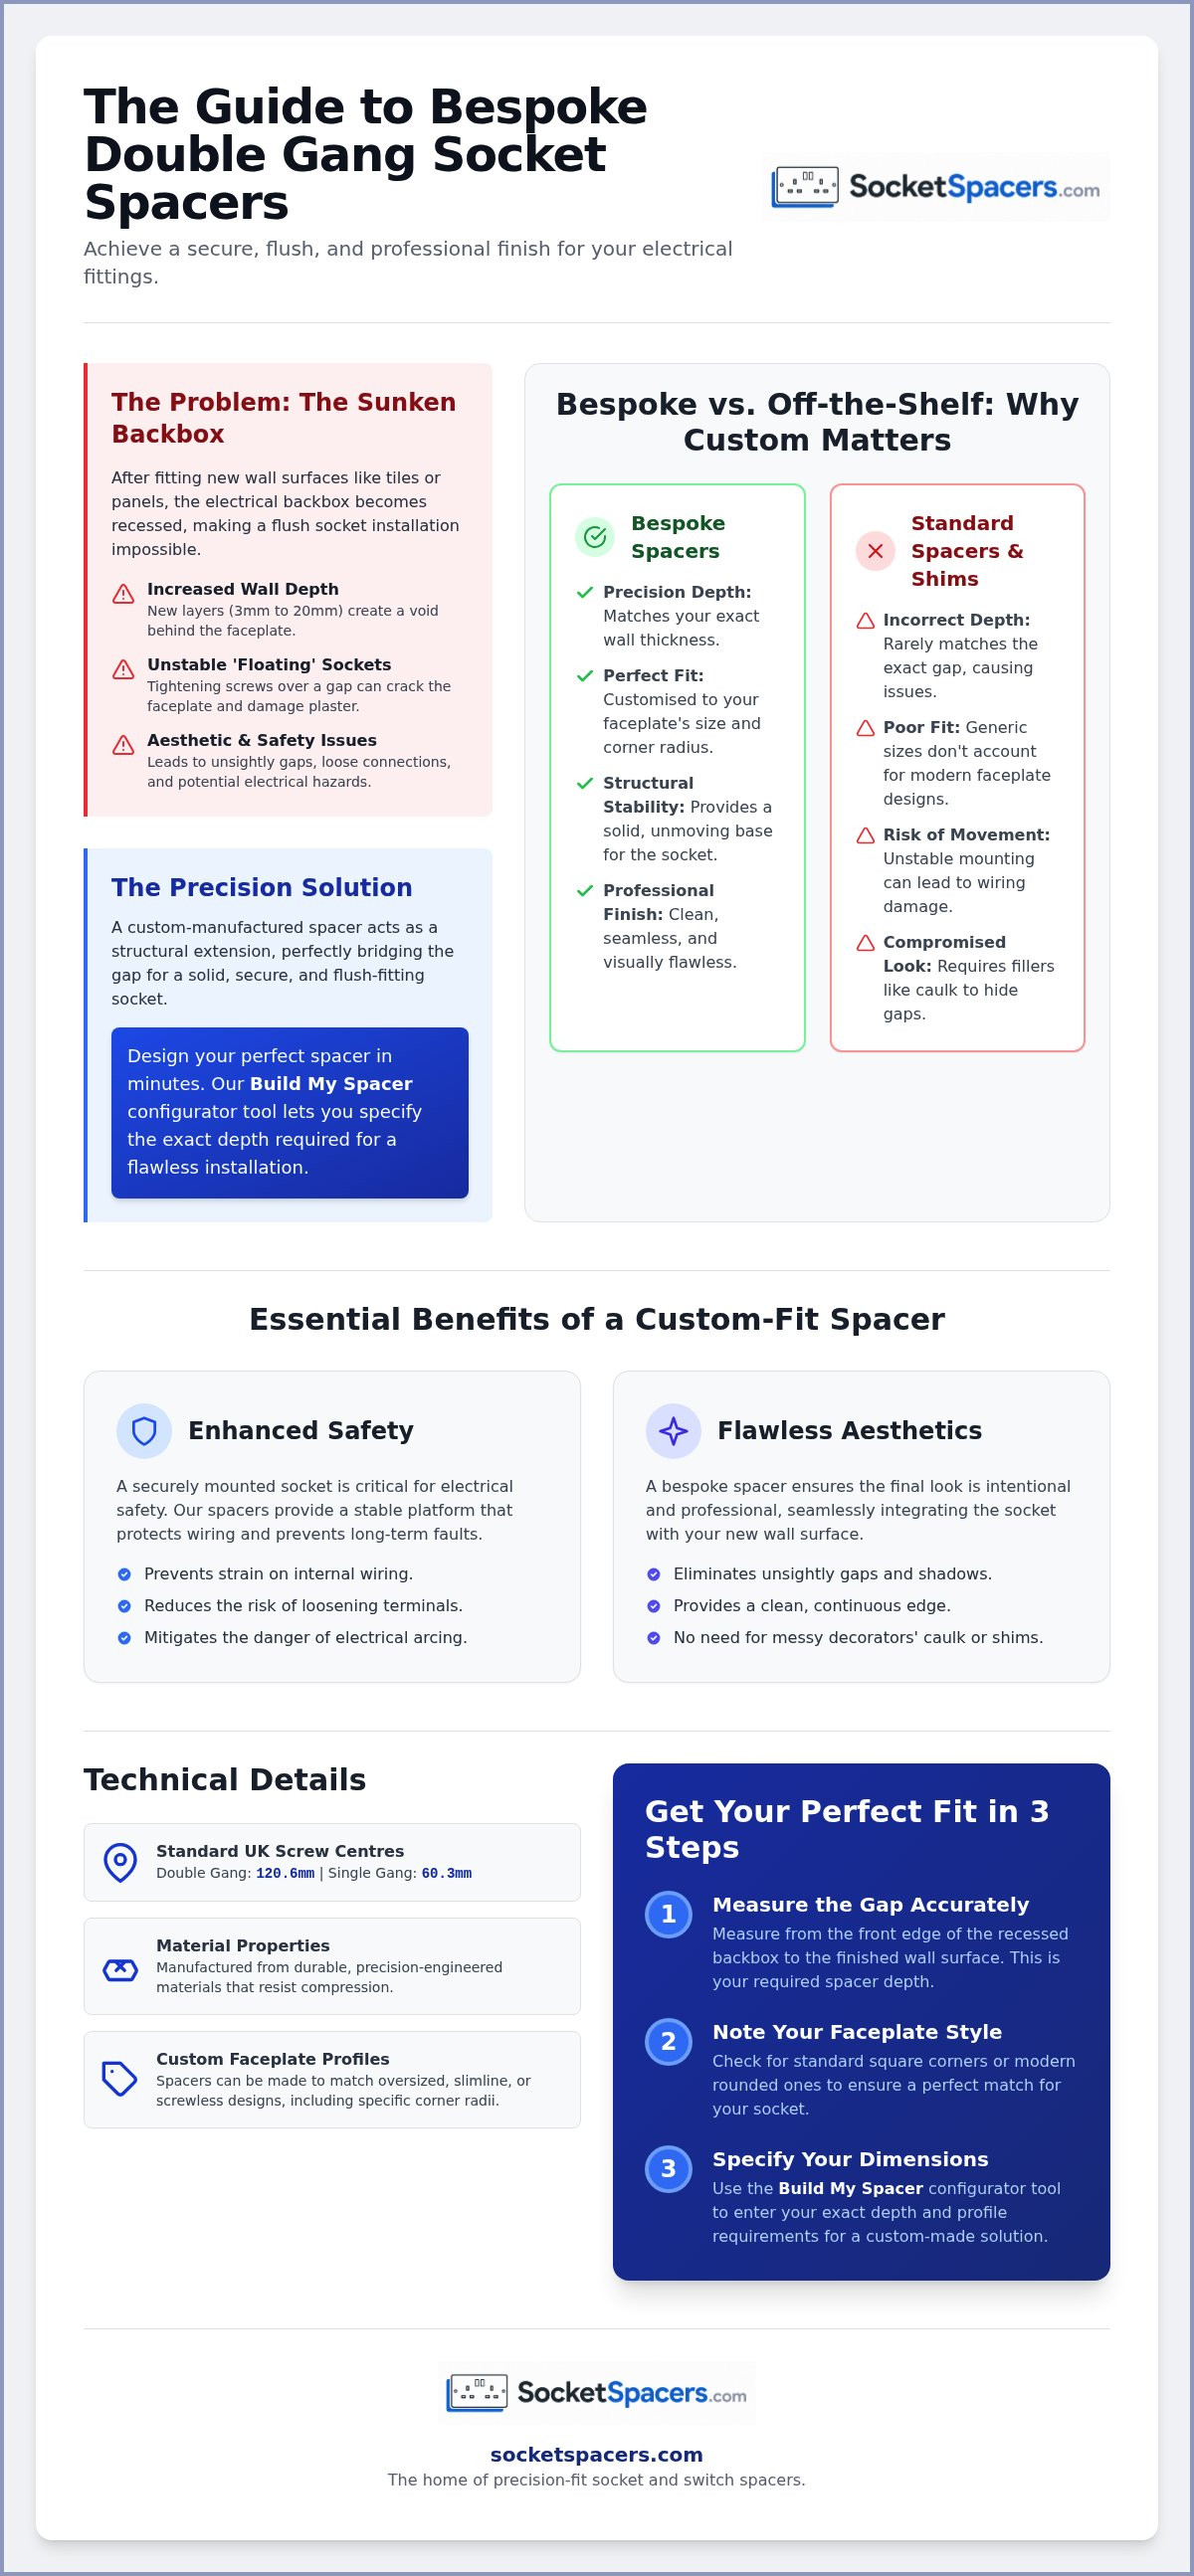
Standard hardware stores typically cater to the most common installation scenarios, which often leaves specialists and DIY enthusiasts with limited options. Most off-the-shelf products are restricted to fixed increments, usually 10mm or 32mm. If your wall covering doesn't happen to match these specific measurements, you're forced to compromise on the quality of the finish. Choosing a bespoke double gang socket spacer ensures that your electrical fittings are supported by a frame that matches your wall depth with millimetre-perfect accuracy.
The Build My Spacer configurator allows you to move beyond these rigid industry standards. By specifying the exact depth you need, you eliminate the instability caused by stacking multiple thin shims. A single-piece, custom-manufactured spacer provides a far more secure foundation than a collection of loose components. This structural integrity is vital for maintaining a flush finish that won't shift or compress over time.
The limitations of standard hardware store spacers
If you visit a typical trade counter, you'll likely find 32mm extension boxes. These are designed as surface-mounted pattress boxes rather than internal spacers for decorative finishes. Using a 32mm box for a 15mm gap results in a socket that protrudes awkwardly from the wall. Conversely, if you have a 7mm metro tile, a standard 10mm spacer will be too thick, leaving a visible 3mm gap behind the faceplate. This "near enough" approach leads to distorted faceplates and messy sealant lines that detract from the overall aesthetic of the room. Finding a 2mm or 5mm spacer in a standard retail environment is nearly impossible, yet these small measurements are often the difference between a botched job and a professional result.
The 2mm to 20mm advantage
Precision manufacturing allows for a level of versatility that mass-produced parts cannot match. Whether you're installing a thin 3mm splashback or a heavy 18mm stone panel, a bespoke spacer can be tailored to the exact requirement. This range is particularly useful when you're trying to achieve a consistent look across different types of fittings. For instance, you might use a double gang socket spacer in the kitchen and a custom depth light switch spacer in the hallway to maintain a uniform profile throughout the property.
- Stability: A single-piece frame won't slide or rotate during installation.
- Precision: Depths such as 3mm, 7mm, or 14mm are easily achievable.
- Safety: Proper support reduces the risk of the faceplate cracking when screws are tightened.
- Aesthetics: No visible gaps or need for excessive caulking around the edges.
If your project involves non-standard materials, don't settle for a generic solution that requires on-site modification. A custom-fit spacer is designed to work with your wall, not against it, providing a clean transition that looks like a natural extension of the original architecture.
How to measure for your double gang socket spacer
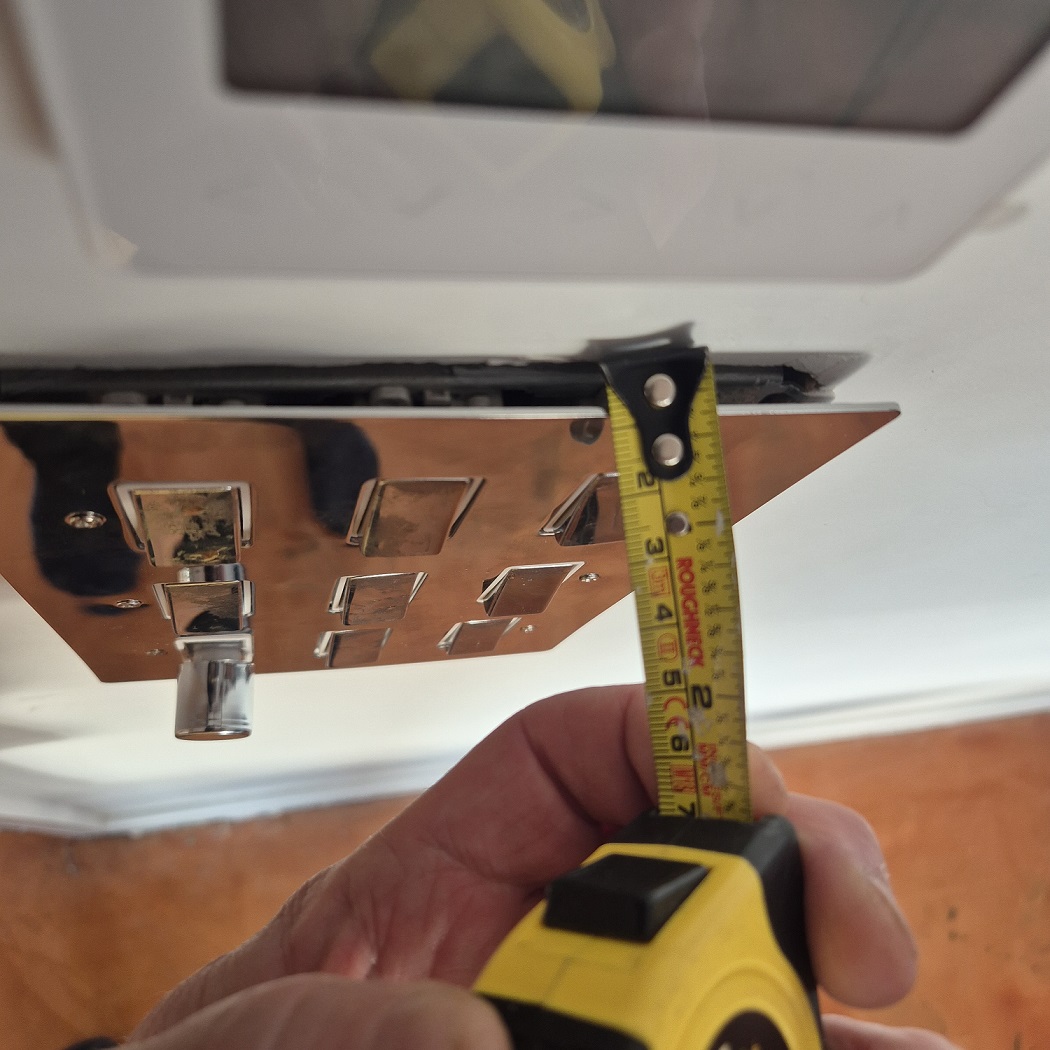
Accurate measurement is the secret to a professional finish that looks like a natural part of the original wall. When a backbox is sunken behind new tiling or panelling, the goal is to bridge that void with a single, solid component. To determine the correct depth for your double gang socket spacer, you must identify the exact distance between the metal flange of the backbox and the finished wall surface. A standard ruler is often sufficient, but using a digital calliper provides the millimetre-level accuracy required for a truly seamless result.
It's important to measure at multiple points around the perimeter of the fitting. Walls are rarely perfectly flat, and adhesive thickness can vary across a single splashback. If you find that the top right corner is 8mm deep whilst the bottom left is 10mm, you should typically opt for the larger measurement to ensure the faceplate is fully supported. You must also consider the "lip" or the rear profile of your faceplate. Some decorative plates have a recessed rear edge that can sit slightly inside the spacer, whilst others are completely flat.
Step-by-step measurement guide
Safety is the first priority. Ensure the power is safely isolated at the consumer unit before you loosen any screws. Once the faceplate is pulled forward, measure from the front edge of the backbox to the outermost surface of your new wall covering. This measurement is your required spacer depth. Finally, check the corner radius of your faceplate. If you've chosen a modern design with soft, rounded edges, you'll want a spacer that follows that curve to prevent any part of the frame from protruding beyond the socket's footprint.
Accounting for wiring and smart sockets
Modern electrical accessories often present spatial challenges that standard sockets do not. Smart sockets, dimmers, and USB-integrated faceplates feature bulky internal modules that consume significant room within the backbox. If your cables are already tightly packed, you may need to specify a deeper spacer to provide increased wiring space behind the socket. This prevents the internal components from crushing the 2.5mm cables, which can lead to overheating or loose connections over time.
When calculating this extra depth, check how much the internal module protrudes from the back of the faceplate. If the module is 25mm deep and your backbox is only 30mm, you're left with very little room for the ring main cables to fold neatly. In these scenarios, adding a bespoke double gang socket spacer creates the necessary breathing room for Wi-Fi modules and wiring loops, ensuring the faceplate closes easily without force.
Configure your bespoke socket spacer now
Ordering your custom spacer from SocketSpacers.com
Our streamlined manufacturing process ensures you receive a component tailored specifically to your renovation requirements. Every double gang socket spacer we produce is bespoke and made-to-order in the UK, allowing for rigorous quality control that mass-market retailers simply don't offer. By using the Build My Spacer tool, you can move from a technical problem to a physical solution in just a few clicks. We offer a variety of colours, including black, white, and grey, to ensure the spacer complements your faceplate and interior decor perfectly.
Choosing a UK-based manufacturer means you're supporting local precision engineering whilst benefiting from fast turnaround times. We don't rely on generic stock; every frame is printed to the exact millimetre you specify. This approach is particularly beneficial when you're working with high-end materials like marble splashbacks or bespoke wood panelling where a standard spacer would look out of place. A custom-fit double gang socket spacer provides the clean, intentional look that modern interiors demand.
Using the Build My Spacer configurator
The Build My Spacer configurator is designed to remove the guesswork from your order. You can input your specific depth requirements, ranging from 2mm up to 20mm, alongside the precise width and height of your faceplate. Selecting the correct corner radius is also a vital step to match specific brands of electrical accessories. You should review all customisations carefully before finalising the order to ensure the dimensions align with the measurements you took on-site. This level of detail ensures that the resulting frame will fit your wall and socket without needing any on-site modifications.
Professional support and bespoke projects
We pride ourselves on providing a reliable service for both DIY enthusiasts and trade professionals. If you're managing a large-scale renovation, we can accommodate bulk orders to ensure consistency across multiple rooms. Our bespoke manufacturing approach provides the precision required for a high-end finish, especially when dealing with unique projects like plug socket extension frames. We understand that every millimetre counts in a professional installation, and our team is committed to delivering a product that meets those exact standards for every customer.
Achieve a Flawless Finish for Your Electrical Fittings
A professional renovation is defined by the details that aren't immediately visible. By selecting a bespoke double gang socket spacer, you ensure that your electrical faceplates are both structurally secure and aesthetically perfect. You've learned how precision measurement and understanding your specific wall depth can prevent cracked faceplates and unsightly gaps, especially when working with modern tiled or panelled surfaces.
Our UK-manufactured solutions provide the exact support required for any project, offering custom depths from 2mm to 20mm for a truly bespoke fit. Whether you're accommodating bulky smart socket modules or looking for a clean transition on a new splashback, a single-piece frame is the superior choice for long-term stability. It's the most efficient way to turn a technical frustration into a high-quality result that lasts.
Create your perfect fit with our Build My Spacer configurator
Take the final step in your installation with confidence, knowing your fittings are supported by a frame designed specifically for your home.
Frequently Asked Questions
Can I stack two double gang socket spacers to reach a greater depth?
Stacking is generally discouraged because it introduces multiple failure points and reduces the overall rigidity of the mounting. A single, solid double gang socket spacer provides a much more stable foundation for your electrical fittings. If you require a depth beyond standard sizes, it's safer to order a bespoke single-piece frame that matches your exact requirements.
Do I need longer screws when using a 20mm socket spacer?
You will almost certainly need longer M3.5 electrical screws to reach the backbox lugs through a 20mm spacer. Standard screws supplied with sockets are usually 25mm or 35mm long, which won't be sufficient for deep recesses. We recommend using 50mm or 75mm screws to ensure a secure and firm connection to the sunken backbox.
Are bespoke plastic spacers safe to use behind high-power kitchen appliances?
Yes, our spacers are suitable for use in kitchens and other high-demand areas. Since May 2026, there has been an increased industry focus on using certified, non-flammable, or self-extinguishing materials for wall inserts. Our manufacturing process utilises materials that meet these rigorous safety standards, providing peace of mind when installed behind heavy-duty appliances and ensuring your double gang socket spacer remains safe under load.
Will these spacers fit all brands of UK double sockets?
These spacers are compatible with standard UK twin-socket faceplates, which typically measure 146mm x 86mm with 120.6mm screw centres. Whilst they fit the vast majority of brands, some decorative or screwless plates have unique footprints. If you're using an oversized or non-standard plate, you can specify custom dimensions to ensure the spacer remains hidden behind the accessory.
How do I choose the right corner radius for my spacer?
The best way to choose is to visually match the spacer profile to the corners of your chosen faceplate. Modern slimline sockets often have a significant curve, whereas traditional or industrial styles might be perfectly square. You can select the most appropriate corner radius using the Build My Spacer configurator to achieve a seamless look.
Can I paint the spacer to match my wall colour?
Whilst we offer spacers in black, white, and grey to match most decors, they can be painted if a specific colour match is required. For the best result, you should use a primer specifically designed for plastics before applying your chosen wall paint. This ensures the finish is durable and won't flake off when the socket is cleaned or used.
What is the difference between a spacer and a surface box?
A spacer is an extension frame used to bridge a gap between a recessed backbox and the wall surface, whereas a surface box is the entire housing used when the wiring is run on the outside of the wall. Spacers are specifically for flush installations that have become sunken due to tiling, panelling, or plastering. They allow you to keep your existing internal backbox rather than replacing it.
How long does it take to manufacture and deliver a custom spacer?
Because each item is bespoke and manufactured in the UK, the process involves precision printing to your specific measurements. Delivery times can vary depending on the complexity of the order, but we aim to process and dispatch custom frames within a few working days. This ensures you receive a high-quality, made-to-order part without the long wait times associated with international shipping.
Electrical Safety
Always isolate the circuit and confirm it is dead before removing a socket or switch faceplate. Only carry out the work if you are competent to do so. If you find damaged wiring, signs of overheating or anything unsafe, stop and contact a qualified electrician.