
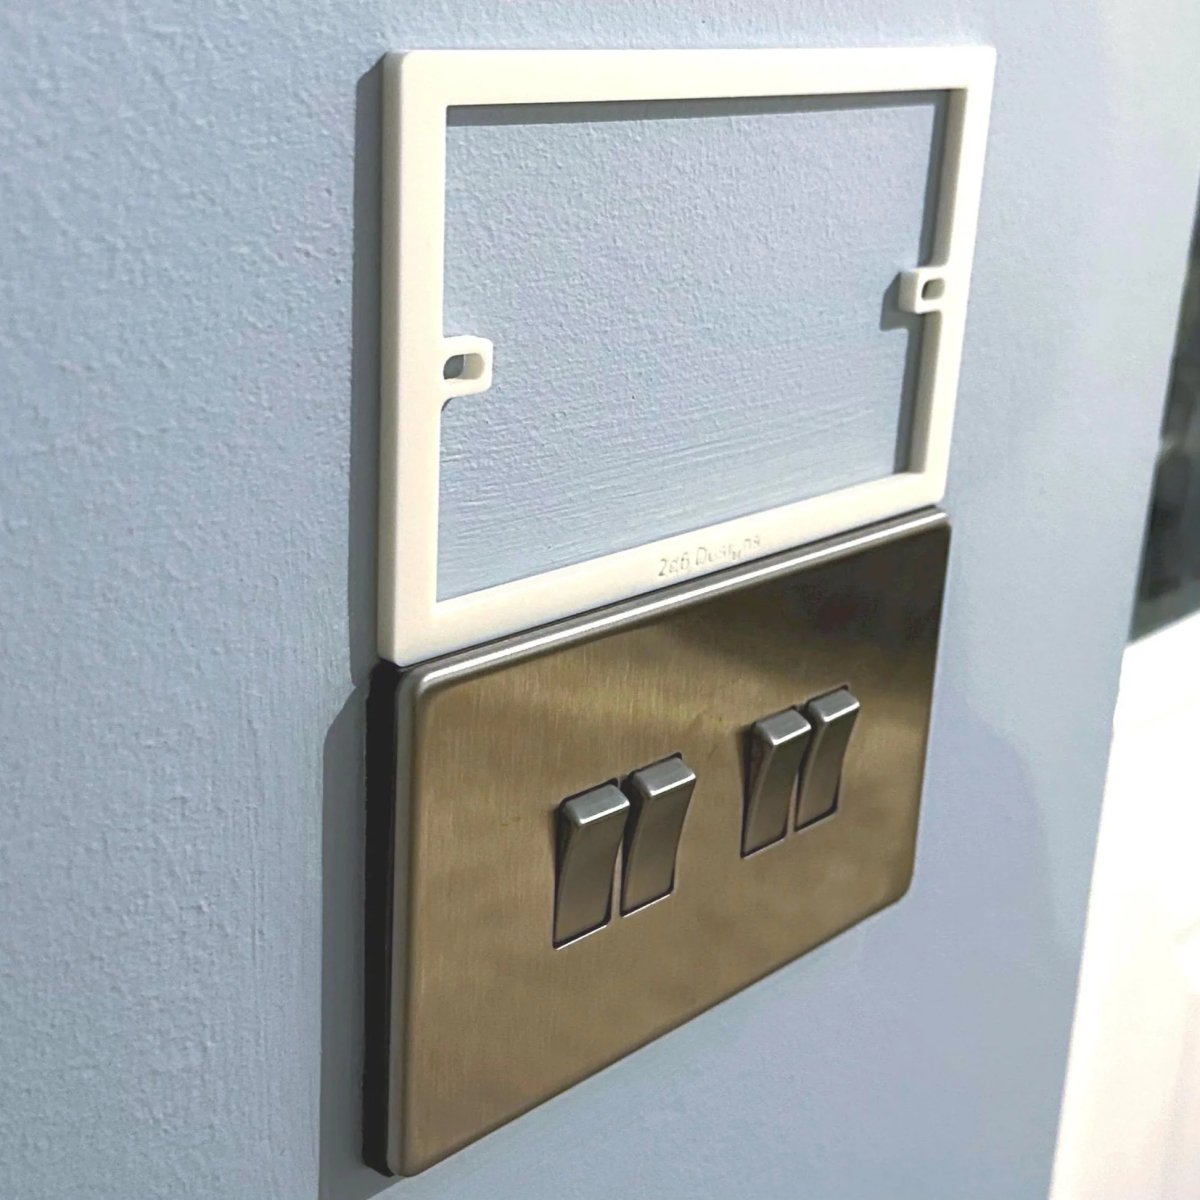
You have spent weeks perfecting your new kitchen tiling only to discover that the faceplates won't sit flush against the wall. It is a common frustration when a sunken backbox leaves an unsightly gap or your screws are simply too short to reach the fitting. If you are facing these technical challenges, using the Build My Spacer configurator tool ensures you get a bespoke light switch spacer that fits your specific depth requirements perfectly.
We agree that a "near enough" fit is rarely sufficient for a high-quality renovation. This guide will show you how to resolve sunken electrical fittings and create a clean finish with bespoke light switch spacer plates that match your wall decor. We will preview the technical benefits of custom-manufactured spacers, how they provide essential wiring room for modern upgrades, and the best ways to ensure your installation remains safe and secure according to the latest BS 7671 Amendment 4 standards. Whether you are a tradesperson or a DIY enthusiast, achieving a flush finish is a matter of having the right tools for the job.
Key Takeaways
- Understand how a precision-cut light switch spacer corrects unsightly gaps and ensures your faceplates sit flush against new wall surfaces.
- Identify the risks of cramped wiring and learn how bespoke spacers provide the necessary depth to prevent cable damage.
- Recognise why standard retail spacers often fail to meet the specific requirements of UK renovations and the benefits of precision-manufactured alternatives.
- Learn the correct technique for measuring the distance between a recessed backbox and the finished wall to guarantee a professional result.
- Utilise the Build My Spacer tool to specify the exact dimensions needed for single, double, or multi-gang installations.
Table of Contents
- What is a Light Switch Spacer and Why is it Essential?
- Solving the Problem of Crowded Wiring Space
- Bespoke Spacers vs Standard Off-the-Shelf Options
- How to Measure and Fit Your Light Switch Spacer
- Custom Solutions from SocketSpacers.com
What is a Light Switch Spacer and Why is it Essential?
A light switch spacer is a precision-manufactured plate designed to sit between the wall surface and the electrical faceplate. Its primary function is to bridge the gap created when an electrical backbox, also known as What is a Pattress Box, becomes recessed behind a new wall finish. This often happens during renovations where layers of material are added to the original wall, leaving the internal fitting too deep for the faceplate to reach comfortably.
Beyond the obvious visual improvements, these plates provide a critical safety function. If a switch is not flush, the faceplate cannot be fastened securely to the backbox. This instability can leave live internal wiring exposed to dust, moisture, or accidental contact. If you are currently dealing with a specific gap depth that standard hardware cannot fix, the Build My Spacer configurator tool offers an immediate bespoke solution tailored to your installation's exact measurements.
Common Scenarios Requiring a Spacer Plate
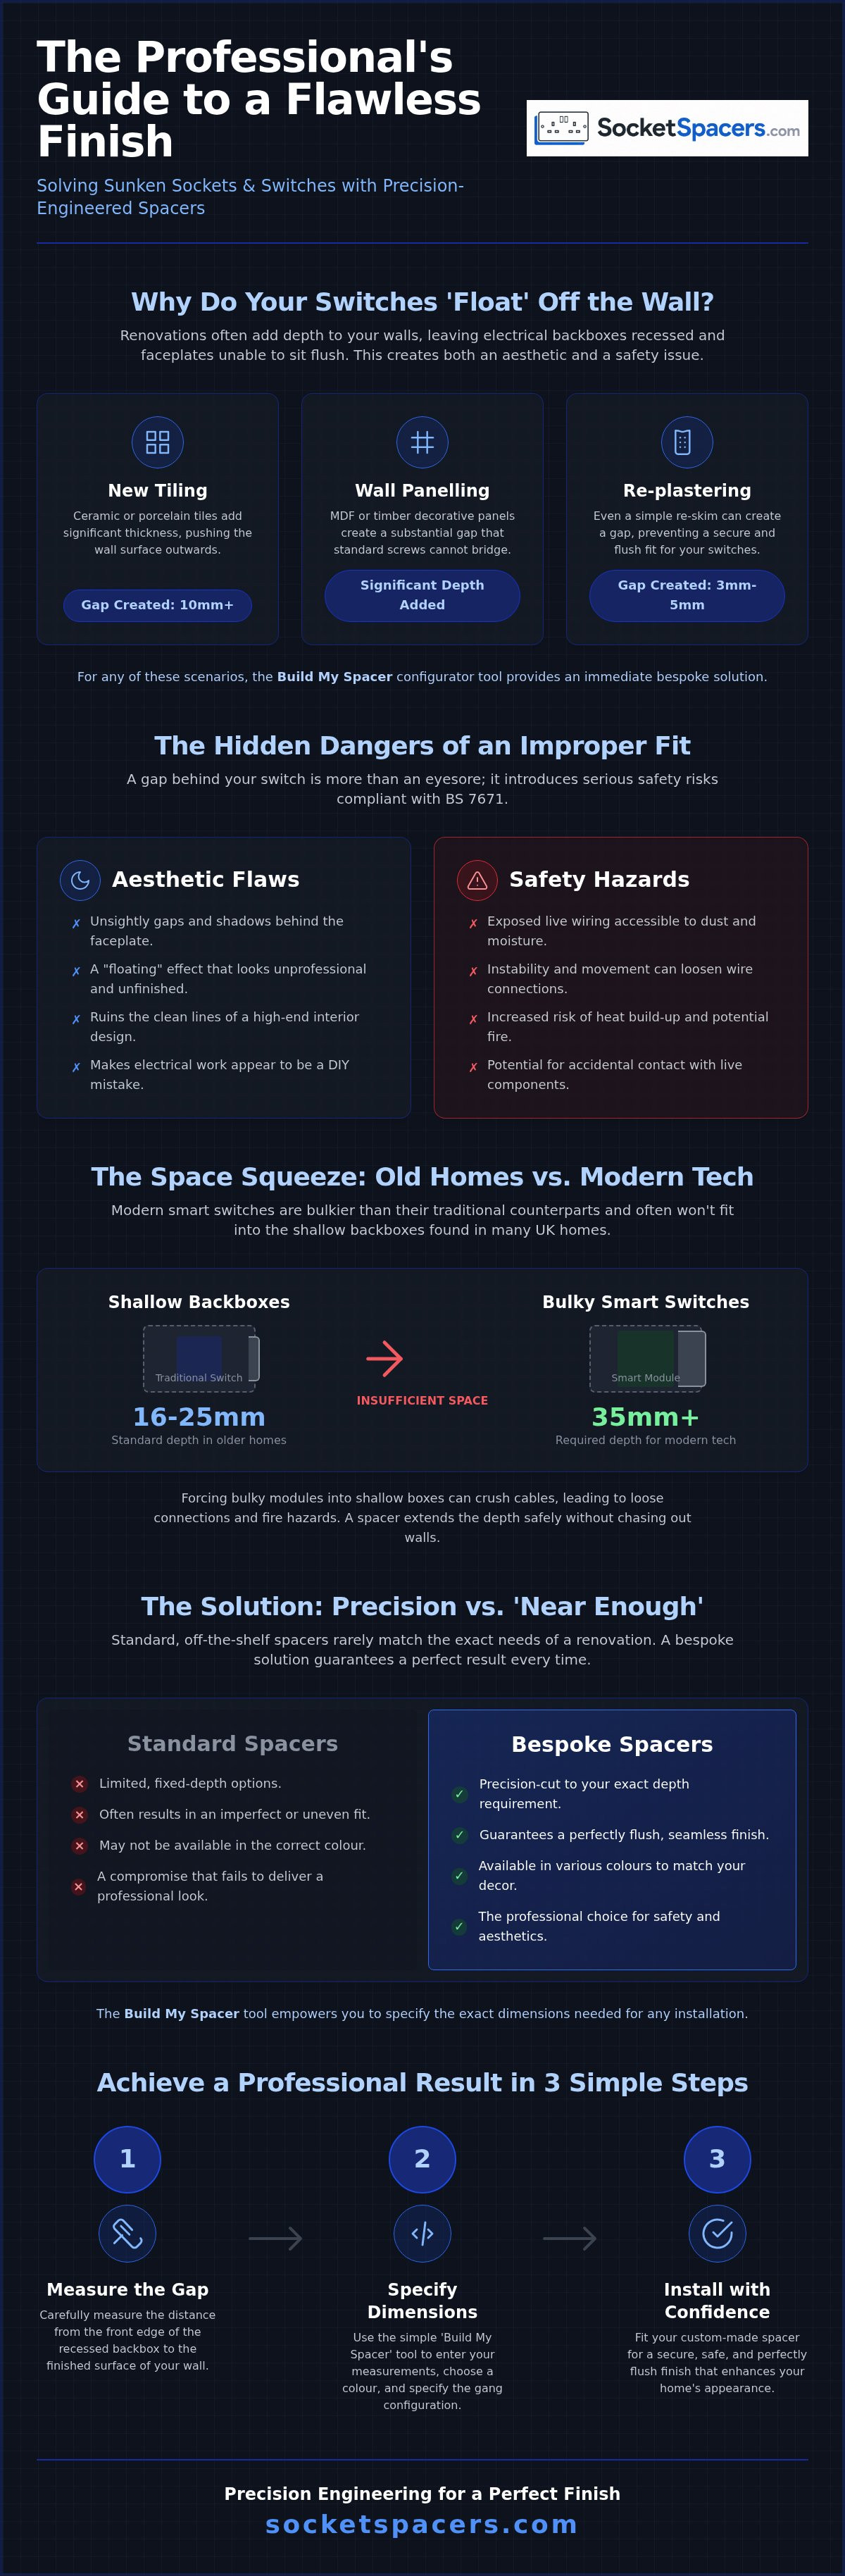
Several common home improvement projects lead to sunken fittings. In kitchens and bathrooms, the addition of ceramic or porcelain tiles can move the wall surface forward by 10mm or more. Wall panelling is another frequent culprit; MDF or timber decorative panels add significant depth that standard electrical screws often cannot bridge safely. Even a simple room refresh involving a new layer of plaster or a "re-skim" can create a 3mm to 5mm gap. Whilst this seems minor, it is enough to prevent the switch from sitting correctly against the wall, leading to a loose and potentially dangerous fitting.
The Aesthetic Impact of a Flush Finish
The visual difference between a standard installation and one using a custom-fit spacer is significant. Without a spacer, you'll often see unsightly shadows or visible gaps behind the switch, which creates a "floating" effect. This can ruin the look of a high-end interior design project and makes the electrical work look unfinished. By using a colour-matched light switch spacer, you create a seamless transition from the wall to the switch. It eliminates the uneven edges and ensures the faceplate looks like an intentional part of the decor rather than a DIY mistake. A professional finish relies on these small details, ensuring every fitting sits perfectly square and level against your chosen wall surface.
Solving the Problem of Crowded Wiring Space
Modern UK electrical installations face a significant space challenge that older homes simply weren't designed to handle. Many properties were originally fitted with shallow 16mm or 25mm backboxes, which were perfectly adequate for simple, traditional rocker switches. However, the shift towards modern hardware and smart home technology has changed these requirements. Forcing a faceplate onto a crowded box is more than just a nuisance; it's a safety risk. When cables are compressed, it can lead to crushed insulation and loose connections. According to the BS 7671 Wiring Regulations, maintaining the integrity of cable insulation and ensuring secure terminations is vital for preventing heat build-up and potential fire hazards.
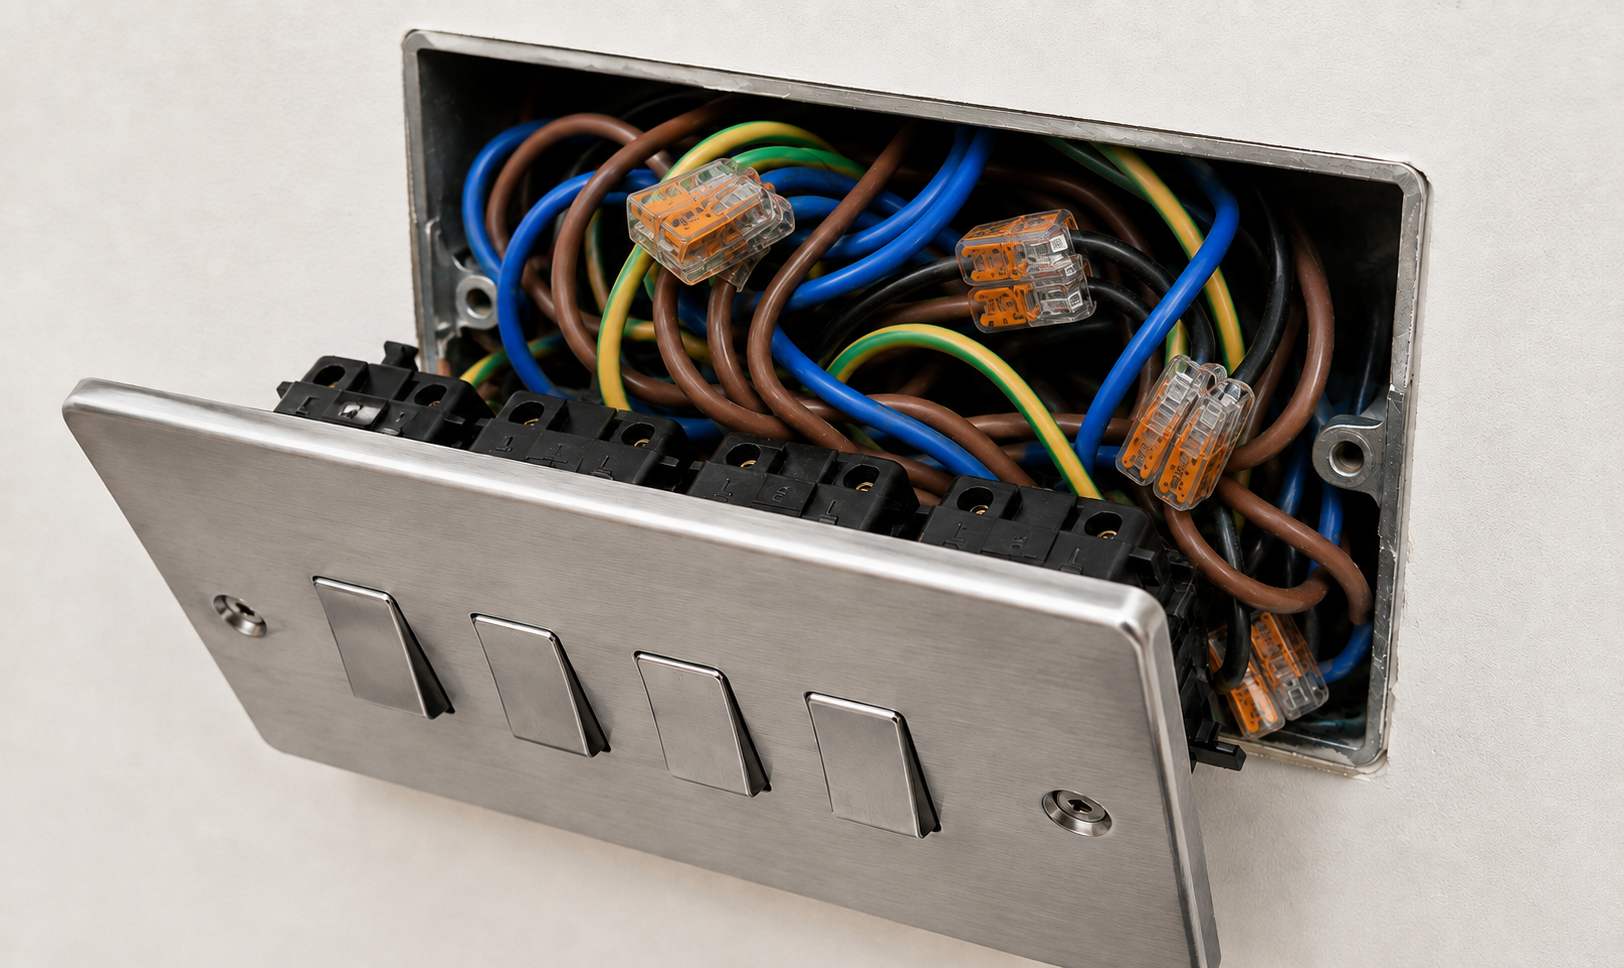
Instead of the disruptive and messy process of chiselling out masonry to install a deeper backbox, a light switch spacer offers a pragmatic alternative. It extends the depth of the fitting outwards, creating the necessary volume for wiring without damaging the wall structure. This is an ideal solution for kitchens where tiles have already been laid or for decorative walls where you want to avoid structural work. For a deeper look at similar issues with power points, you can read our guide on managing plug socket wiring space to see how these principles apply across your home.
Fitting Smart Switches in Shallow Boxes
Smart dimmers and Wi-Fi enabled switches are significantly bulkier than their traditional counterparts. These devices often house internal modules that require at least 35mm of depth to sit comfortably. If your existing backbox is too shallow, a custom-depth light switch spacer provides the clearance needed. It allows you to enjoy modern home automation whilst maintaining a slimline, professional look on the wall surface. Using the Build My Spacer configurator tool allows you to specify the exact thickness required to house these larger smart modules safely.
Organising Cables for Safety
Proper cable management is essential for long-term electrical reliability. When cables are forced into a tight space, the sharp bend radii can stress the copper conductors, leading to fatigue over time. A spacer provides the extra millimetres required to organise ring main loops and additional smart modules safely. This extra breathing room reduces the risk of terminal failure amongst the crowded wiring. A tidy installation isn't just about aesthetics; it's about ensuring that every connection remains secure and that there's no pressure on the faceplate screws. If you are struggling with a particularly cramped fitting, you can explore bespoke spacer options to find the perfect fit for your project.
Bespoke Spacers vs Standard Off-the-Shelf Options
When you visit a local trade counter or hardware store, you'll likely encounter the "32mm Trap". Most standard accessories are designed for surface mounting rather than precision gap-filling. If you have added a 6mm tile and a 2mm layer of adhesive, a chunky 32mm frame will look completely out of place. It creates an industrial, bulky aesthetic that contradicts the clean lines of a modern interior. These off-the-shelf options lack the flexibility required for the subtle depth changes common in domestic renovations.
Choosing a bespoke light switch spacer allows you to select a depth between 2mm and 20mm, ensuring the faceplate sits perfectly against the finished surface. Unlike flimsy DIY shims or cardboard packings, which can degrade or shift over time, a robust plastic spacer plate provides a solid foundation. This is essential for complying with electrical regulations, as it ensures the enclosure remains rigid and secure. For a detailed comparison between standard and custom solutions, you can read The Essential Guide to Custom Depth Light Switch Spacer Plates to understand the technical advantages of precision manufacturing.
Why 2mm to 10mm Depths are the Most Popular
Most UK renovation projects involve relatively small depth increases. A 3mm spacer is often all that's required after a room has been re-skimmed with fresh plaster to prevent the switch from sinking. For kitchens, a 7mm or 8mm spacer usually matches the combined thickness of a standard tile and adhesive layer. By using an exact measurement, you avoid the oversized, "floating" look associated with industrial spacers. These thinner plates maintain the original design intent of your switchgear whilst solving the practical problem of a recessed backbox.

Multi-Gang and Custom Configurations
Finding a light switch spacer for a three-gang or four-gang switch is notoriously difficult in high-street stores, which typically only stock single or double gang sizes. Bespoke manufacturing solves this by creating plates that match your specific switch layout exactly, ensuring all fixing points align perfectly. This includes customising corner radii and fixing lugs so the spacer remains hidden behind the faceplate edges. If you are working with a non-standard arrangement, the Build My Spacer tool allows you to specify the exact dimensions needed for a truly professional result.
How to Measure and Fit Your Light Switch Spacer
Before you begin any work on your electrical fittings, safety is the absolute priority. You must isolate the power at the consumer unit and verify that the circuit is dead using a suitable voltage tester. Once the power is safely disconnected, you can unscrew the faceplate to inspect the gap between the backbox and the finished wall surface. This inspection allows you to determine the exact depth required for your light switch spacer to ensure a professional, flush finish.
Calculating the correct depth requires a precise measurement from the metal lug of the backbox to the outermost face of the wall. If you are fitting a spacer to a wall that has already been tiled or panelled, a simple ruler or depth gauge will provide the necessary figure. However, if you are measuring before the final surface is applied, you must account for the thickness of the material and the adhesive layer. Most standard UK wall tiles are approximately 6mm to 8mm thick, whilst adhesive typically adds another 2mm to 3mm to the total depth.
When you have determined the required thickness, you must also consider the length of your fixing screws. Standard electrical screws are often 25mm long, which may be insufficient once a spacer is in place. You will likely need longer M3.5 screws, such as 40mm or 50mm variants, to bridge the new distance and secure the faceplate firmly to the backbox lugs. Ensuring the screws are the correct length prevents stripping the threads or leaving the switch feeling loose when operated. It is a simple but vital component of the installation that ensures the entire fitting remains rigid under daily use.
Step-by-Step Measurement Guide
- Measure the distance from the backbox lug to the wall surface at several points to account for uneven plaster.
- If you are mid-renovation, add the thickness of your chosen tile and a 3mm allowance for adhesive.
- Check the horizontal and vertical alignment of the backbox to see if the spacer needs to compensate for a slightly tilted fitting.
- Input your final measurements into the Build My Spacer tool to generate a bespoke plate that fits your requirements exactly.
Installation Best Practices
During the final fit, pay close attention to cable management. Carefully dress the wires into the backbox to ensure they aren't trapped between the spacer and the wall or pinched by the faceplate. As you tighten the screws, check that the light switch spacer remains level and aligned with the room's horizontal lines. A slight adjustment before the final turn of the screwdriver can make the difference between a mediocre job and a professional result. Once secured, the faceplate should be immobile and sit perfectly flush against the spacer without any visible gaps or movement. This creates a solid, tactile feel when the switch is used, reflecting the quality of the underlying work.
Configure your bespoke light switch spacer
Custom Solutions from SocketSpacers.com
Finding a light switch spacer that meets the specific technical requirements of a high-end renovation is often impossible through traditional retail channels. Standard hardware stores typically stock generic, mass-produced accessories that lack the precision needed for bespoke finishes. SocketSpacers.com addresses this limitation by offering made-to-order plates manufactured right here in the UK. This approach ensures that whether you are dealing with a single gang switch or a complex multi-gang extension frame, the final result is safe, secure, and aesthetically perfect.
Every project has unique spatial challenges. A kitchen with heavy porcelain tiles requires a different solution than a bedroom with thin decorative panelling. By specialising in custom depths, we provide the exact millimetre-perfect fit that off-the-shelf products cannot match. Our manufacturing process focuses on durability and accuracy, giving both homeowners and professionals the confidence that their electrical fittings are supported by a robust, purpose-built component.
The "Build My Spacer" Advantage
The Build My Spacer configurator tool is designed to give you total control over the specifications of your order. You aren't limited to standard industry increments; instead, you can define the precise thickness, width, and height required for your specific faceplates. This level of customisation is particularly beneficial when working with non-standard electrical hardware or unique interior design features. You can also select from different colours to ensure the spacer complements your favourite faceplate finishes, maintaining a cohesive look throughout the property. Despite being bespoke, the turnaround for these orders is fast, ensuring your renovation stays on schedule.
Trusted by UK Trades and DIYers
Professional electricians frequently choose our bespoke solutions for high-end residential projects because they eliminate the need for makeshift DIY fixes. Using washers, cardboard, or stacked plastic shims is not only unprofessional but can also lead to unstable fittings that don't comply with the spirit of safety regulations. By ordering a custom light switch spacer, tradespeople reduce their time spent on-site and deliver a superior finish for their clients. The reliability of our products is reflected in the feedback from across the country, where precision and fit are paramount. For more technical insights, you can explore our blog for detailed installation guides and project advice.
Visit the Build My Spacer configurator to design your perfect light switch spacer today.
Achieve a Professional Finish for Your Electrical Fittings
Perfecting a home renovation relies on addressing the technical details that off-the-shelf products often ignore. Whether you are dealing with the added depth of new kitchen tiles or the complex wiring requirements of modern smart home upgrades, a bespoke light switch spacer provides the exact clearance needed for a safe and professional installation. By choosing a custom-manufactured solution, you avoid unsightly gaps and ensure your faceplates sit perfectly against the wall surface.
Our UK-based manufacturing enables precision depths ranging from 2mm to over 20mm, catering to the unique requirements of any project. This commitment to accuracy is reflected in our 5-star customer reviews, which highlight the reliable fit and quality finish our products provide. You don't have to settle for makeshift shims or oversized retail frames that compromise the aesthetic of your interior design.
Design your bespoke light switch spacer with our Build My Spacer tool
Take the final step in your renovation project with the confidence that your electrical fittings are secure, safe, and look exactly as intended.
Frequently Asked Questions
What is the best way to fix a light switch that is too deep in the wall?
The most effective method is installing a bespoke light switch spacer to bridge the gap between the recessed backbox and the new wall surface. This provides a solid foundation for the faceplate and ensures the fitting is secure. Unlike makeshift packing or shims, a dedicated spacer maintains structural integrity and meets professional standards for a flush finish.
Can I use multiple thin spacers together to reach the desired depth?
Whilst stacking multiple shims is technically possible, it is not recommended for a high-quality finish. Using a single, bespoke plate from the Build My Spacer tool is far more stable and prevents the faceplate from shifting over time. A single unit ensures that the fixing lugs remain perfectly aligned and the enclosure stays rigid under daily use.
Do I need longer screws when fitting a light switch spacer plate?
Yes, you will typically require longer M3.5 electrical screws to account for the added depth of the spacer. If you are using a 10mm spacer, a 40mm or 50mm screw is usually necessary to reach the backbox lugs securely. Always check the thread engagement to ensure the faceplate is held firmly against the wall without over-tightening the fitting.
Are light switch spacers safe to use in bathrooms or kitchens?
These spacers are perfectly safe for use in kitchens and bathrooms when installed correctly as part of a secure fitting. They serve as a protective barrier that prevents access to live internal wiring and stops dust or moisture from entering the backbox. Ensure the spacer is flush against the wall surface to maintain the integrity of the electrical installation.
What thickness of spacer do I need for a standard tiled wall?
Most standard UK wall tiles combined with a layer of adhesive require a spacer thickness between 8mm and 12mm. It is best to measure the exact distance from the backbox lug to the tile face after the grout has dried. Precision is key to avoiding an unsightly gap or a floating faceplate effect that ruins the room's decor.
Can I get a custom spacer for a multi-gang light switch?
Yes, you can order custom-made spacers for three-gang, four-gang, or non-standard multi-gang switch plates. Because retail stores rarely stock these sizes, bespoke manufacturing is often the only way to achieve a professional result. The Build My Spacer tool allows you to specify the exact dimensions for any multi-gang configuration to ensure a perfect fit.
How do I ensure my smart switch has enough wiring space in the box?
Using a light switch spacer to extend the faceplate outwards effectively increases the internal volume available for your cables. This provides the necessary clearance for the bulky modules found in smart dimmers and Wi-Fi switches without the need for structural work. It is a much simpler alternative to the messy task of chiselling out a deeper hole in the masonry.
Will a spacer plate hide the rough edges of my tiles or plaster?
A spacer plate is designed to sit behind the faceplate, effectively covering any rough tile cuts or plaster edges around the backbox opening. It creates a neat border that conceals the transition between the electrical fitting and the wall. This ensures that the final installation looks intentional and polished, even if the underlying wall opening is slightly untidy or uneven.
Electrical Safety
Always isolate the circuit and confirm it is dead before removing a socket or switch faceplate. Only carry out the work if you are competent to do so. If you find damaged wiring, signs of overheating or anything unsafe, stop and contact a qualified electrician.