
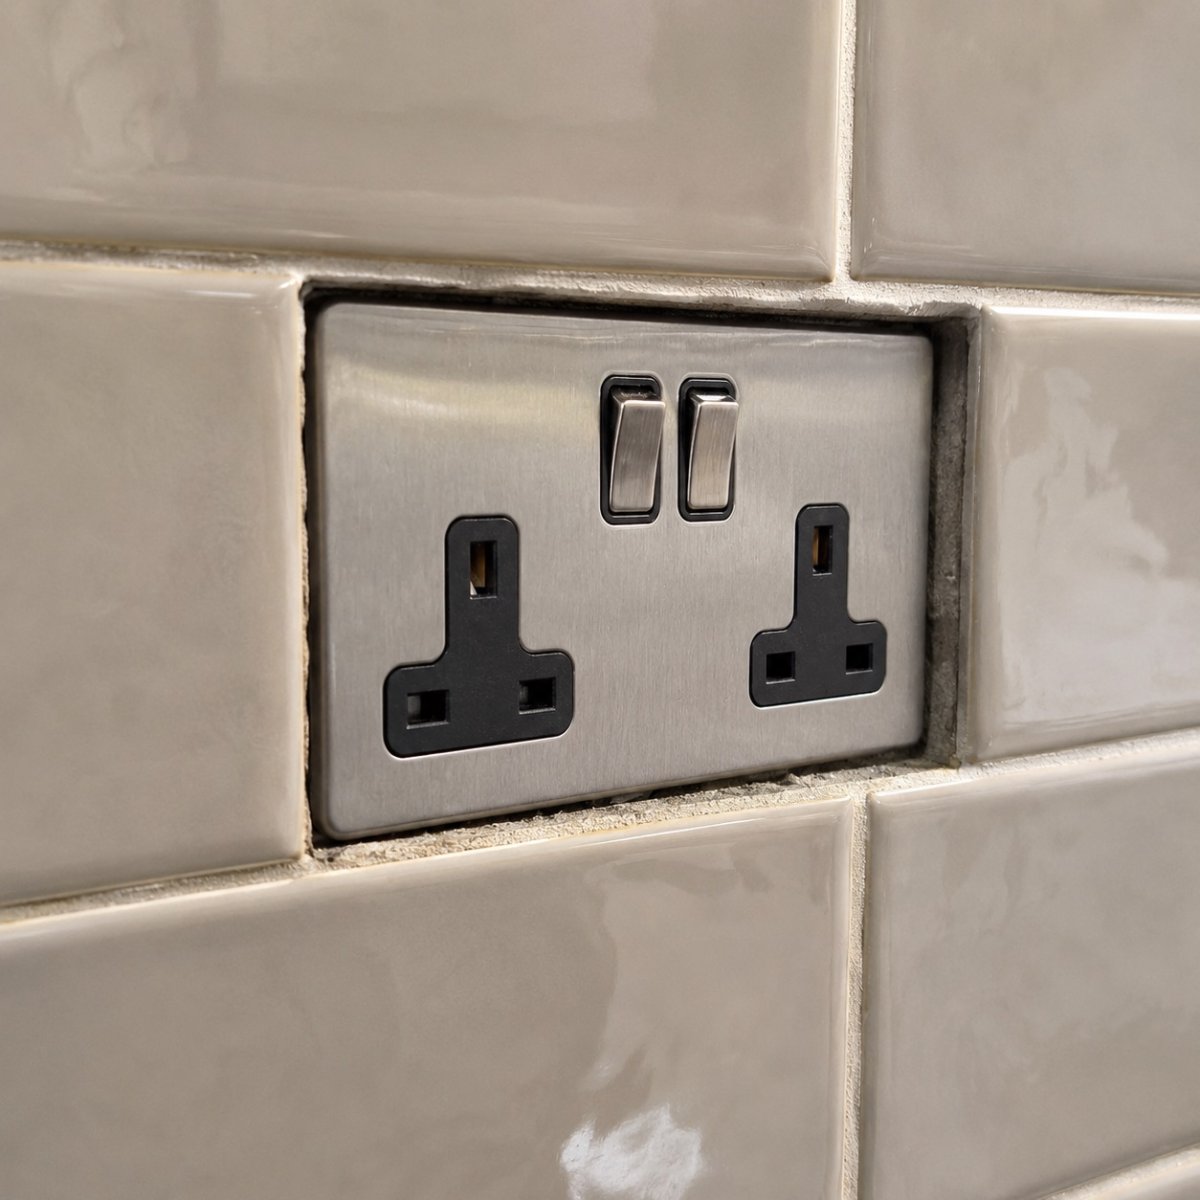
You have just finished a meticulous tiling project, only to find your socket too deep in wall after tiling to sit flush. It is a frustrating moment where the added depth of the tiles and adhesive leaves the electrical backbox recessed, making it impossible for standard screws to reach their threads. Rather than settling for a wobbly faceplate or an unprofessional gap, you can use the Build My Spacer configurator tool to specify a bespoke solution that bridges the distance perfectly. This simple step ensures your sockets are safe, secure, and visually integrated with your new décor.
We recognise that achieving a high-quality finish is about more than just aesthetics; it is about technical accuracy and safety. In this guide, we will explain how to professionally extend recessed electrical sockets to eliminate movement and comply with current wiring standards. You will discover the most efficient way to manage sunken backboxes, ensuring your installation meets the BS 7671:2018+A4:2026 regulations whilst providing the structural support necessary for a long-lasting, flush result.
Key Takeaways
- Identify how the added depth of tiles and adhesive creates a recessed cavity that standard backboxes cannot accommodate.
- Recognise the electrical safety risks, such as arcing and terminal stress, associated with wobbly or poorly supported faceplates.
- Learn the professional technique for measuring the exact depth required to bring a socket flush with your new wall surface.
- Compare extension methods and learn how the Build My Spacer configurator tool creates a bespoke, professional fit.
- Discover the most reliable way to fix a socket too deep in wall after tiling whilst ensuring compliance with UK wiring regulations.
Table of Contents
- Understanding Why Your Electrical Socket Is Recessed After Tiling
- The Hidden Risks of Sockets That Do Not Reach the Surface
- Comparing Methods to Extend a Socket Backbox After Tiling
- A Step-by-Step Guide to Measuring Your Required Spacer Depth
- Why Bespoke Spacers Are the Ultimate Solution for UK Homes
Understanding Why Your Electrical Socket Is Recessed After Tiling
When you add a new layer of ceramic or porcelain to a kitchen or bathroom, you are fundamentally changing the wall's profile. Most UK homes feature an electrical junction box, often called a backbox, that is recessed into the brickwork or stud wall to sit flush with the original plaster. Once you apply a 3mm to 5mm bed of adhesive followed by a 10mm tile, that backbox is suddenly 15mm further away from the surface. This creates a recessed cavity that standard fittings cannot bridge safely. Finding your socket too deep in wall after tiling is a common issue, but it requires a precise mechanical fix rather than a decorative workaround.
The difference between a professional flush finish and a floating faceplate is structural support. If your socket is sitting back too far, the faceplate will essentially hover over the cavity rather than resting against the backbox. This lack of contact creates a "floating" effect where the faceplate is only held in place by the tension of the screws. To avoid guessing the required depth or settling for a wobbly installation, you should use the Build My Spacer configurator as soon as the tiles are set. This tool allows you to specify the exact dimensions needed to bring the fitting forward, ensuring a solid foundation for your electrical accessories.
The Geometry of a Tiled Wall
Calculating the necessary extension requires looking at the total stack height. A standard tile might be 8mm thick, but when you account for the adhesive ridges and the grout, the total depth often exceeds 12mm. Modern large-format tiles are particularly challenging because they often require thicker adhesive beds to ensure a level surface. If the original wall was slightly out of plumb, you might even find that one side of the socket is deeper than the other. This unevenness makes it impossible for a standard off-the-shelf extension to provide a square, professional result. Precision is vital to prevent unsightly gaps between the tile edge and the socket frame.
Why Long Screws Are Not Always the Answer
It's tempting to simply buy longer M3.5 screws and pull the socket faceplate forward until it touches the tile. However, this creates a significant mechanical weakness. Without a physical spacer behind the faceplate, the socket relies entirely on the tension of the screws. Every time you plug in a heavy appliance or pull a plug out, the faceplate flexes. This repeated movement can eventually crack your new tiles or, more dangerously, loosen the internal wiring connections. A physical spacer provides the rigid rear support required to keep the installation stable, safe, and compliant with modern building expectations. Relying on screws alone is a shortcut that often leads to long-term damage.
The Hidden Risks of Sockets That Do Not Reach the Surface
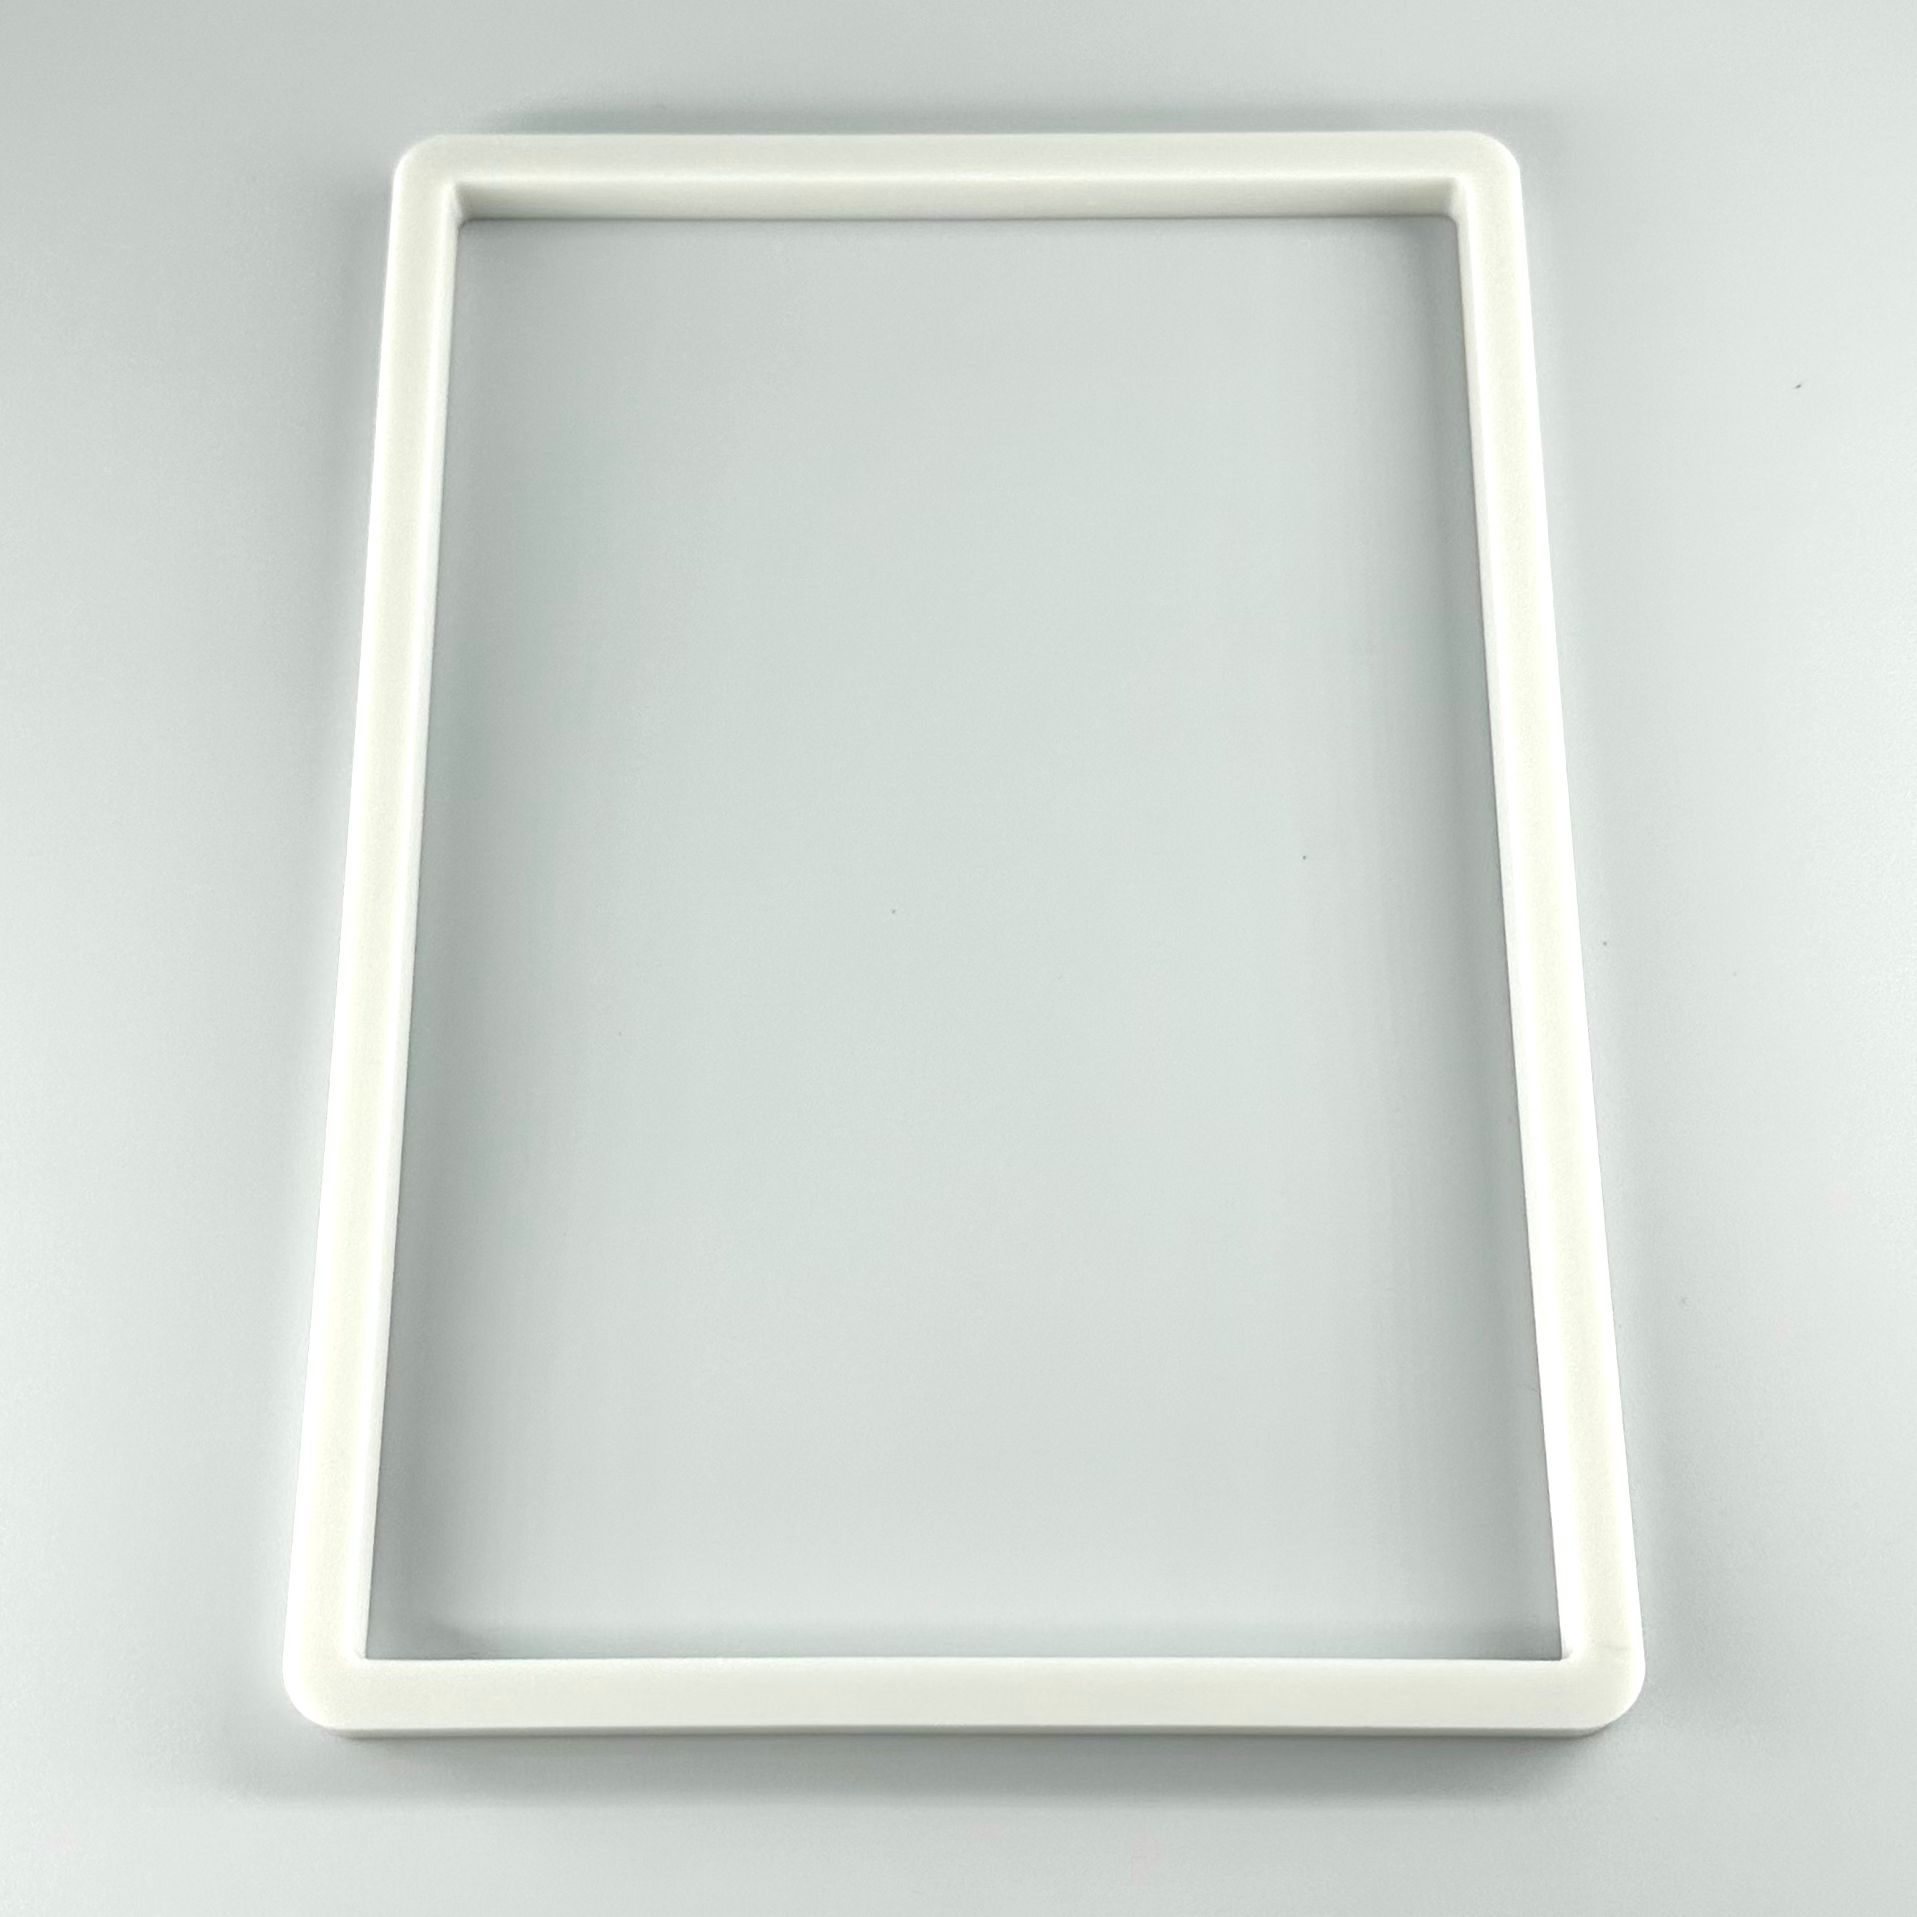
Leaving a socket too deep in wall after tiling is often dismissed as a minor cosmetic flaw that can be ignored once the faceplate is screwed on. However, the technical reality is far more serious than just an aesthetic annoyance. When a faceplate is not supported by the rim of the backbox, it loses its structural integrity. This lack of support means that every time you insert a plug, you are essentially pushing the faceplate into a hollow cavity. Over time, this leads to mechanical failure that can compromise the entire circuit and your wall finish.
Stability and Faceplate Damage
Mechanical instability is the most immediate issue you will encounter. If you use a high-force appliance, such as a vacuum cleaner or a kettle, the faceplate will flex under the pressure of the plug. This repeated movement often causes the plastic to fatigue and eventually crack. If you have invested in premium metal or decorative finishes, this flexing can also cause the edges of the plate to grind against your new tiles, leading to permanent surface damage. A wobbly socket is more than a nuisance; it is a sign that the installation is physically incomplete and prone to failure.
Electrical Safety and Fire Prevention
The safety implications of a recessed backbox are even more critical. Electrical backboxes are designed to act as a non-combustible enclosure for the wiring terminals. If there is a significant gap between the box and the faceplate, this protective enclosure is broken. According to UK government safety requirements, sockets must be securely fixed to ensure there are no gaps that could allow access to live parts or compromise fire safety.
A sunken backbox also forces the internal wiring to bridge a larger distance than originally intended. If the cables are short, pulling the socket forward to meet the tiles can put extreme tension on the terminals. This strain can lead to loose connections, which in turn cause 'arcing'. Arcing generates significant heat and is a primary cause of domestic electrical fires. Additionally, the void behind a recessed faceplate becomes a collection point for dust, debris, and even moisture in kitchen environments. This accumulation creates a potential path for electricity, increasing the risk of short circuits. To ensure your home remains safe and compliant with BS 7671 regulations, it is essential to use a proper UK socket spacer to bridge the gap and restore the enclosure's integrity.
Comparing Methods to Extend a Socket Backbox After Tiling
When you discover your socket too deep in wall after tiling, the immediate temptation is to find a quick fix. Many hardware stores sell "caterpillar" shims. These are small plastic segments that you stack onto the screws to bridge the gap. Whilst they are inexpensive, they are notoriously flimsy. Because they only support the area immediately surrounding the screw, they do not provide a continuous seal between the backbox and the faceplate. This often leads to alignment issues where the socket appears tilted or uneven, failing to provide the professional finish you expect.
Generic extension boxes are another common choice, but they suffer from fixed depths. If your wall profile has increased by 14mm, a standard 10mm or 20mm extender will leave you with a fit that is either too shallow or too proud. These generic parts rarely match the specific dimensions of modern UK faceplates perfectly. Using them often results in unsightly gaps or a bulky appearance that ruins the aesthetic of a high-end kitchen or bathroom renovation. Precision is the difference between a temporary patch and a permanent solution.
Some DIY enthusiasts resort to using metal washers or cut-down plastic tubing as makeshift spacers. You should avoid these methods entirely. These hacks fail to provide the rigid, non-combustible enclosure required by BS 7671 wiring regulations. Washers can easily slip during installation, and tubing lacks the necessary surface area to prevent the faceplate from flexing. A professional result requires a dedicated component designed specifically for electrical safety and structural stability.
Generic Shims vs Full Frame Spacers
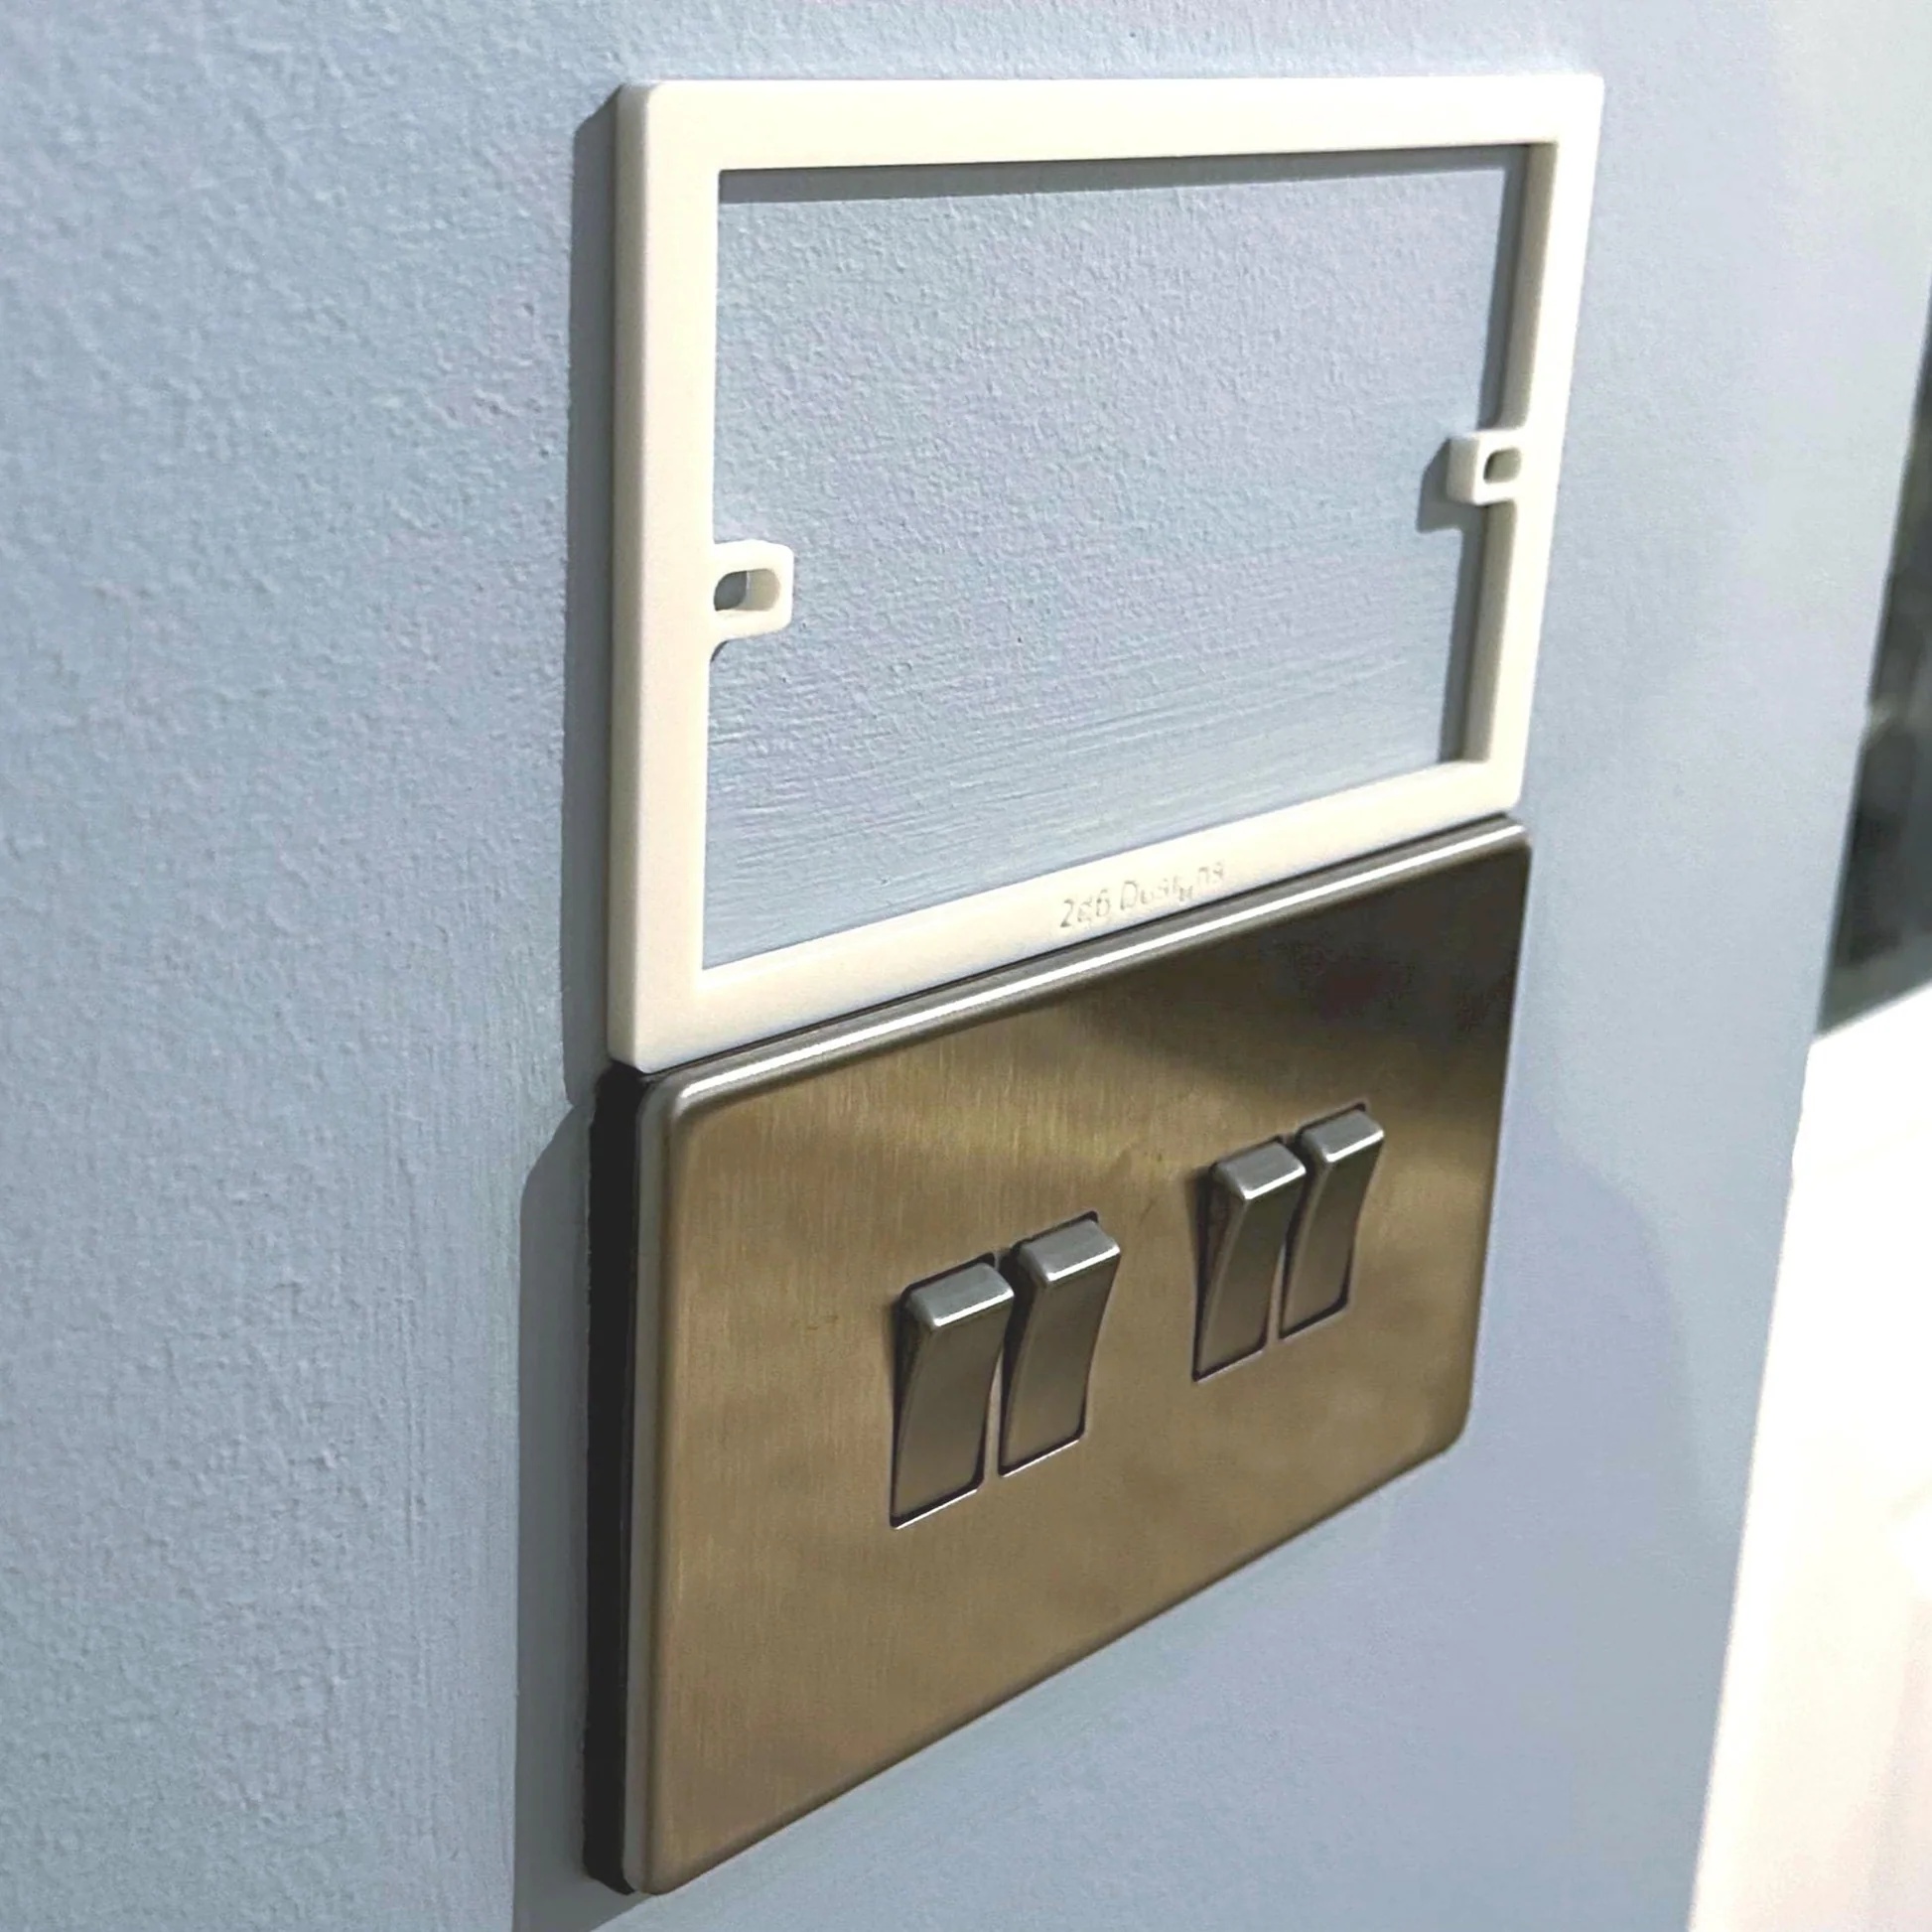
Shims are independent components, meaning they can compress or shift at different rates. This makes it incredibly difficult to get a double socket perfectly level. In contrast, a custom double gang socket spacer acts as a single, solid frame. This full-perimeter support ensures the faceplate sits perfectly parallel to the wall surface. You will also find that installing a single bespoke frame is significantly faster than faffing with multiple loose shims behind a live socket, reducing the time spent on the final fix.
Bespoke Manufacturing Benefits
The primary advantage of a bespoke approach is millimetre precision. By using the Build My Spacer configurator, you can order a part that matches your measured depth exactly. This eliminates the floating effect and provides a seamless transition between the tile and the electrical accessory. You can also ensure the spacer matches the colour and profile of your faceplate for a truly integrated finish. You can read more about the benefits of custom fit extension frames to understand how they transform a standard installation into a high-end, compliant finish.

A Step-by-Step Guide to Measuring Your Required Spacer Depth
Before you begin, safety is paramount. Isolate the circuit at the consumer unit and verify that the power is off using a voltage tester; don't rely on the socket switch alone. Once the circuit is dead, you can safely remove the faceplate screws to assess the extent of the gap. Finding your socket too deep in wall after tiling usually means the screws can barely catch the threads of the backbox lugs, so proceed carefully to avoid stripping them during removal.
The goal is to measure the distance from the front face of the finished tile to the metal rim of the backbox. If you have a digital calliper, use the depth probe for the most accurate reading. Alternatively, a standard metric ruler will suffice. Place the ruler flat against the tile surface and measure down to the backbox rim. This measurement represents the exact thickness your spacer needs to be to achieve a flush, professional finish.
It is rare for a wall to be perfectly flat, especially in older UK homes. You should measure the depth at all four corners of the socket aperture. Adhesive thickness often varies, which might mean the top left corner is 12mm deep whilst the bottom right is 14mm. Recording these variations ensures that your bespoke spacer will provide a uniform seat for the faceplate, preventing it from sitting at an angle or leaving unsightly gaps on one side.
Tools You Will Need for Measurement
Precision is the key to a professional result. A digital calliper is the preferred tool for tradespeople because it provides a clear reading to the nearest 0.1mm. If you don't have one, a simple metric ruler is a reliable alternative. You should also keep a spirit level handy to verify that the backbox hasn't shifted or tilted during the tiling process. Finally, use a pencil to mark any specific depth variations directly on the tile edge to help you keep track of your findings before ordering.
Dealing with Multi-Gang and Custom Sizes
Measuring for triple or quadruple gang installations follows the same principle but requires more frequent checks along the length of the frame. Larger faceplates are more prone to flexing, so a full-frame spacer is essential for long-term stability. If you are using slimline or flat-plate accessories, your measurements must be even more precise, as these styles offer almost no tolerance for error. Whilst measuring, consider managing plug socket wiring space to ensure you aren't cramming cables into a tight spot, which could lead to terminal damage or overheating.
Once you have your dimensions, you can input them into the Build My Spacer tool. This configurator is designed to handle bespoke depth requirements, ensuring you receive a part that fits your specific wall profile exactly. This removes the guesswork and provides a clean, factory-standard finish for any socket too deep in wall after tiling.
Why Bespoke Spacers Are the Ultimate Solution for UK Homes
Standard off-the-shelf solutions often fail to address the specific millimetre requirements of a socket too deep in wall after tiling. Bespoke spacers provide a precision-engineered bridge that eliminates gaps and wobbly faceplates entirely. By creating a continuous support frame, these spacers ensure that the pressure from plugging and unplugging devices is distributed evenly across the backbox rim rather than the fragile edges of your new tiles. This structural stability prevents the faceplate from flexing, which is the most common cause of cracked tiles around electrical points.
Aesthetics are equally important in a modern UK home. Generic extenders often leave an unsightly sandwich effect where the extension piece is visible and mismatched. A bespoke solution is designed to sit behind the faceplate, maintaining the clean lines of your interior design whilst providing a factory-standard finish. Because these spacers are a fit and forget solution, you can achieve a professional result without the need for complex electrical rewiring or moving the backbox itself. Manufactured from high-quality plastic, these parts are designed to last the life of the installation.
The Value of a Professional Finish
Experienced tradespeople recognise that bespoke parts are essential for high-end kitchen and bathroom renovations. Whilst generic shims might save a few pence initially, the time spent faffing with them often makes them more expensive in labour costs. Doing the job correctly the first time with a precision part protects your reputation as a professional or your investment as a homeowner. You can find further technical guidance and project examples on the SocketSpacers.com blog to see how precision manufacturing simplifies these common technical frustrations.
Ordering Your Custom Solution
Using the Build My Spacer configurator tool is a straightforward process. Once you have measured your required depth as detailed in the previous section, you can specify the exact millimetres and gang size needed for your project. When your custom bespoke plastic socket spacers arrive, they are ready for immediate installation. Simply place the spacer between the backbox and the faceplate and secure it with the appropriate length screws to enjoy a flush, professional finish for any socket too deep in wall after tiling.
Achieving a Level and Secure Finish
Finding your socket too deep in wall after tiling is a common technical challenge that requires a precise mechanical solution. As we have explored, relying on long screws or flimsy shims compromises both the safety and the longevity of your electrical installation. By taking accurate measurements and opting for a bespoke frame, you ensure a solid seat for your faceplate that meets UK safety standards and protects your decorative finish from mechanical stress.
Our bespoke UK manufacturing process provides a precision fit to the millimetre, catering specifically to single, double, and multi-gang sockets. This tailored approach eliminates the frustration of wobbly fittings and ensures your home renovation looks as professional as it feels. You don't need to settle for unsightly gaps or movement when a high-quality, engineered solution is readily available to bridge the void perfectly.
Fix your recessed sockets today with the Build My Spacer tool
Take the final step in your renovation project with confidence. Securing a flush, stable socket is the hallmark of a high-quality installation that will remain safe and visually integrated for years to come. It is the most efficient way to complete your tiling project with the precision it deserves.
Frequently Asked Questions
How do I fix a socket that is too deep in the wall?
You fix a recessed socket by installing a bespoke extension frame between the backbox and the faceplate. This component bridges the gap created by new tiles and adhesive, providing a solid seat for the accessory. To ensure a precision fit, use the Build My Spacer tool to specify the exact depth required for your project. This method avoids the need for messy electrical work or moving the original backbox.
Is it safe to use a socket that is wobbly after tiling?
It is not safe to use a wobbly socket because the movement stresses internal wiring terminals. Every time a plug is inserted, the faceplate flexes into the wall cavity, which can lead to loose connections or electrical arcing. Arcing is a major cause of domestic fires in the UK. A secure, flush finish is essential for maintaining the integrity of the non-combustible enclosure required by modern wiring regulations.
What is a socket extension collar and do I need one?
A socket extension collar is a frame designed to extend the reach of a recessed backbox. You need one if your socket too deep in wall after tiling because it ensures the faceplate is physically supported. Without a collar, the faceplate relies entirely on screw tension, which often leads to cracked tiles and unstable fittings. These collars provide the structural bridge necessary for a professional, durable installation.
Can I just use longer screws if my socket is recessed?
Longer screws are not a sufficient solution on their own. Whilst they allow you to reach the backbox, they don't provide the rear support needed to stop the faceplate from flexing. If you tighten the screws too much, you risk cracking your expensive new tiles. A physical spacer is required to act as a solid foundation, ensuring the socket remains rigid and safe during daily use.
How do I measure the depth needed for a custom socket spacer?
You should measure the distance from the metal rim of the backbox to the front surface of the finished tile. Use a digital calliper or a metric ruler for accuracy. It is best to measure all four corners of the aperture, as adhesive thickness can vary across the wall. Once you have the maximum depth, you can order a precision-fit part using the Build My Spacer configurator.
Do I need an electrician to install a socket spacer?
In the UK, all electrical work must comply with BS 7671:2018+A4:2026 regulations. Whilst installing a spacer is a mechanical task, it involves exposing live terminals. You should consult a qualified electrician to ensure the installation is safe and compliant. Statistics show that faulty sockets cause thousands of accidental fires annually, so professional verification is always the safest path for any homeowner.
Will a spacer work for a double gang socket?
Yes, bespoke spacers are specifically manufactured for single, double, and multi-gang installations. A full-frame spacer is particularly effective for double sockets because it provides a continuous support surface that prevents the wider faceplate from tilting. This ensures both sides of the socket sit perfectly flush against the tiled surface, maintaining a clean and professional aesthetic across the entire fitting.
What happens if my tiled wall is uneven behind the socket?
If your wall is uneven, you should measure for the deepest point to ensure the spacer provides adequate support. A bespoke spacer can be manufactured to a specific millimetre depth to compensate for thick adhesive beds or large-format tiles. This precision eliminates the floating effect common with generic shims and ensures the faceplate sits parallel to the wall, even if the underlying surface is slightly irregular.
Electrical Safety
Always isolate the circuit and confirm it is dead before removing a socket or switch faceplate. Only carry out the work if you are competent to do so. If you find damaged wiring, signs of overheating or anything unsafe, stop and contact a qualified electrician.