
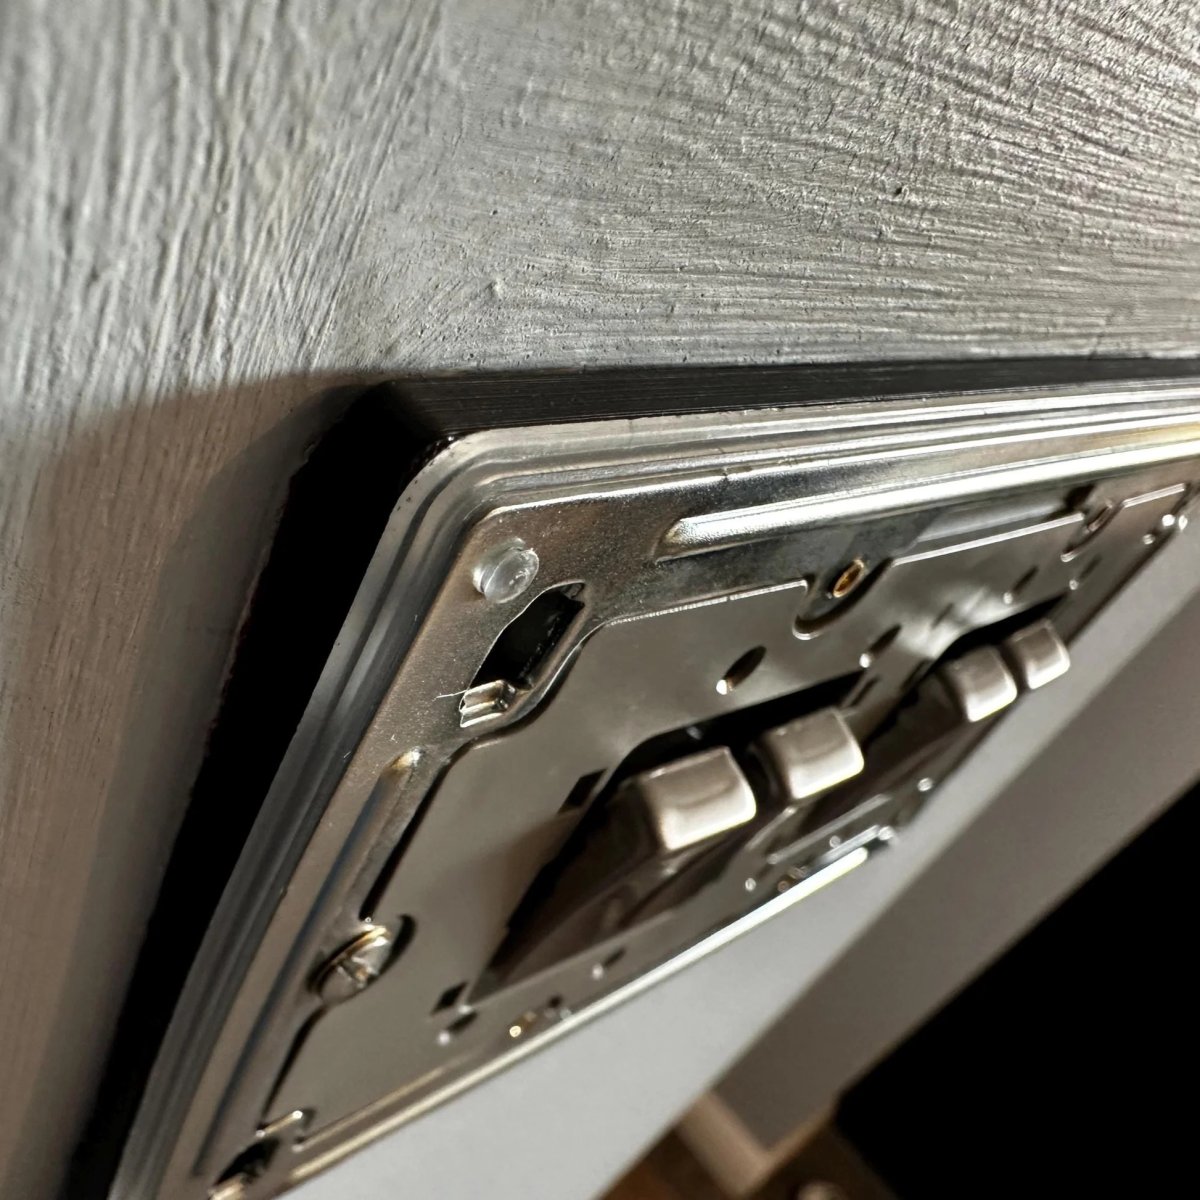
You have just connected your new smart dimmer, but as you try to secure the faceplate, you realise there is simply no room left for the cables. It is a common frustration that can lead to crushed insulation or unsightly gaps between the switch and the wall. Effectively organising your light switch wiring space is essential for both safety and aesthetics, yet the solution is often simpler than digging out the wall. By using the Build My Spacer tool, you can create a bespoke extension that provides the precise volume required for a flush, professional finish.
In this guide, you will discover how to safely manage overcrowded backboxes and create the essential wiring space needed for modern light switches. We will explore the evolution of UK electrical enclosures and the specific challenges posed by bulky smart home modules. You will also learn the step-by-step process for installing a custom spacer, ensuring your home meets safety standards whilst maintaining a high-end look without the need for replastering.
Key Takeaways
- Learn why modern smart modules often require more depth than traditional UK backboxes can provide.
- Understand the safety risks associated with compressed cables and how to calculate the light switch wiring space needed for a compliant installation.
- Compare the practical benefits of using bespoke extension frames against the labour-intensive process of digging out masonry.
- Discover how to use the Build My Spacer tool to specify a custom-fit solution for any depth or switch configuration.
- Achieve a flush, professional finish that eliminates unsightly gaps whilst ensuring your electrical fittings sit perfectly against the wall.
Table of Contents
- Understanding Why You Lack Light Switch Wiring Space
- The Hidden Dangers of Overcrowded Electrical Backboxes
- Comparing Methods to Increase Wiring Depth
- How to Install a Light Switch Spacer for Extra Room
- Achieving a Professional Finish with Bespoke Extension Frames
Understanding Why You Lack Light Switch Wiring Space
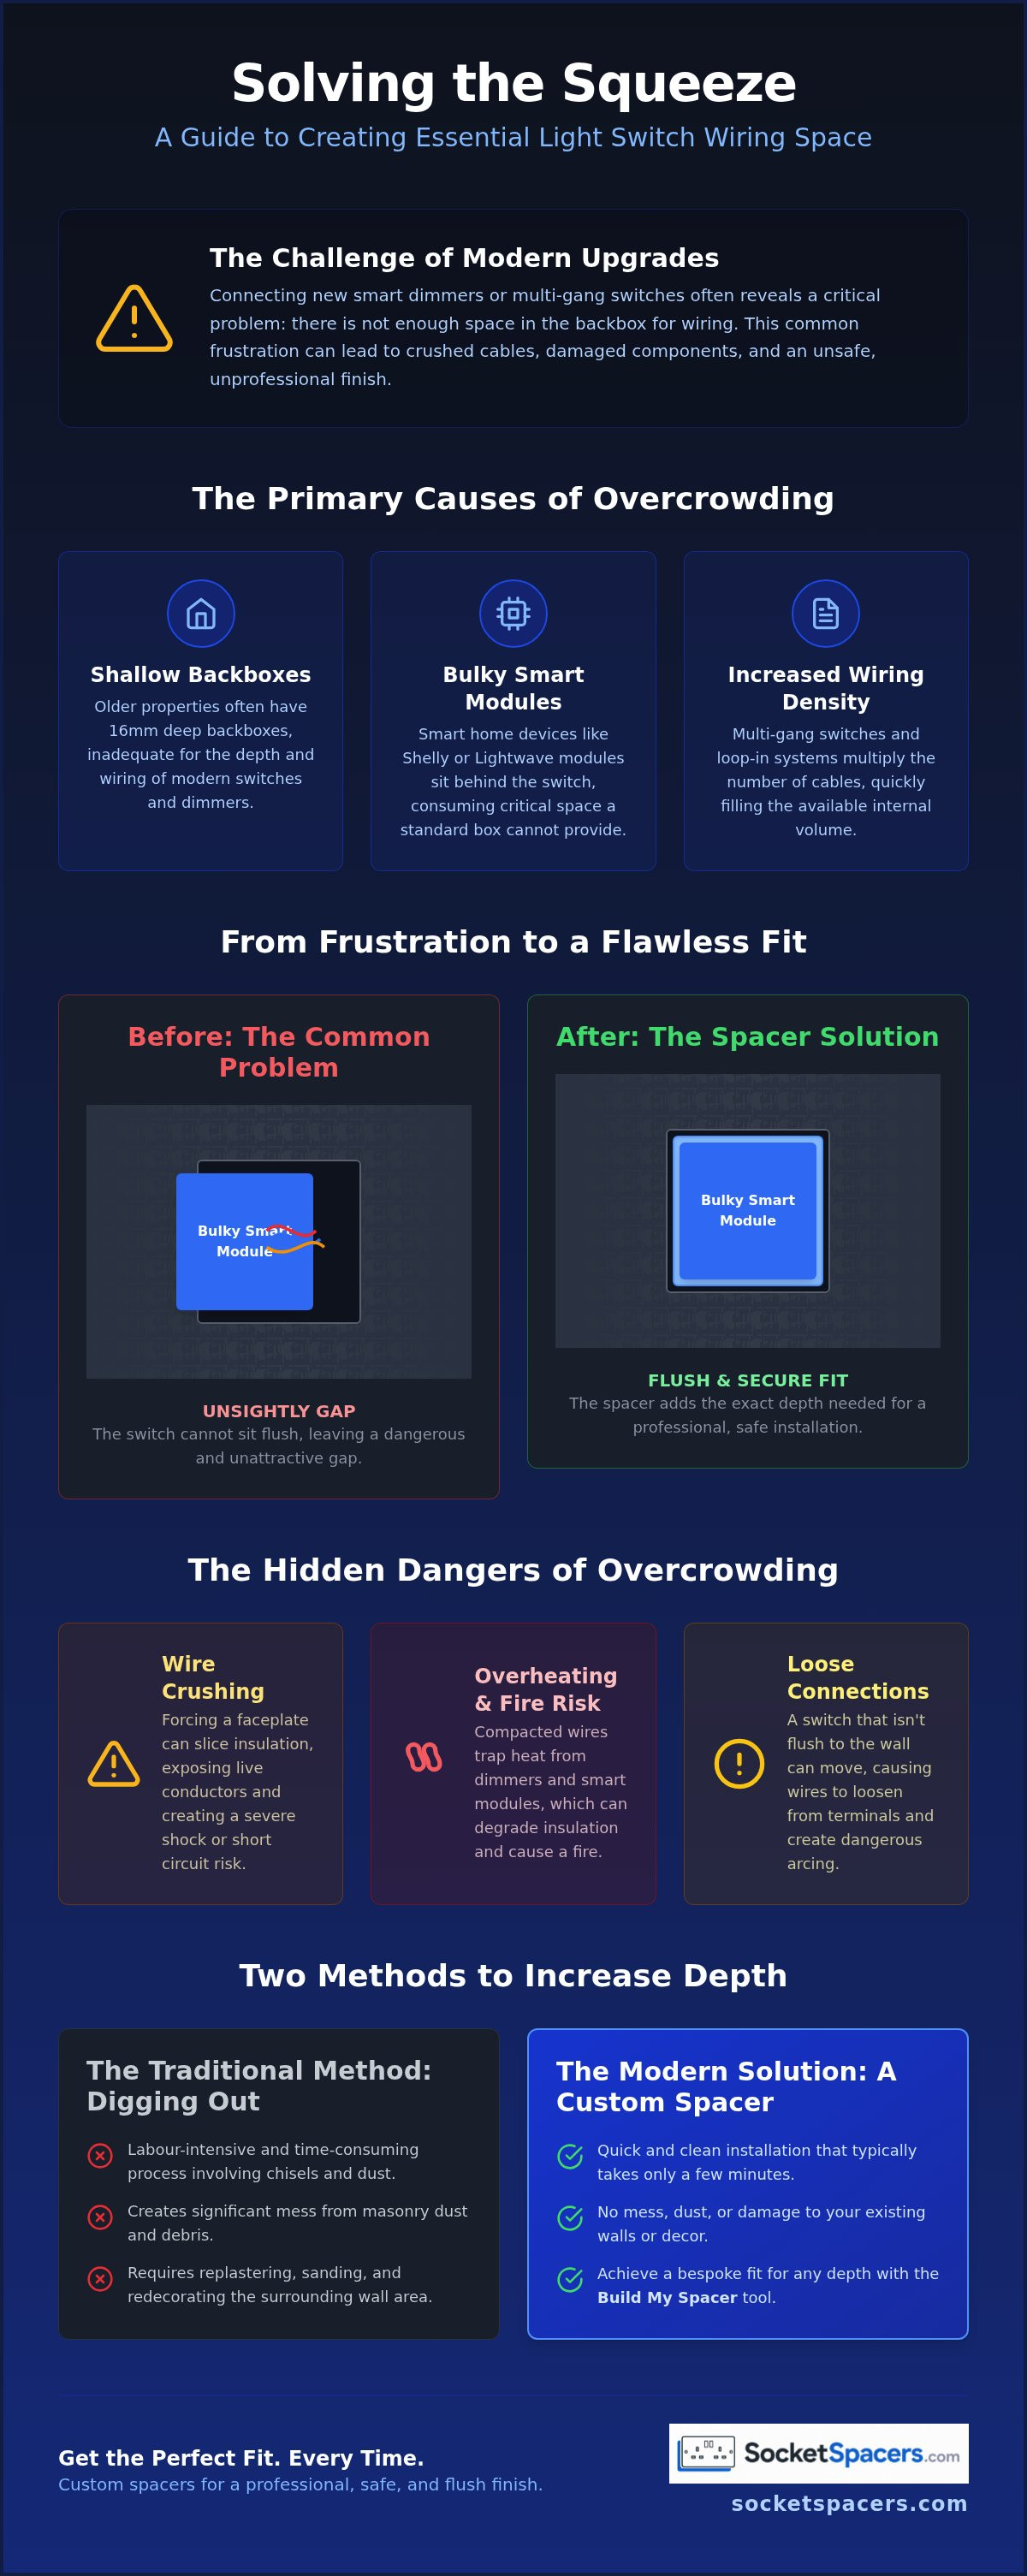
The physical constraints of UK electrical installations have changed significantly over the last few decades. In many older properties, you will find shallow 16mm metal backboxes that were once perfectly adequate for a simple mechanical toggle switch and a single circuit. However, as electrical demands have increased, so has the volume of hardware we expect to fit inside these wall cavities. Modern installations now typically require a minimum depth of 25mm or 35mm to accommodate the sheer number of conductors and deeper switch designs. If your home hasn't been rewired recently, your existing enclosures are likely undersized for modern upgrades.
A backbox essentially functions as an electrical junction box designed to contain connections safely within the wall. When you upgrade to a 3-gang or 4-gang switch, the number of twin and earth cables entering the enclosure multiplies. Each cable requires physical room for its conductors and the associated terminations. If you are also dealing with a loop-in system where multiple cables meet at the switch, the internal volume disappears quickly. This often leaves you struggling to find enough light switch wiring space to secure the faceplate without damaging the insulation or straining the terminals.
The Impact of Smart Home Technology
The rise of home automation has made the depth issue even more acute. Popular smart modules from brands like Shelly or Lightwave are designed to sit behind your existing switch to provide remote control and scheduling. Whilst these devices are impressively compact, they still occupy a physical footprint that a standard 25mm box simply cannot handle. Electronic dimmers also feature bulkier internal components compared to traditional mechanical switches. If you attempt to force these devices into a shallow enclosure, you risk creating a short circuit or causing the module to overheat. This is a common point of frustration, as standard advice often fails to account for the spatial requirements of modern smart hardware.
When to Use the Build My Spacer Tool
If you find yourself with a switch that won't sit flat or wires that are being crushed, you need a precise solution rather than a risky workaround. The Build My Spacer tool allows you to identify exactly how much extra depth your specific installation requires. It is particularly useful if you have recently added wall panelling, tiling, or extra plasterboard. These decorative finishes effectively move the wall surface forward whilst leaving the backbox sunken deep within the wall. Rather than digging out the masonry to fit a deeper box, a custom extension frame provides the necessary light switch wiring space whilst ensuring a professional finish. Accurate measurement is essential here; knowing the exact gap between your backbox and the faceplate ensures the bespoke spacer fits perfectly the first time.
The Hidden Dangers of Overcrowded Electrical Backboxes
Electrical overcrowding occurs when the internal volume of a backbox is insufficient to accommodate the total number of conductors, connectors, and devices without using excessive force. Whilst it might be tempting to use the faceplate screws to compress the internal components into place, this creates a high-pressure environment that is fundamentally unsafe. When light switch wiring space is restricted, the risk of "wire crushing" becomes a reality. This mechanical pressure can pin cables against sharp metal edges or the back of the switch, potentially slicing through the PVC insulation and exposing live conductors.
A loose or poorly seated switch plate also compromises the earthing and structural integrity of the installation. If the switch isn't firmly attached to the wall, the repetitive action of pressing the buttons causes the internal wiring to flex. Over time, this movement can cause wires to wiggle out of their terminals, leading to intermittent faults or dangerous arcing. Ensuring your fittings sit flush is not just about aesthetics; it's a requirement for a stable and safe electrical connection.
Thermal Management and Airflow
Heat dissipation is a critical factor that is often overlooked in domestic wiring. Electronic components, particularly dimmers and smart home modules, generate thermal energy during operation. In a properly sized enclosure, air circulates around these parts to dissipate that heat. However, amongst tightly packed cables, this airflow is non-existent. Excessive heat buildup causes the wire insulation to become brittle and eventually fail, creating a significant fire hazard within the wall cavity.
This thermal stress also leads to the premature failure of expensive smart modules. High temperatures can degrade internal capacitors and semiconductors, turning what should be a long-lasting upgrade into a recurring expense. Adhering to professional wiring techniques involves ensuring there is enough physical volume for both the hardware and the necessary air gap to prevent these thermal issues from developing.
Mechanical Stress on Terminals
When wires are forced into a cramped box, they are often bent at extreme angles, putting immense tension on the terminal connections. This mechanical stress can cause the copper conductor to snap or pull away from the screw terminal entirely. If a connection becomes loose, it creates high resistance, which generates even more heat and increases the likelihood of a short circuit. Under BS 7671 regulations, electrical overcrowding is defined as any installation where the enclosure volume is insufficient to allow for the safe termination and cooling of all conductors and equipment.
If you find that your cables are under tension or the faceplate won't sit flat, you may need a bespoke light switch spacer to provide the necessary relief without the need for major structural changes.
Comparing Methods to Increase Wiring Depth
When faced with a lack of light switch wiring space, the most invasive solution is to physically remove the existing backbox and chase out a deeper cavity in the masonry. Whilst this technically solves the volume issue, it is a destructive process that requires replastering and redecorating. For a single switch upgrade, this often turns a thirty-minute task into a weekend-long renovation project. Many homeowners and tradespeople find this approach impractical, especially when dealing with finished wallpaper or bespoke paint colours.
At the other end of the spectrum is the "DIY hack", which often involves using extra-long screws and a stack of washers to bridge the gap between a sunken box and the faceplate. This is fundamentally unsafe. Using shims or washers leaves the internal wiring exposed at the sides, failing to provide a continuous, non-combustible enclosure. This violates the spirit of various international safety guidelines, including OSHA standards for wiring design and protection, which emphasise the necessity of proper enclosure and physical protection for conductors. Even if your installation is domestic, the mechanical stability of your switch is compromised when it isn't supported by a solid frame.
The Limitations of Standard Extension Frames
Mass-produced plastic extension frames are available, but they are typically restricted to standard depths like 10mm or 15mm. If your wall panelling or tiling has created a non-standard 12mm gap, a generic frame will either leave a loose fitting or an unsightly ledge. These off-the-shelf options rarely match the aesthetic of high-end decorative switches or modern slimline plates. For those seeking a seamless look, Bespoke Plastic Socket Spacers offer a tailored alternative that matches the exact dimensions and colour profile of your hardware.

Why Bespoke Spacers Beat DIY Shims
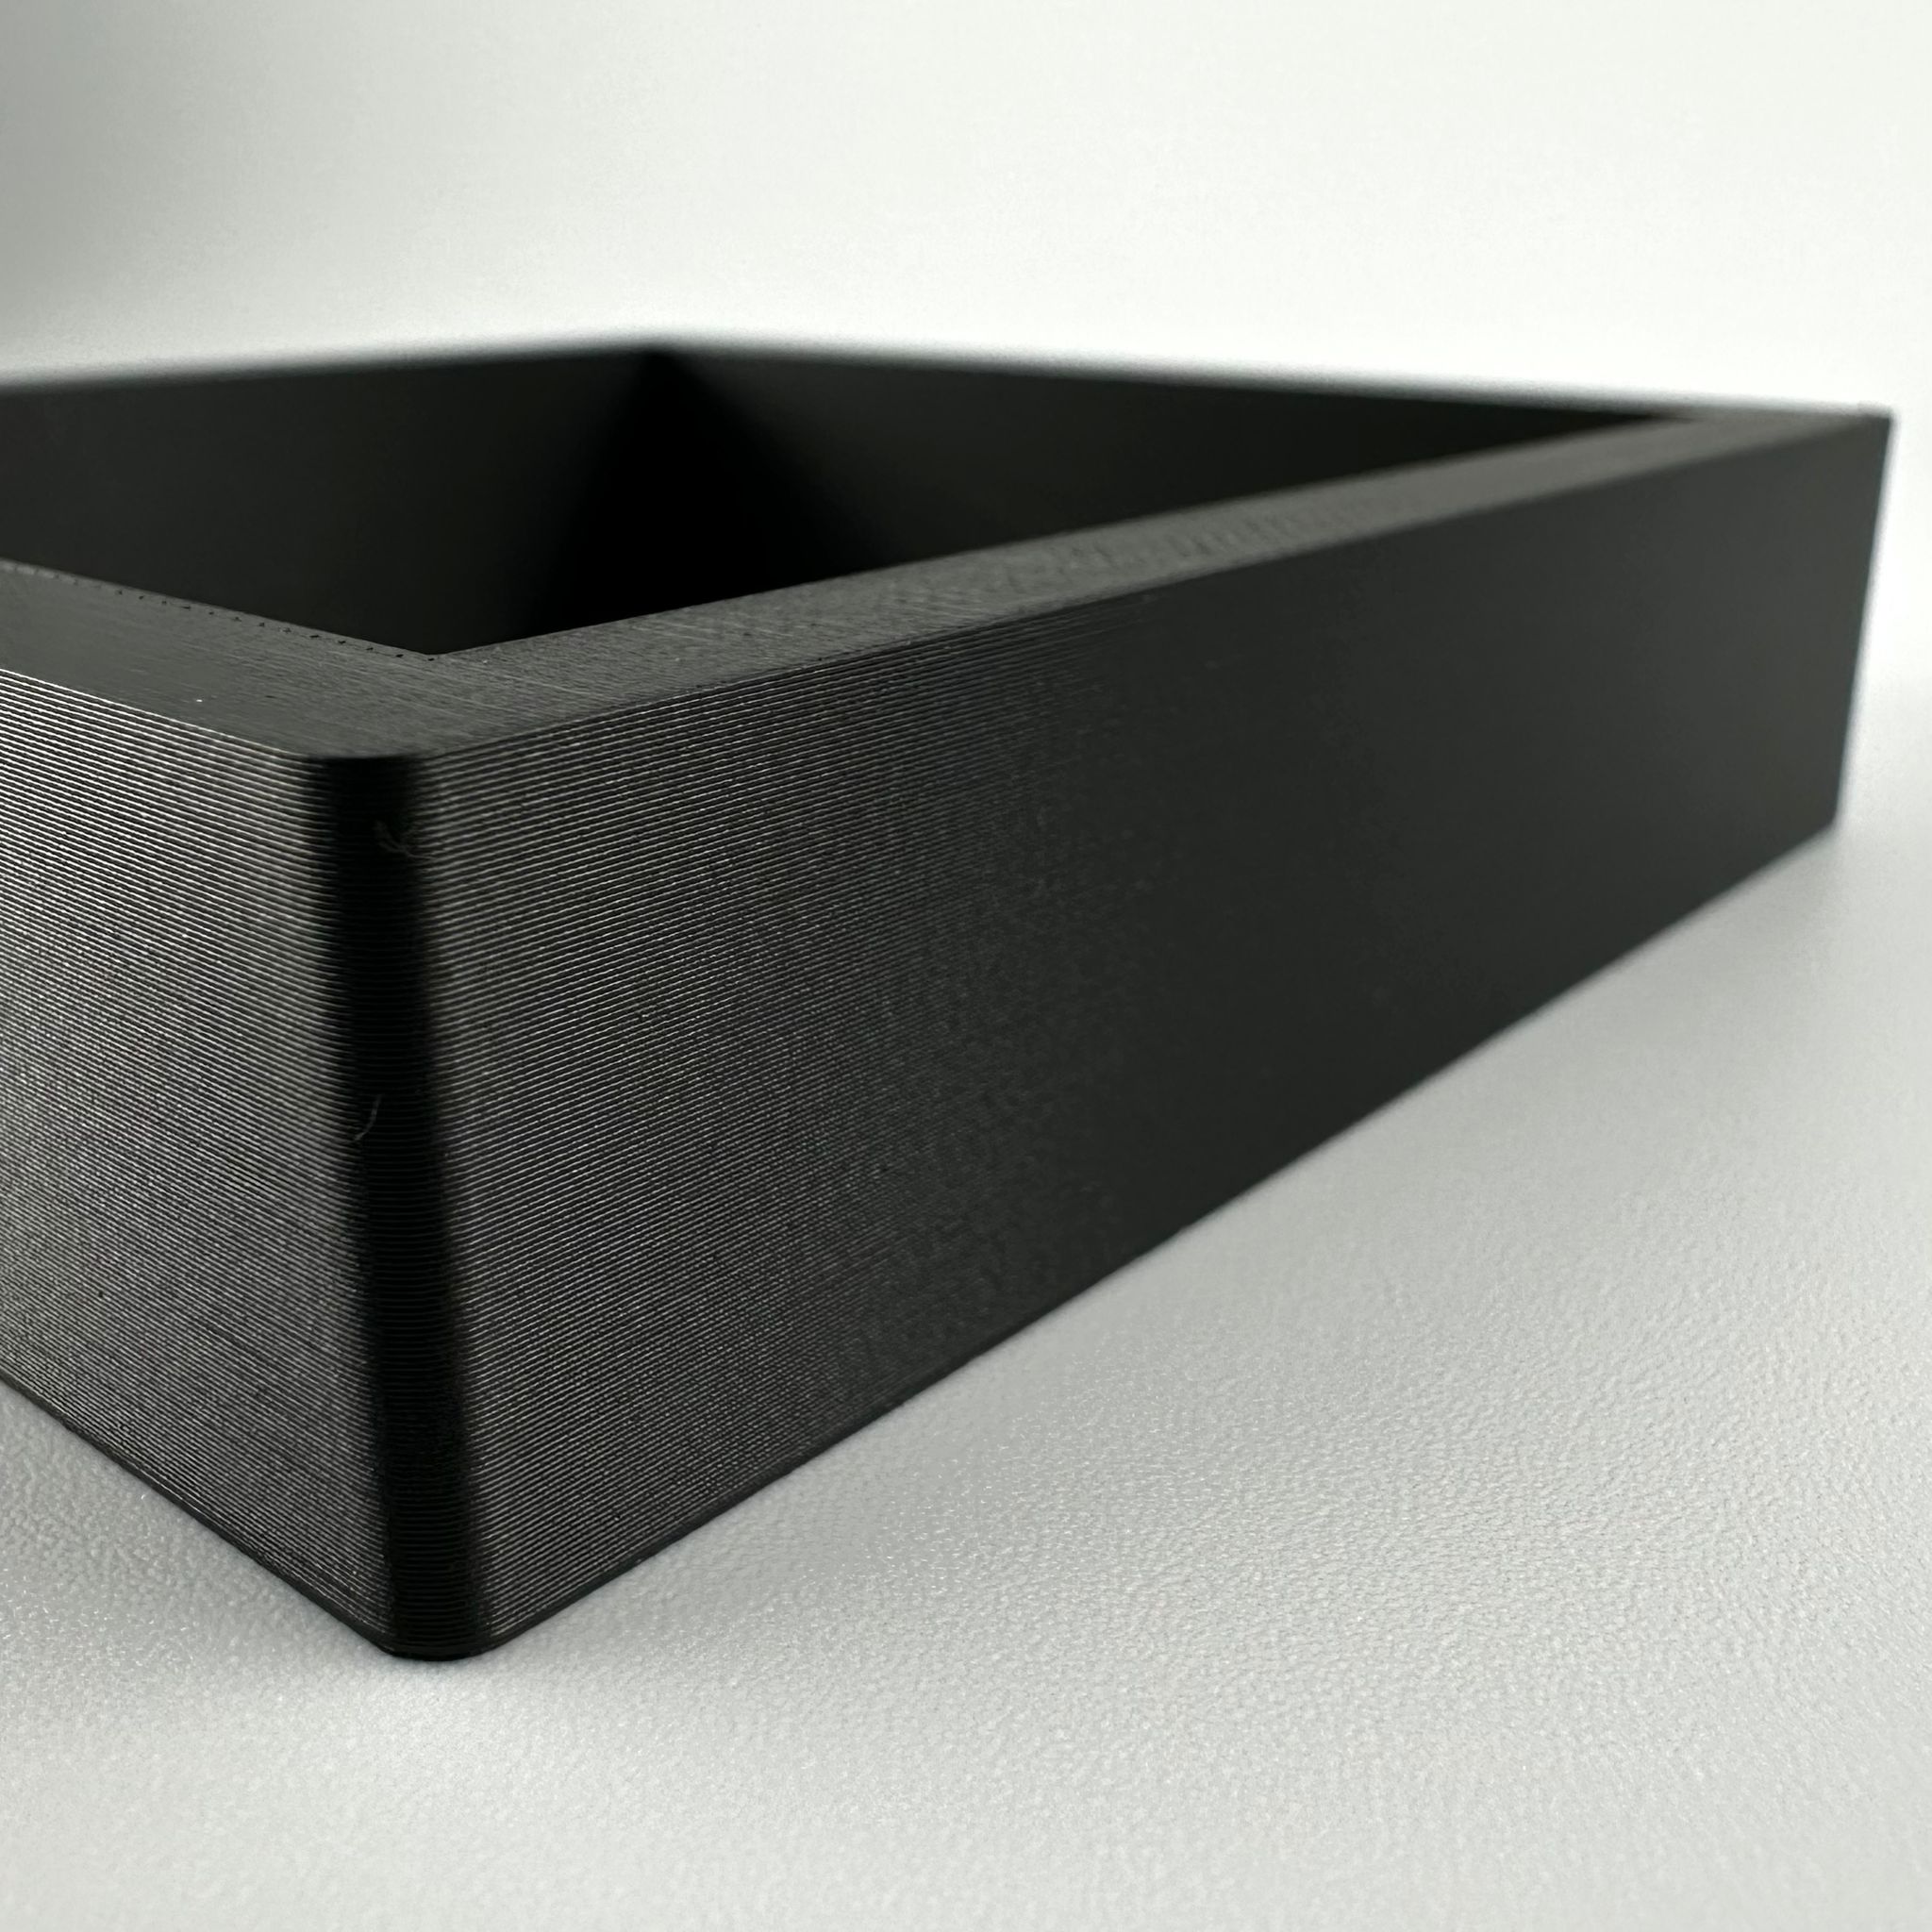
A custom-fit light switch spacer plate provides a continuous collar that bridges the gap between the wall and the faceplate. This maintains the integrity of the enclosure whilst instantly creating the required light switch wiring space. Because these spacers are manufactured to your specific depth requirements using the Build My Spacer tool, there is no need for "making do" with ill-fitting parts. This method saves significant time for tradespeople working on high-end residential projects where a "near enough" finish isn't acceptable. By choosing a bespoke frame, you ensure the switch sits perfectly flush against the wall surface, preserving the interior decor whilst meeting all safety requirements.
How to Install a Light Switch Spacer for Extra Room
Fixing a depth issue requires a methodical approach to ensure the final result is both aesthetically pleasing and electrically sound. Before you begin any work, you must isolate the circuit at the consumer unit and use a verified voltage tester to confirm the circuit is dead. Safety is the priority; never assume a power supply is off just because the light has ceased to function. Once the power is safely isolated, you can remove the existing faceplate to assess the internal volume and identify why the switch is not sitting flush.
Step-by-Step Installation Guide
If you have added a decorative finish like wall panelling or tiles, the backbox will now sit recessed within the wall. This makes it difficult for the switch screws to reach the lugs and leaves the wiring exposed. To resolve this, follow these steps:
- Measure the gap: Use a ruler or calliper to measure the distance from the new wall surface to the front edge of the backbox.
- Order the part: Use the Build My Spacer configurator to order a bespoke frame that matches this dimension exactly.
- Dress the cables: Organise the wires by folding them into a controlled "S" or "Z" pattern. This accordion-style fold pushes the bulk of the conductors to the back of the enclosure.
- Fit the spacer: Slide the bespoke frame over the switch body and align it with the screw holes. Tighten the faceplate screws gradually, ensuring the spacer remains centred against the wall.
By carefully managing the internal layout, you maximise the light switch wiring space and prevent the faceplate from putting mechanical pressure on the terminals. This technique is far more effective than simply pushing the wires back, which can lead to loose connections or damaged insulation.
Final Safety Checks
Before restoring power, perform a thorough visual inspection of the installation. Ensure that no insulation is trapped between the spacer and the faceplate, as this can lead to mechanical failure or a poor earth connection. The switch plate should be rigid; if it moves when operated, the spacer depth may be incorrect or the screws may require further tightening. A professional finish means the plate sits perfectly flat against the wall with no visible gaps or wobbles.
For those also working on power outlets, our guide on Managing Plug Socket Wiring Space provides additional techniques for handling heavier 2.5mm ring main cables. Following these steps ensures your installation is compliant with UK safety standards whilst achieving the high-end look your interior design deserves.
Achieving a Professional Finish with Bespoke Extension Frames
Achieving a professional finish is the final, essential step in any electrical upgrade. Whilst previous sections focused on the technical necessity of light switch wiring space, the visual result is what defines the quality of the work. A "make-do" fix, such as using oversized washers or generic plastic collars, often leaves an uneven gap that attracts dust and detracts from the room's decor. In contrast, a bespoke extension frame from SocketSpacers.com provides a seamless transition between the wall and the switch plate, ensuring the installation looks intentional rather than accidental.
High-end interior design often involves architectural finishes like wood panelling, deep plasterwork, or textured tiling. These materials add significant depth to the wall, which almost always leaves the original electrical backbox recessed too deep to meet the faceplate. By opting for a custom-fit solution, you maintain the structural integrity of the circuit whilst supporting the aesthetic value of your property. A compliant installation that sits perfectly flush is a mark of quality that future surveyors and buyers will recognise as a sign of a well-maintained home.
Custom Solutions for Multi-Gang Switches
Installing multi-gang switches presents unique spatial challenges that standard off-the-shelf products cannot address. A 3-gang switch plate is wider and heavier than a single gang unit, and the volume of twin and earth cables behind it is significantly higher. On panelled walls, aligning these larger plates without a solid, supportive frame is nearly impossible. Standard spacers are rarely available in the specific depths required for bespoke joinery, leading to plates that flex or tilt when pressed. For a broader look at how these solutions apply to other areas of the home, you can read about the Top 10 Benefits of Custom Fit Plug Socket Extension Frames.
Ordering Your Bespoke Spacer
The most efficient way to resolve these depth discrepancies is through the Build My Spacer configurator tool. This tool allows you to specify the exact depth, gang size, and colour required for your specific project. Whether you are using polished chrome, brushed brass, or standard white hardware, choosing a colour-matched spacer ensures the extension blends perfectly with the switch faceplate. This level of detail separates a standard DIY job from a professional architectural finish. By using precision-manufactured parts, you ensure that your light switch wiring space is safely enclosed whilst achieving a result that complements your interior hardware perfectly.
Secure Your Electrical Installation Today
Ensuring your electrical fittings are safe and aesthetically pleasing requires a precise approach to internal volume management. We have explored how the transition from shallow backboxes to modern smart home requirements necessitates a more robust solution than simply forcing wires into a cramped enclosure. Creating sufficient light switch wiring space is the only way to prevent mechanical stress on terminals and ensure that electronic components have the airflow they need to function safely.
By choosing a bespoke extension frame, you avoid the dust and disruption of digging out masonry whilst achieving a finish that meets the highest architectural standards. Our UK-based production ensures that every part is manufactured to your specific depth requirements, providing a trusted solution for tradespeople and homeowners working on high-end projects. You can now resolve sunken fitting issues with confidence and precision.
Design your custom light switch spacer now with the Build My Spacer tool
Take the final step toward a flush finish and a compliant home. With the right tools and measurements, your lighting upgrades will be both secure and perfectly integrated into your interior decor.
Frequently Asked Questions
Can I use a spacer to fit a smart switch in a shallow backbox?
Yes, a bespoke spacer is an ideal solution for accommodating smart switches when your wall cavity is too shallow. Most smart modules require a depth of at least 35mm, but many older UK properties are fitted with 16mm or 25mm boxes. By using the Build My Spacer tool, you can specify the exact extension needed to house the module safely without the need for messy masonry work.
How much extra space does a light switch spacer actually provide?
The amount of extra space provided is determined by the specific depth of the spacer you order, which can range from 3mm to 30mm or more. Because these are bespoke components, you aren't restricted to standard sizes. This allows you to create the precise volume required for your specific wiring bundle whilst ensuring the faceplate remains structurally stable.
Is it safe to have a gap behind a light switch faceplate?
No, leaving an open gap between the faceplate and the wall is unsafe as it exposes live connections and fails to provide a continuous, non-combustible enclosure. A bespoke extension frame must be used to bridge this distance. This ensures the light switch wiring space is fully protected from dust and moisture whilst maintaining the fire integrity of the wall cavity.
What is the minimum depth required for a modern dimmer switch?
Most modern electronic dimmers require a minimum backbox depth of 35mm to allow for the internal circuitry and essential cooling. If you are working with a standard 25mm box, you will need a 10mm spacer to provide the necessary clearance. Always check the manufacturer's data sheet, as some high-output dimmers generate more heat and may require even more internal volume.
Do I need a qualified electrician to install a light switch spacer?
You don't strictly require an electrician to fit a spacer if you are competent in basic DIY and follow strict safe isolation procedures. However, if you are uncomfortable testing for dead or managing complex multi-gang wiring, a professional should be consulted. A qualified electrician will ensure that the final installation remains fully compliant with BS 7671 safety standards.
What happens if I crush the wires behind my light switch?
Crushing wires can lead to insulation failure, dangerous arcing, and persistent overheating within the enclosure. When cables are forced into a restricted light switch wiring space, the mechanical pressure can cause the metal edges of the backbox to cut through the PVC insulation. This creates a major fire hazard and often results in intermittent circuit faults or RCD tripping.
Are plastic spacers fire-rated and safe for UK homes?
Yes, bespoke spacers are manufactured from flame-retardant materials specifically designed for use in electrical installations. It is essential to use purpose-made frames rather than generic plastic shims or washers. These professional spacers provide a solid, continuous barrier that maintains the safety requirements for electrical enclosures in UK residential properties.
How do I measure the depth of the spacer I need?
To determine the correct depth, measure the distance from the front edge of the sunken backbox to the finished surface of the wall. You should also consider the depth of the switch body itself to ensure it doesn't bottom out. Once you have these measurements, you can use the Build My Spacer configurator to order a frame that bridges the gap perfectly.
Electrical Safety
Always isolate the circuit and confirm it is dead before removing a socket or switch faceplate. Only carry out the work if you are competent to do so. If you find damaged wiring, signs of overheating or anything unsafe, stop and contact a qualified electrician.