
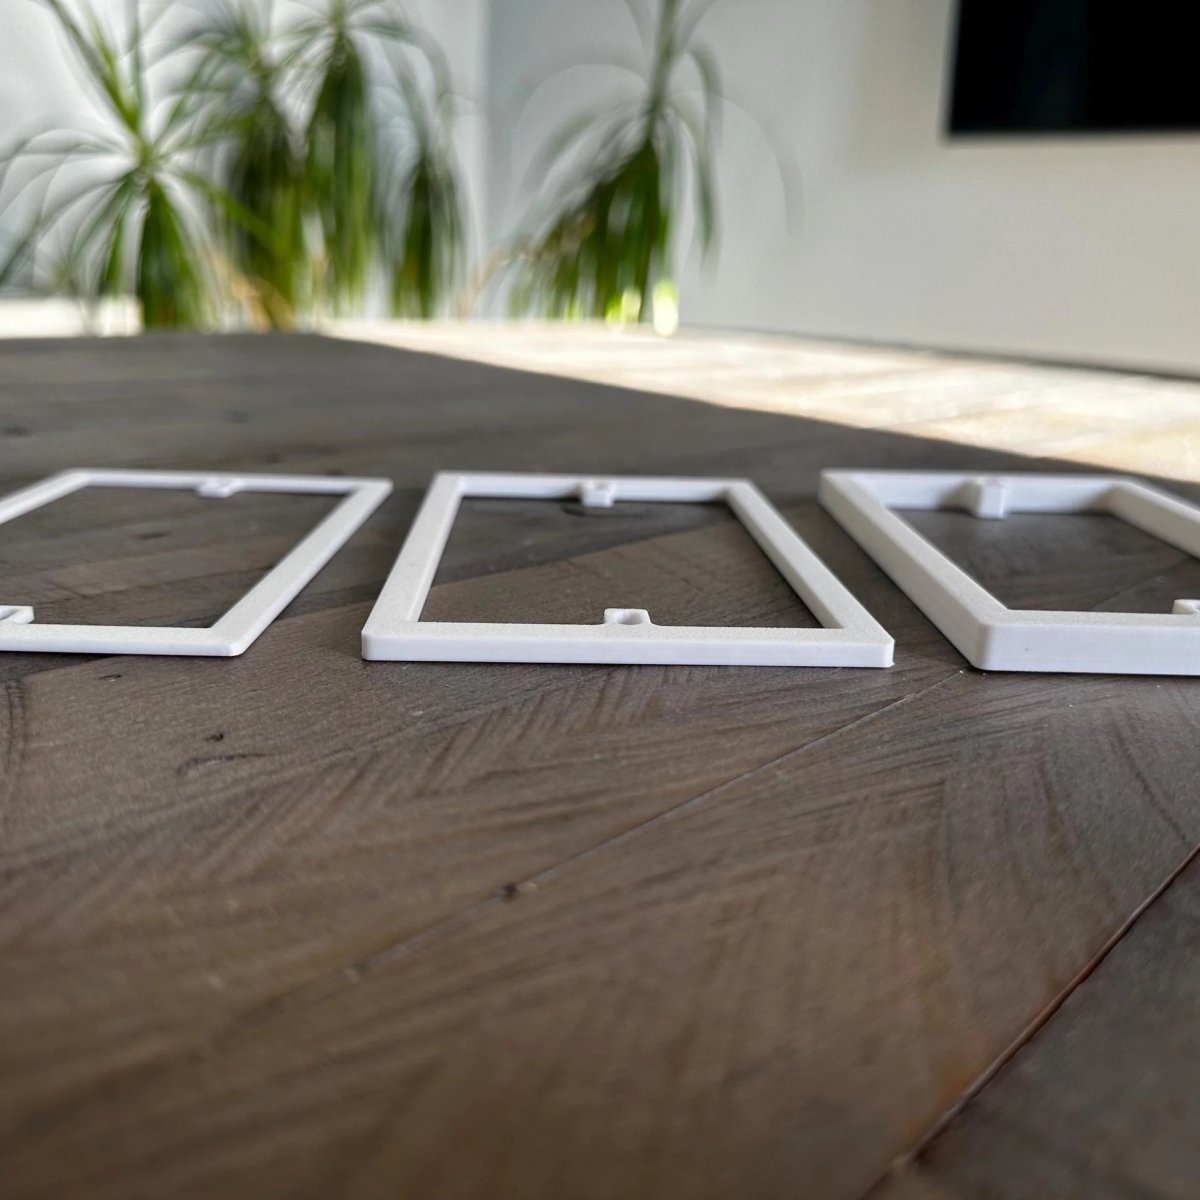
You have just finished tiling a kitchen splashback or installing elegant wall panelling, only to discover your electrical sockets are now deeply recessed and look completely unfinished. It's a common frustration for homeowners and tradespeople alike when the faceplate no longer meets the wall, leaving unsightly gaps or screws that simply won't reach the backbox. While some attempt to stack generic shims, using bespoke plug socket extension frames is the only reliable method to achieve a professional, flush finish. By using our Build My Spacer configurator tool, you can design a part that matches your specific wall depth exactly, ensuring a safe and stable installation.
We understand that a sunken socket is more than just an aesthetic issue; it's a matter of electrical integrity. Under BS 7671 regulations, your electrical enclosure must sit flush with the finished surface to safely contain heat and potential sparks. This guide will show you how to solve the problem of sunken sockets on any surface, from thick tiles to decorative panels. You will learn how to measure for bespoke parts and why a single-piece frame is superior to DIY workarounds. We will explore how to restore the safety and appearance of your home with precision-engineered solutions that fit perfectly every time.
Key Takeaways
- Identify the physical distinction between electrical cables and plug socket extension frames to ensure you select the correct hardware for sunken backboxes.
- Recognise how kitchen splashbacks and modern wall panelling create unsafe gaps that require specialised support to meet UK wiring regulations.
- Learn why a bespoke, single-piece frame offers significantly better structural integrity than the common but unstable practice of stacking multiple generic shims.
- Master the step-by-step process for measuring the exact depth of your wall gap to guarantee a perfect, professional finish.
- Simplify your project by using the Build My Spacer configurator to design a tailored part that fits your specific installation requirements.
Table of Contents
- What are Plug Socket Extension Frames and When Do You Need Them?
- Common Installation Challenges: From Kitchen Tiling to Wall Panelling
- Comparing Generic Spacers with Bespoke Extension Frames
- How to Measure for a Custom Socket Extension Frame
- Achieving a Professional Finish with SocketSpacers.com
What are Plug Socket Extension Frames and When Do You Need Them?
A plug socket extension frame is a physical component designed to bridge the gap between a sunken backbox and the decorative faceplate. When you add a new surface to a wall, such as kitchen tiles or timber panelling, the original electrical box often ends up too deep. This creates a sunken effect that looks unfinished and can be unsafe. Unlike an extension lead, which is a cable used to reach a distant power point, plug socket extension frames are structural parts that extend the reach of the electrical enclosure itself. If you're currently facing this issue, you can use the Build My Spacer configurator to determine the exact dimensions you need for a bespoke solution.
Confusion often arises because the term extension is so frequently associated with power strips. In a technical context, we're discussing the physical modification of What is a Pattress Box?, which is the container behind the socket. By installing a frame, you ensure the internal wiring is fully enclosed and the faceplate is securely supported against the new wall surface. It's a precise solution for a common renovation problem.
The Difference Between Spacers and Extension Frames
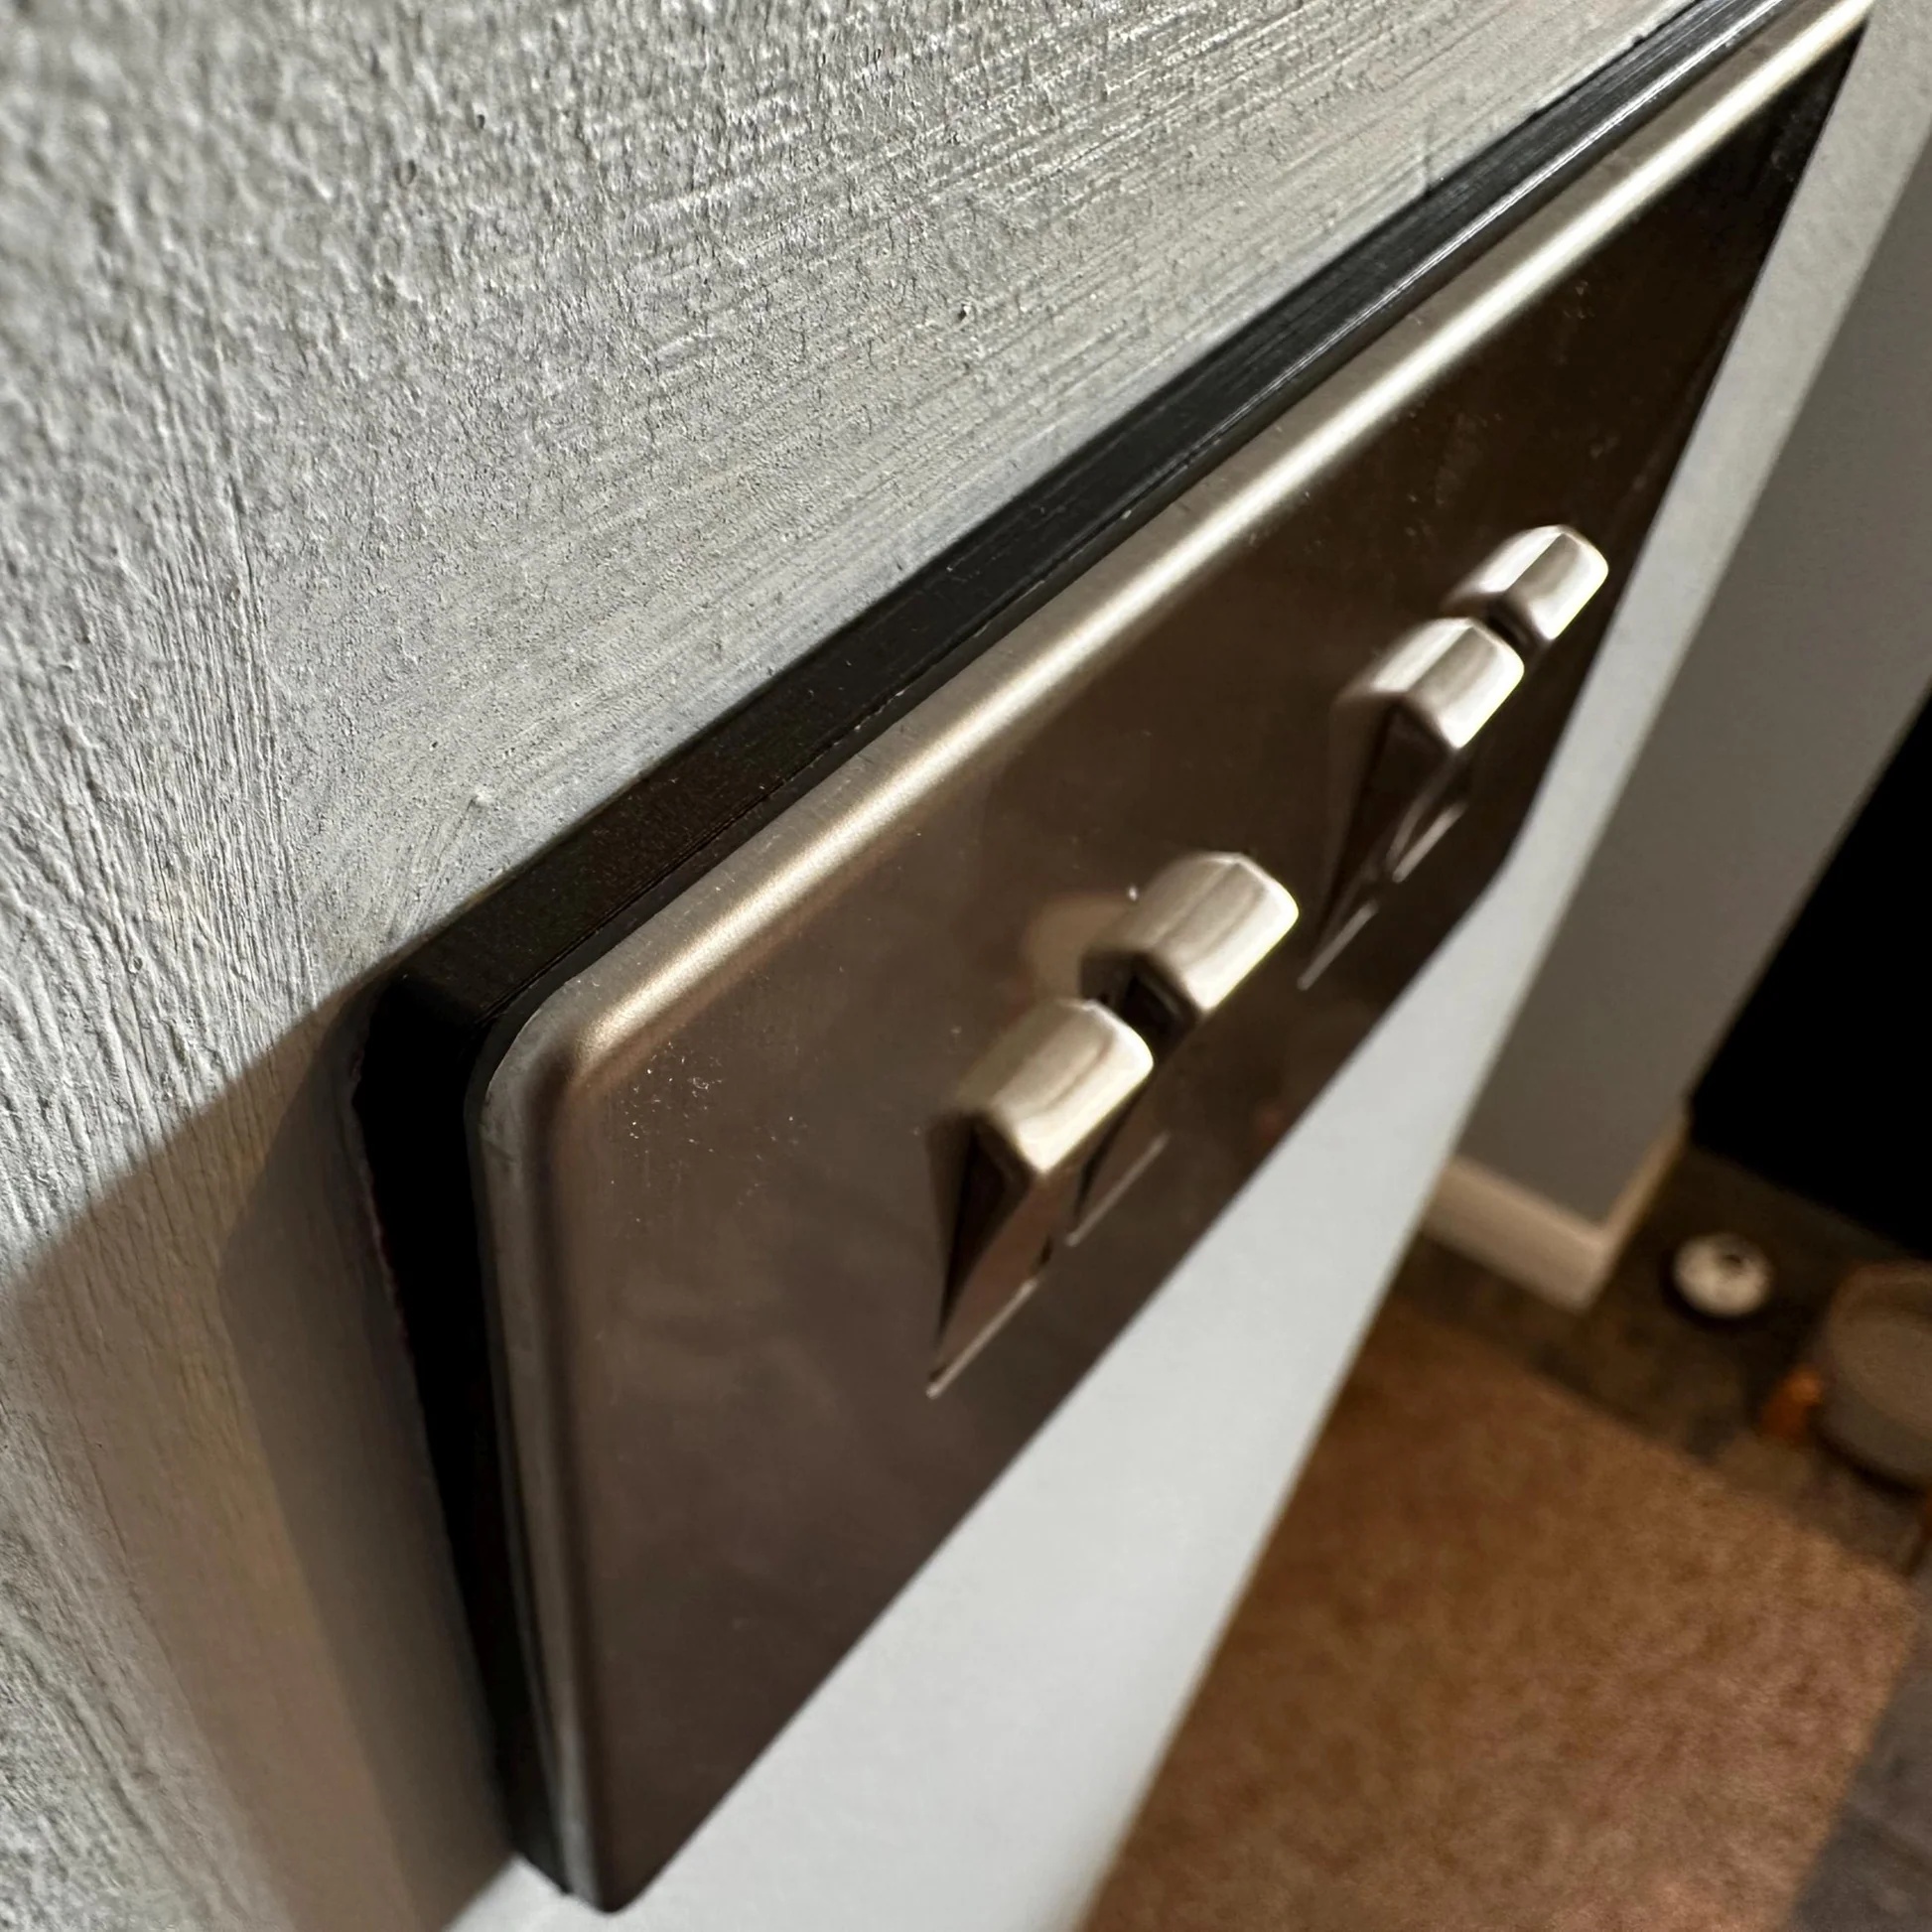
Standard spacers are often small plastic shims that sit only behind the screw points. Whilst these can help with minor depth issues, they don't provide a continuous seal around the edge of the socket. A full extension frame surrounds the entire perimeter. This design is superior because it prevents dust and debris from entering the wall cavity. It also helps maintain the fire-rated integrity of the electrical box. From an aesthetic perspective, a colour-matched frame hides the unsightly gap behind the faceplate. It ensures the finish looks intentional and professional rather than like a DIY compromise.
Signs Your Installation Requires an Extension Frame
It isn't always obvious that you need a frame until you try to screw the socket back into place. You should look out for these specific indicators during your project:
- Spongy movement: If the faceplate flexes or moves when you insert or remove a plug, it lacks proper rear support.
- Screw length issues: If your standard M3.5 screws won't reach the threaded lugs in the backbox, the depth has exceeded the standard installation range.
- Visible gaps: If you can see the edge of the plaster or the side of the backbox from above or below the socket, the enclosure is no longer flush.
If you notice any of these signs, don't try to force the installation. Forcing a socket into a sunken position can strain the internal wiring or cause the faceplate to crack. A dedicated frame provides the necessary mechanical strength to keep the installation safe and secure for years to come.
Common Installation Challenges: From Kitchen Tiling to Wall Panelling
Renovating a room often involves adding layers to the walls that the original electrical installation didn't account for. Whilst a few millimetres of paint or thin wallpaper won't affect your sockets, modern decorative finishes create substantial gaps. These gaps prevent the faceplate from sitting flush against the wall, which compromises both the look and the safety of the fitting. Standard DIY stores often provide one-size-fits-all solutions, but these rarely account for the specific depths of high-end materials. Using bespoke plug socket extension frames is the most effective way to bridge these gaps without resorting to unstable workarounds.
Safety is a global priority in electrical work. International standards, such as the National Electrical Code (NEC), highlight the importance of flush-mounted enclosures to contain potential sparks and heat. In the UK, failing to maintain a flush finish after tiling or panelling can lead to a "spongy" socket that moves during use. This movement eventually loosens the wire connections, creating a fire risk or a fault. If you're dealing with a non-standard depth, you can Build My Spacer online to get a part that matches your wall thickness exactly.
Fixing Sockets After Kitchen Tiling
Kitchen splashbacks are the most frequent cause of sunken sockets. When you factor in the thickness of a ceramic tile plus the layer of adhesive, the total depth often exceeds 12mm. Leaving a gap behind the socket in a kitchen is particularly problematic. Food debris, dust, and moisture can accumulate in the void, leading to hygiene issues or electrical shorts. A custom extension frame creates a solid, continuous bridge. It provides a clean, professional edge that sits perfectly against your grout lines, ensuring no gaps remain for debris to enter.
Extension Frames for Decorative Wall Panelling
Decorative wall panelling has seen a massive surge in popularity, but it presents a unique challenge for electrical accessories. Whether you're using MDF shaker-style panels or solid wood slats, the thickness can range from 9mm to over 20mm. Standard spacers are typically only 10mm deep, which means they can't bridge the gap on their own. If you stack them, the installation becomes wobbly. A single-piece bespoke frame provides the structural support needed for a firm fix. It ensures your high-end panelling isn't ruined by a recessed socket that looks like an afterthought. For a truly seamless result, you might consider ordering a custom fit light switch spacer to match your new interior design.
Uneven wall surfaces also complicate the process. In older properties, plasterboard is often fitted using the "dot and dab" method, which can leave inconsistent voids behind the board. This makes it difficult to keep a multi-gang socket level. A tailored extension frame helps to square up the fitting against the finished surface, regardless of the irregularities in the structural wall behind it. This level of precision is what separates a standard DIY job from a professional-grade installation.
Comparing Generic Spacers with Bespoke Extension Frames
Most electrical wholesalers stock 10mm spacers as a standard item. Whilst these are useful for minor adjustments, they often force installers into a practice known as "stacking". If your wall panelling or tiling has created a 15mm or 25mm gap, a single 10mm component is insufficient. Attempting to use multiple shims creates a layered, unstable foundation that lacks the mechanical strength of a single-piece unit. Using professional plug socket extension frames ensures that the installation remains rigid and secure regardless of the wall depth.
The Limitations of Standard 10mm Spacers
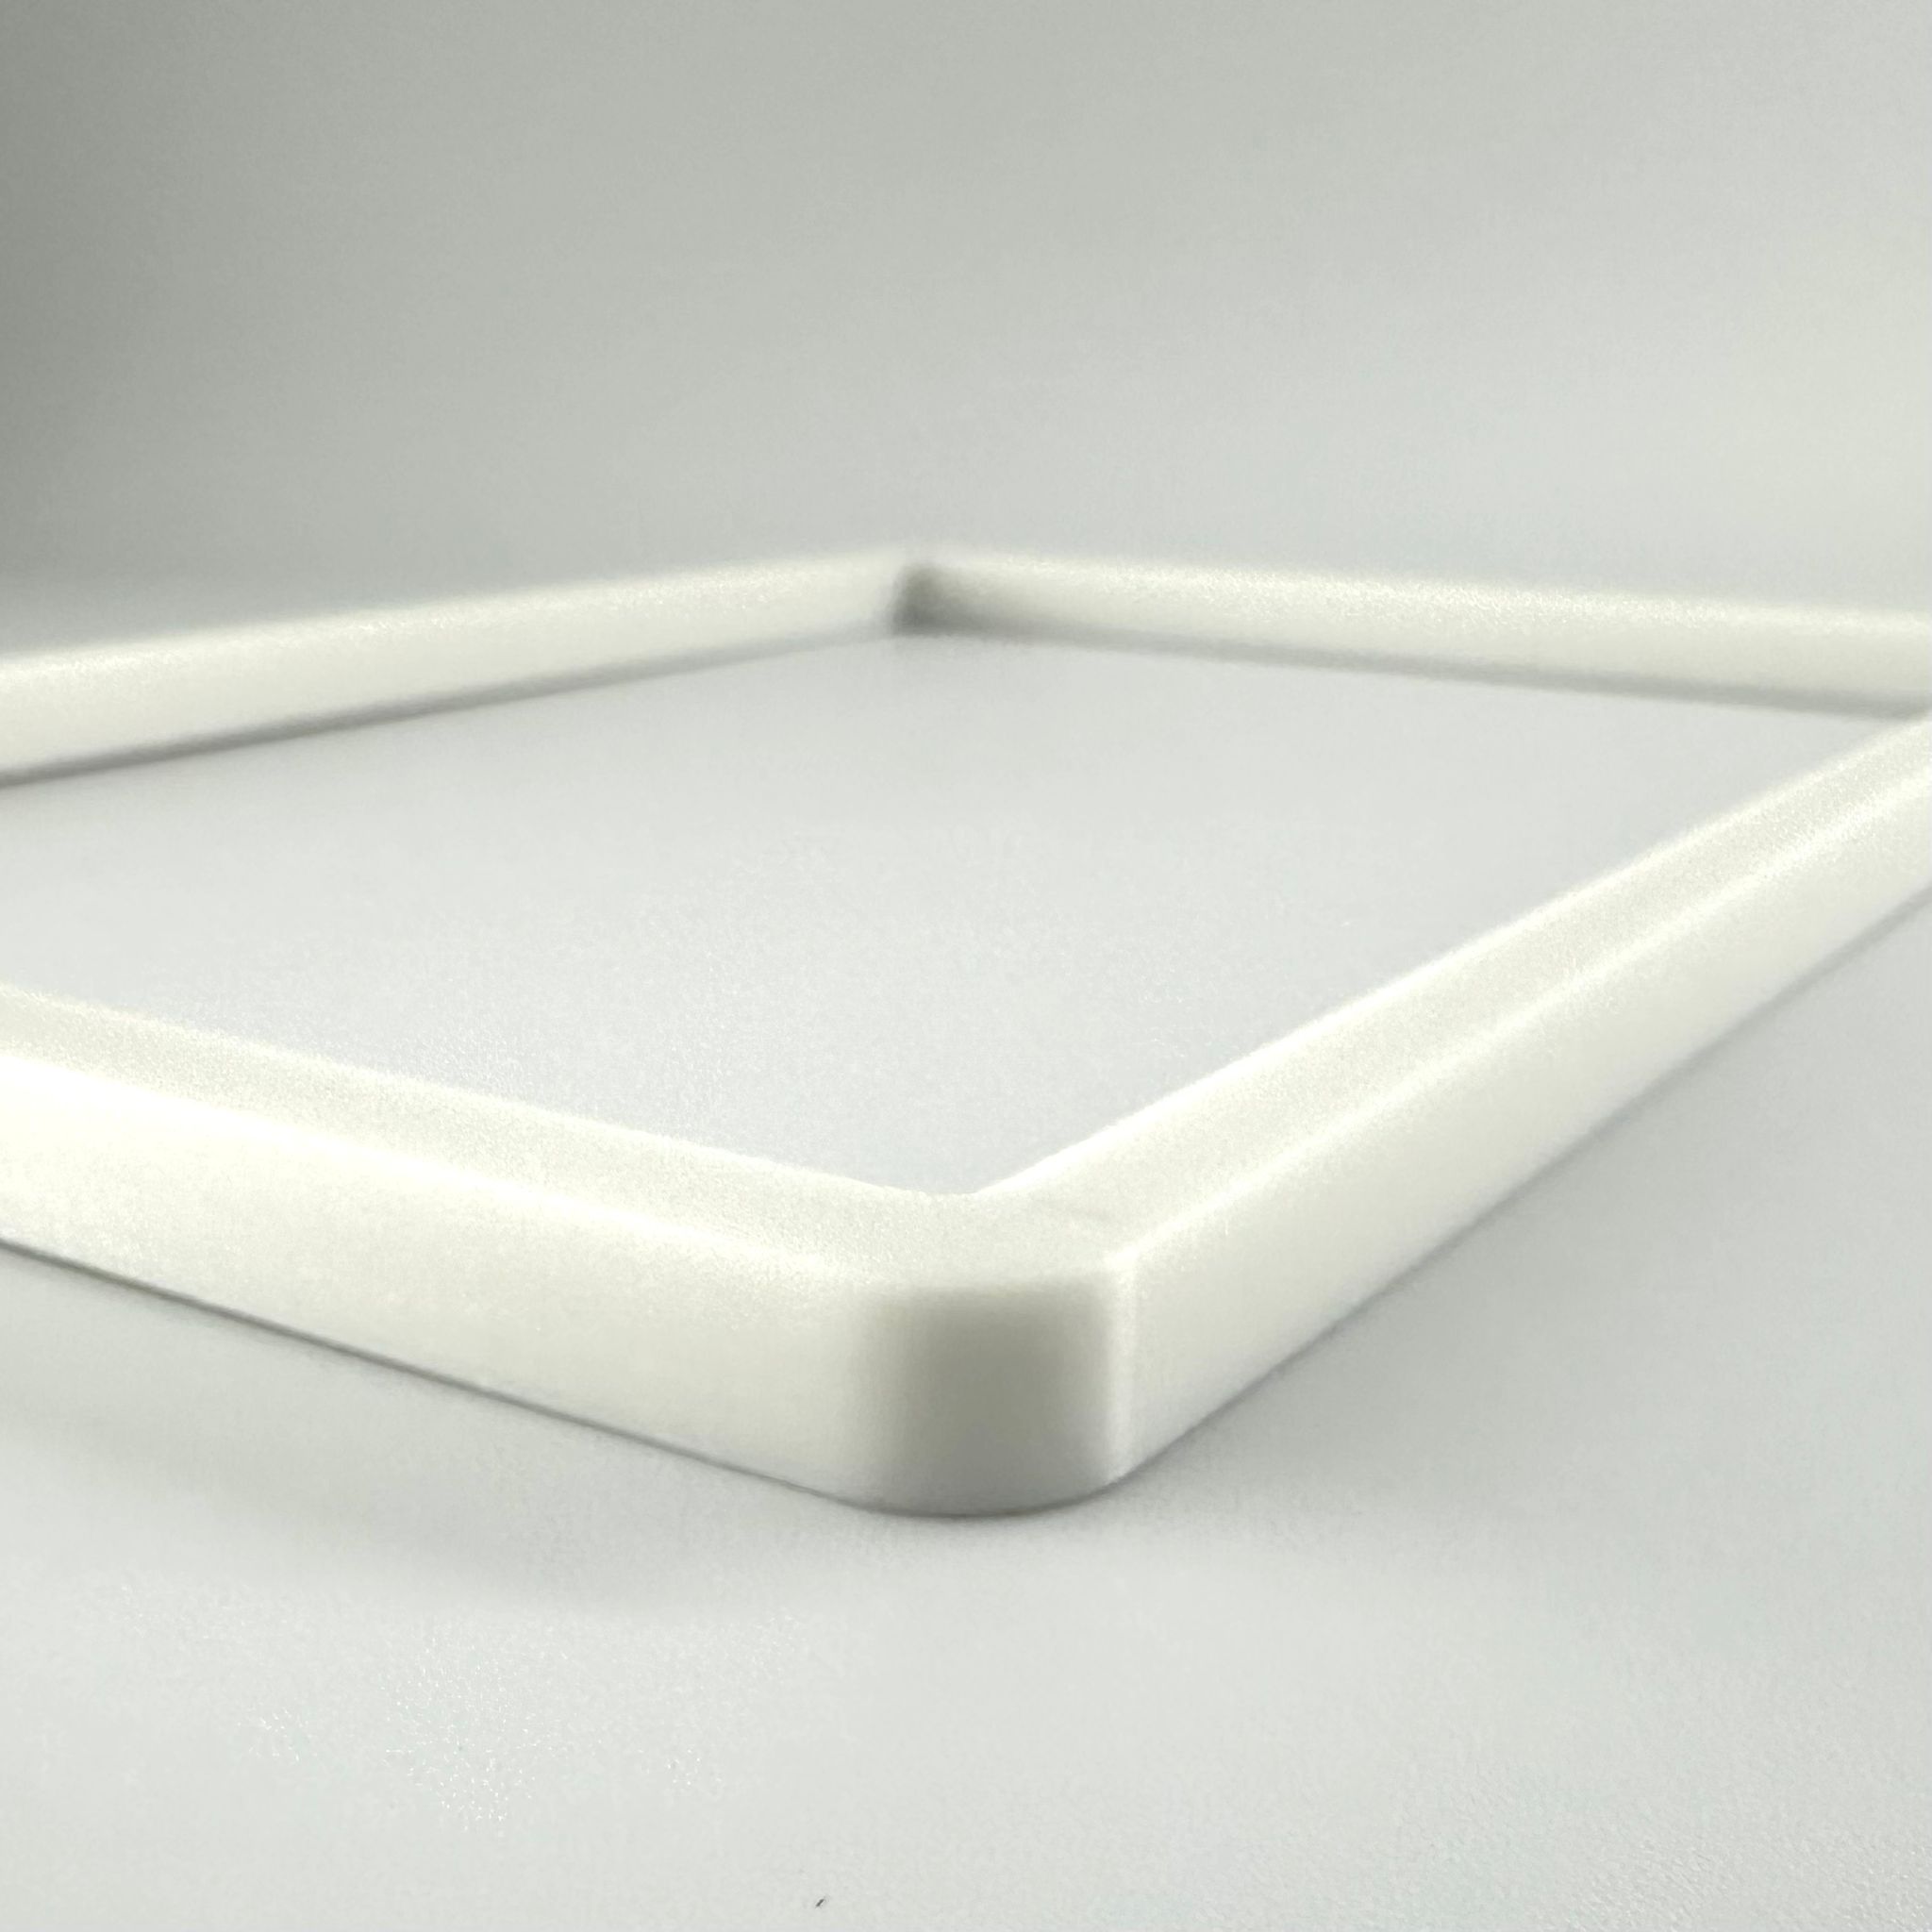
Stacking generic parts often leads to screw alignment errors. As you add layers, the path for the M3.5 screw becomes less secure, which increases the risk of cross-threading the backbox lugs. Visually, the result is often subpar. You can see the distinct layers of plastic from the side, which ruins the clean lines of a high-end renovation. These off-the-shelf parts are also usually limited to basic white or black plastic. This often clashes with premium brushed steel or brass faceplates, making the fix look like a temporary patch rather than a permanent feature.
The Professional Advantage of Bespoke Frames
Choosing bespoke frames eliminates the need for compromise. These parts are manufactured to the exact millimetre required for your specific project. This precision ensures the faceplate sits perfectly flush without any spongy movement. Additionally, a custom frame can provide much-needed wiring space. If you are installing smart home modules or dealing with bulky cables, a deeper frame offers the internal volume required to organise wires without crushing them. To find the exact fit for your project, you can use the Build My Spacer tool to specify your requirements.
A custom-moulded frame acts as a single, solid barrier. This is safer than shims because it forms a continuous enclosure that effectively contains heat and prevents dust ingress. It also accommodates multi-gang configurations that standard retailers simply don't stock. Whether you have a triple-gang socket or a bespoke large extension frame, a made-to-order solution provides a level of stability that DIY hacks cannot replicate. Whilst a bespoke part may involve a small upfront cost, the time saved during installation is significant. You avoid the frustration of hacking parts to fit and achieve a result that looks entirely professional.
How to Measure for a Custom Socket Extension Frame
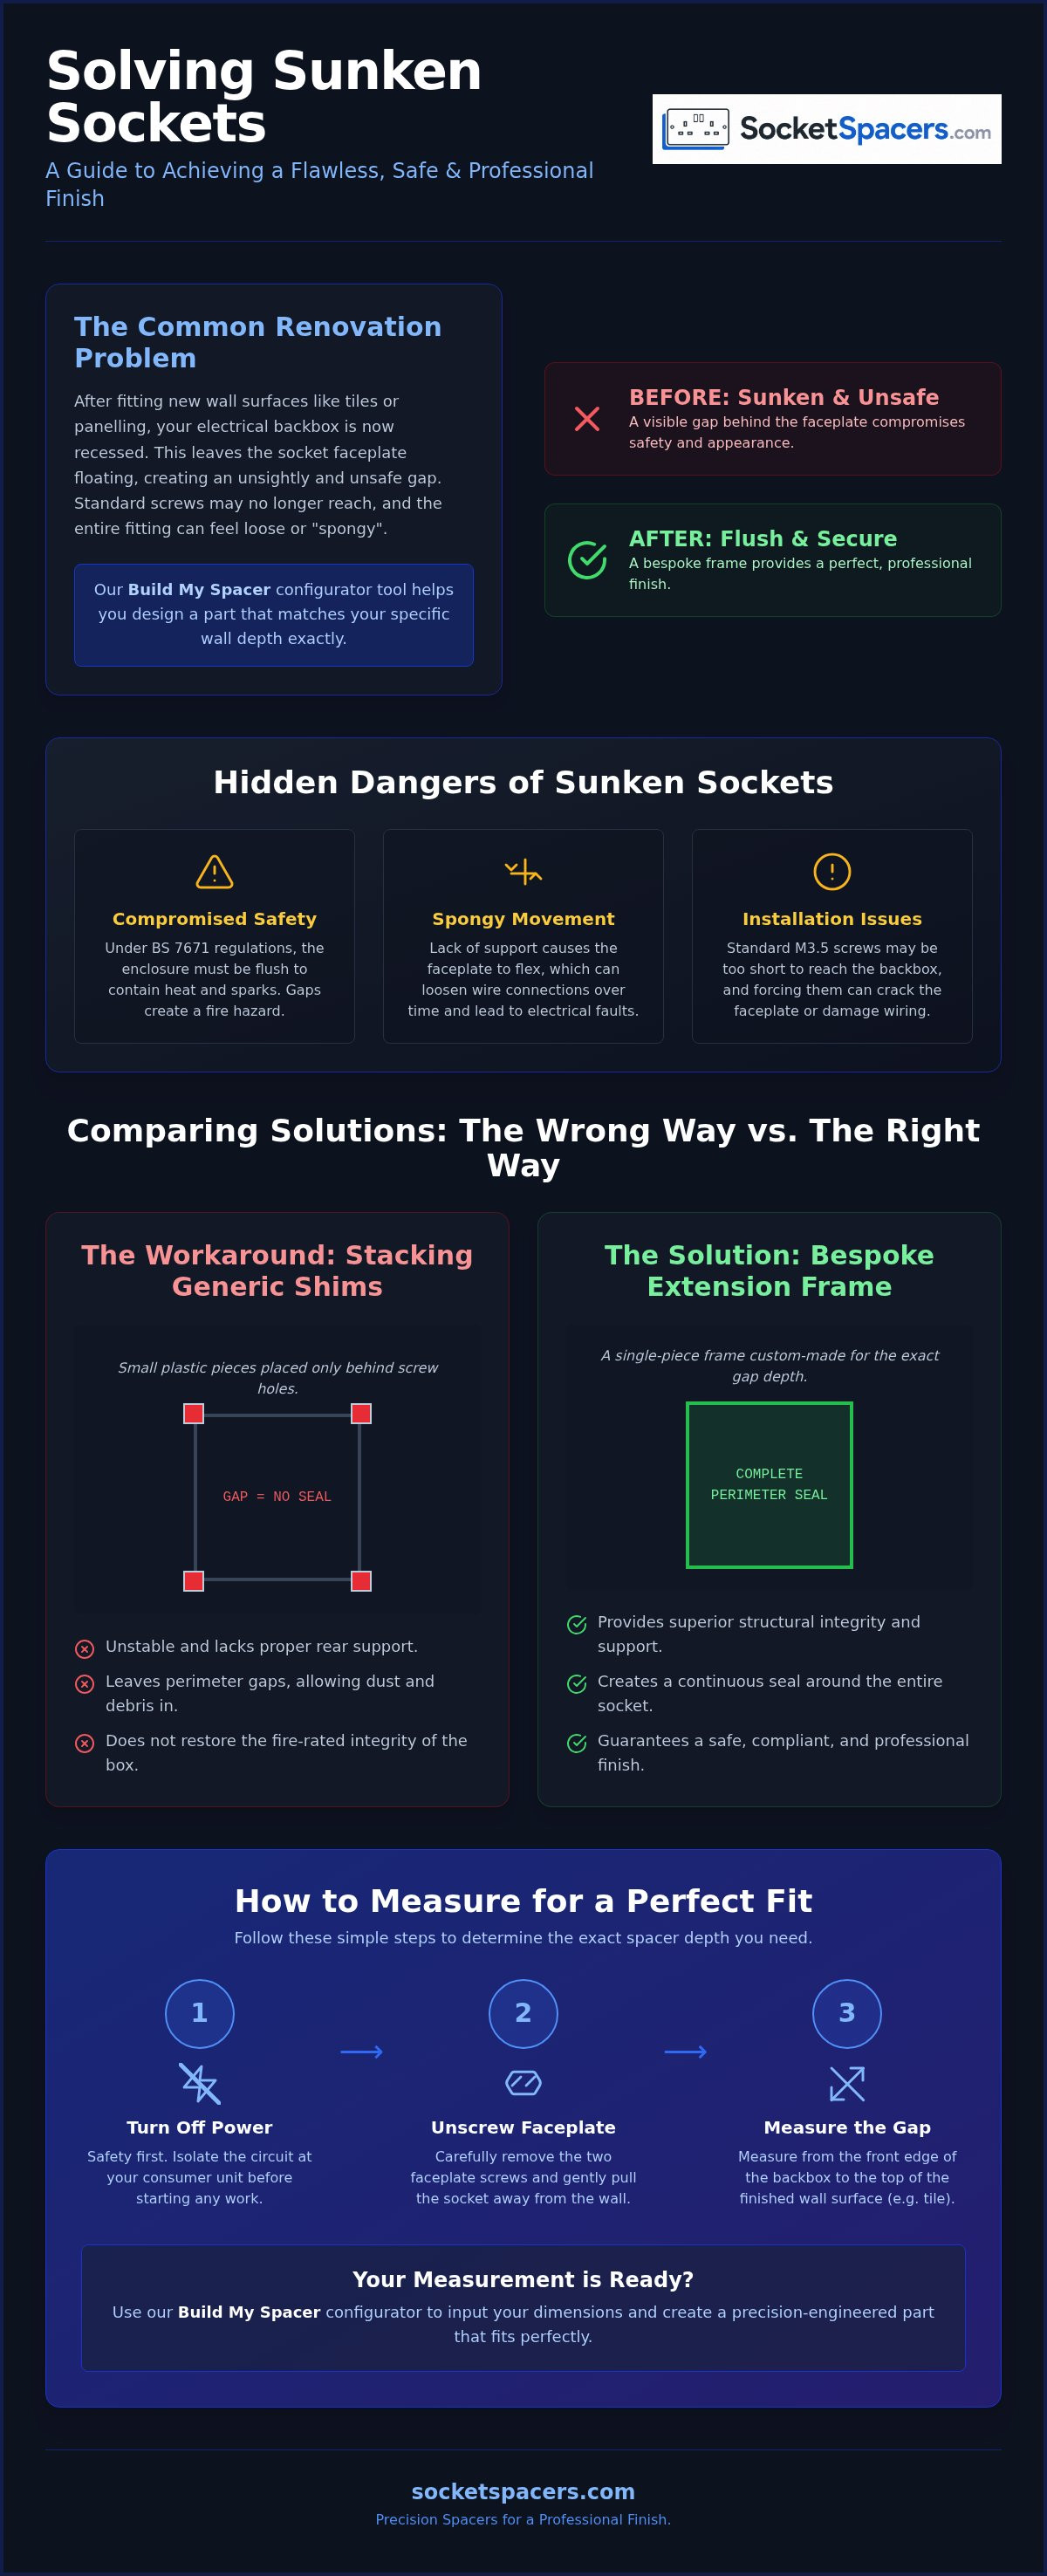
Accuracy is the most critical factor when ordering bespoke parts. To ensure your plug socket extension frames fit perfectly, you must measure the distance from the metal lug of the backbox to the finished surface of the wall. This measurement represents the depth of the void you need to fill. Using a digital caliper is the most reliable method for achieving millimetre precision, but a standard steel ruler or a simple depth gauge can also provide a reliable result if used carefully. When you have your measurements ready, you can use the Build My Spacer configurator to input your specific dimensions and generate a tailored part.
One professional tip is to account for a "proud" finish. The frame should ideally be a fraction of a millimetre shorter than the total depth of the gap. If the frame is exactly the same depth as the wall, or slightly longer, it may prevent the faceplate from pulling tight against the wall surface. By specifying a depth that is roughly 0.5mm less than the measured gap, you guarantee that the faceplate will sit firmly against your tiles or panelling without any visible light gaps or wobbles.
Measuring for Single and Double Gang Sockets
Standard UK single gang accessories typically measure 86mm by 86mm, whilst double gang versions are 146mm wide. When measuring, don't just take a single reading. If the backbox was installed at a slight angle or if the wall plaster is inconsistent, the depth may vary from one side to the other. It's best to measure at both screw points. If the measurements differ, use the larger dimension to ensure the frame provides full support. You should also check that the internal aperture of the frame allows enough room for your hand to organise the cables behind the socket during the final fit.
Special Considerations for Multi-Gang and Large Frames
Multi-gang installations require extra attention to detail. Whether you're dealing with a triple-gang socket or a bespoke large extension frame, you must identify the correct orientation. Frames can be manufactured for either horizontal or vertical setups. A common mistake is measuring the outer edge of the decorative faceplate instead of the gap behind it. The frame is designed to support the internal structure of the socket, so the measurements must focus on the relationship between the backbox and the wall surface. Taking the time to verify the corner radius of your faceplate will also help you choose a frame that remains hidden behind the accessory for a truly professional look.
Configure your bespoke socket extension frame now
Achieving a Professional Finish with SocketSpacers.com
Choosing bespoke plug socket extension frames turns a common technical frustration into a high-end design feature. When you invest in premium wall finishes, the electrical accessories should reflect that same standard of quality. SocketSpacers.com acts as a specialised partner for those who refuse to settle for the "spongy" feel of recessed sockets. By providing a solid bridge between the backbox and the faceplate, our frames ensure that every fitting in your home feels firm and secure. This precision fit significantly reduces installation time for tradespeople and removes the need for unstable DIY workarounds that compromise the final look of a room.
Bespoke Solutions for Every Room
Whilst we have discussed the challenges of kitchens and panelling, the need for precision extends to every corner of the home. Consider a modern media wall installation where bespoke cabinetry or decorative slat walls can create significant voids. A standard spacer simply cannot provide the necessary support for multi-gang media plates. By using a tailored frame, you ensure these central hubs are perfectly flush and structurally sound. Similarly, in bathroom renovations where thick porcelain tiles are used, maintaining the integrity of the electrical enclosure is vital for safety. A flush finish is not just an aesthetic choice; it preserves the professional standard of your electrical system and protects the long-term value of your property by ensuring every fitting is robust and code-compliant.
Ordering Your Custom Frames Online
The process of securing a precision-fit part has been simplified through our specialised online service. Our UK-based manufacturing facility utilises advanced technology to produce each order to your exact specifications, ensuring that no project is too unique for a professional solution. To begin, you can use the Build My Spacer configurator tool to input your specific depth and gang requirements. Once your order is placed, our team organises the production and dispatch of your frames directly to your site or home anywhere in the UK. This methodical approach is why we are a trusted choice for interior designers and electricians who require reliable, made-to-order components. You can rely on our specialist expertise to provide the exact part needed for a perfect result, backed by a history of positive customer feedback and successful installations across the country.
Eliminate the frustration of sunken sockets and achieve a high-quality result in minutes. Use the Build My Spacer tool today to specify the exact dimensions for your project and enjoy the confidence of a perfectly flush electrical finish.
Secure Your Professional Electrical Finish
Achieving a flush finish on renovated walls requires more than just standard hardware. You now understand that precision measurement and single-piece construction are essential for maintaining safety and aesthetic standards. By choosing a solution that is expertly crafted in the UK, you ensure that your home meets technical requirements whilst looking its best. These frames provide the necessary support for your accessories, preventing the movement that often leads to loose connections and electrical faults.
Professional electricians endorse these bespoke depths because they provide the structural stability that stacked shims simply lack. Investing in bespoke plug socket extension frames allows you to complete your project with confidence, knowing that every accessory is secure and perfectly aligned with your new wall surface. Whether you are finishing a high-end kitchen or adding decorative panelling to a lounge, the right frame makes the difference between a DIY compromise and a premium result.
Design your bespoke extension frame now with our Build My Spacer tool
Take the final step to eliminate unsightly gaps and spongy sockets for good. Your home renovation deserves a finish that is as safe as it is beautiful. With the right tools and accurate dimensions, you can achieve a result that looks professional and stands the test of time.
Frequently Asked Questions
Can I stack multiple 10mm spacers to reach a 20mm gap?
You should avoid stacking multiple 10mm spacers as it creates an unstable and layered foundation. This practice often leads to screw misalignment and unsightly gaps between the plastic layers. A single-piece bespoke frame provides far greater structural integrity and a much cleaner finish. For gaps larger than 10mm, it is always safer to use a part manufactured to your exact depth requirements to ensure a firm fix.
Are socket extension frames safe and do they meet UK building regulations?
Yes, plug socket extension frames are safe and help installations comply with BS 7671 wiring regulations. These regulations require the electrical enclosure to be flush with the finished wall surface to safely contain heat or potential sparks. By bridging the gap created by new wall coverings, these frames restore the integrity of the backbox and prevent dust or debris from entering the electrical cavity. They are a critical safety component for renovated walls.
Do I need a different frame for a light switch versus a plug socket?
You will often need a specific frame because light switches and plug sockets can have different faceplate profiles and internal apertures. Whilst both usually follow standard UK sizing for single gang (86mm) or double gang (146mm) fittings, the corner radius and depth requirements vary between manufacturers. It's best to check the specific accessory dimensions before ordering to ensure the frame remains hidden behind the plate once installed.
What is the maximum depth available for a bespoke extension frame?
Bespoke extension frames are typically available in depths ranging from 2mm up to 30mm. This range covers almost every domestic renovation scenario, including thick timber panelling or heavy stone tiling. If you have a specific depth requirement outside of standard stock sizes, you can use the Build My Spacer configurator tool to specify the exact millimetre precision your project demands for a flush finish.
Can I get a custom frame for a non-standard or multi-gang socket?
You can absolutely order custom frames for multi-gang or non-standard configurations. UK-based manufacturing allows for the production of triple, quadruple, or even larger bespoke extension frames that aren't available in standard DIY shops. These are designed to fit the specific orientation of your installation, whether it is a horizontal row of sockets or a vertical stack of switches, ensuring a precise result that matches your unique layout.
What material are the extension frames made from and can they be painted?
These frames are manufactured from a robust, non-conductive thermoplastic called PLA. This material is durable and provides an excellent surface for finishing. You can paint the frames to match your wall or faceplate colour, though we recommend a light sanding and a suitable plastic primer first. This allows the frame to blend seamlessly into your interior design whilst maintaining its structural purpose and non-conductive safety properties.
How do I know if I need longer screws as well as an extension frame?
You will almost certainly need longer M3.5 electrical screws when installing an extension frame. Standard screws supplied with sockets are usually only 25mm or 30mm long, which won't reach the backbox lugs once a frame is added. We suggest measuring your frame depth and adding at least 20mm to determine the screw length required. Most projects involving sunken sockets require 50mm or 75mm screws to achieve a secure and stable fix.
Do extension frames work with smart sockets like Hive or Nest?
Extension frames are ideal for smart sockets like Hive or Nest because these devices often have bulkier rear modules. These smart accessories require more room for internal components and wiring than standard sockets. Using a bespoke frame provides that vital extra volume, preventing the cables from being crushed against the back of the box. This ensures a safer installation and makes the final fitting process significantly easier for both DIYers and professionals.
Electrical Safety
Always isolate the circuit and confirm it is dead before removing a socket or switch faceplate. Only carry out the work if you are competent to do so. If you find damaged wiring, signs of overheating or anything unsafe, stop and contact a qualified electrician.