
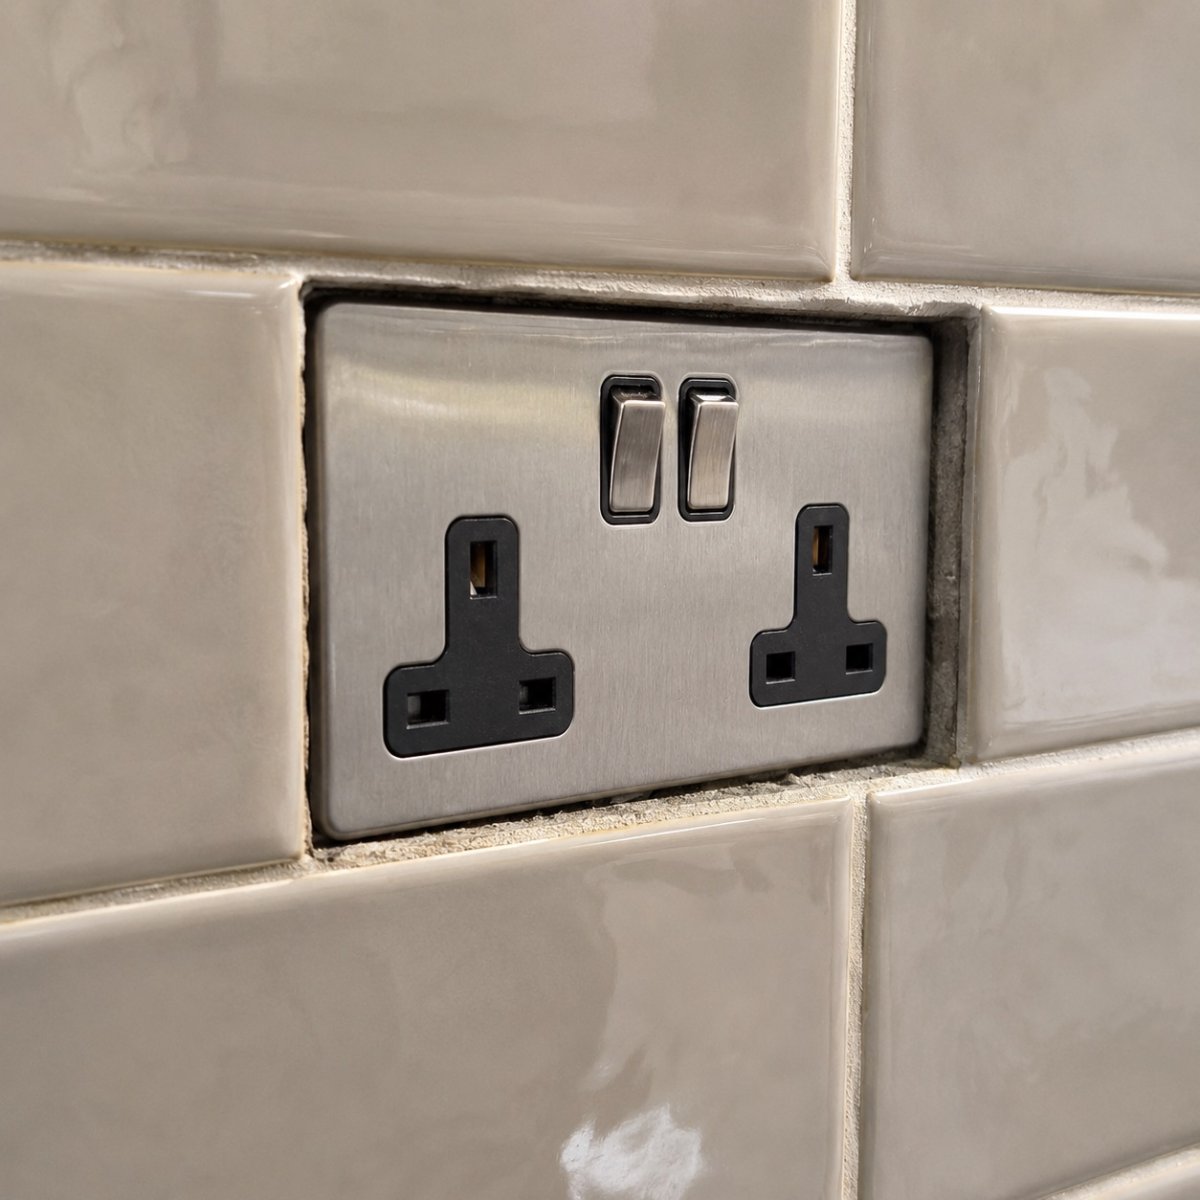
Imagine finishing a premium kitchen renovation with 20mm porcelain tiles, only to discover your plug sockets are recessed so deeply they feel like they're disappearing into the wall. It's a common technical frustration where faceplates wobble when a plug is inserted, and standard screws are far too short to reach the sunken backbox. If you're facing this gap, using a specialist socket spacer for thick porcelain tiles is the only way to ensure a secure, flush finish. By using our Build My Spacer configurator tool, you can specify the exact depth required to bridge the void between your tiles and the electrical box.
We understand that a high-end finish shouldn't be compromised by dangerous gaps or unstable fittings. This article explains how to bridge the distance between recessed backboxes and thick wall coverings for a result that is both aesthetically perfect and safe. You'll learn how to select the right components to meet the latest BS 7671:2018+A4:2026 electrical regulations whilst ensuring your sockets remain rock-solid for years to come. We will cover the risks of ignoring these gaps and provide a step-by-step approach to achieving a professional, trade-standard installation that provides total peace of mind.
Key Takeaways
- Identify the common causes of recessed sockets in modern renovations and why standard ceramic solutions often fall short with 20mm porcelain.
- Discover why a bespoke socket spacer for thick porcelain tiles is necessary to provide structural support and prevent the mechanical stress that leads to cracked faceplates.
- Learn how to accurately measure the gap between your backbox and tile surface to ensure a perfect fit for your extension frames.
- Understand the safety implications of the latest UK electrical regulations and why using certified, non-conductive materials is vital for fire prevention.
- Explore the "slide and screw" installation process that achieves a professional, flush finish without the instability of stacked generic spacers.
Table of Contents
- Understanding the Problem of a Socket Not Flush with Thick Porcelain Tiles
- Why Standard Screws and DIY Shims Often Fail
- The Structural Importance of a Solid Electrical Spacer
- Measuring for Your Custom Porcelain Socket Spacer
- Achieving a Professional Finish with Bespoke Extension Frames
Understanding the Problem of a Socket Not Flush with Thick Porcelain Tiles
In modern UK kitchen and bathroom renovations, the trend has shifted towards large-format, heavy-duty porcelain. Whilst these materials offer durability and a premium aesthetic, they introduce a mechanical challenge for electrical fittings. A sunken or recessed socket occurs when the electrical junction box remains fixed to the original masonry or stud wall, but the new tiled finish sits significantly further forward. This creates a physical void that standard M3.5 screws cannot bridge securely. If you find your faceplate is recessed, you should use the Build My Spacer configurator tool to determine the exact depth needed for a professional fix.

The gap between the backbox and the tile surface isn't just a cosmetic issue. It creates a lack of structural integrity. When a socket is tightened against a void, the only thing holding it in place is the tension of the screws. This results in a wobbly faceplate that moves every time a plug is inserted or removed. For a high-end renovation, this lack of stability feels cheap and unfinished. Addressing this requires more than just longer screws; it requires a rigid support system to fill the empty space behind the tile.
Porcelain vs Ceramic: The Depth Discrepancy
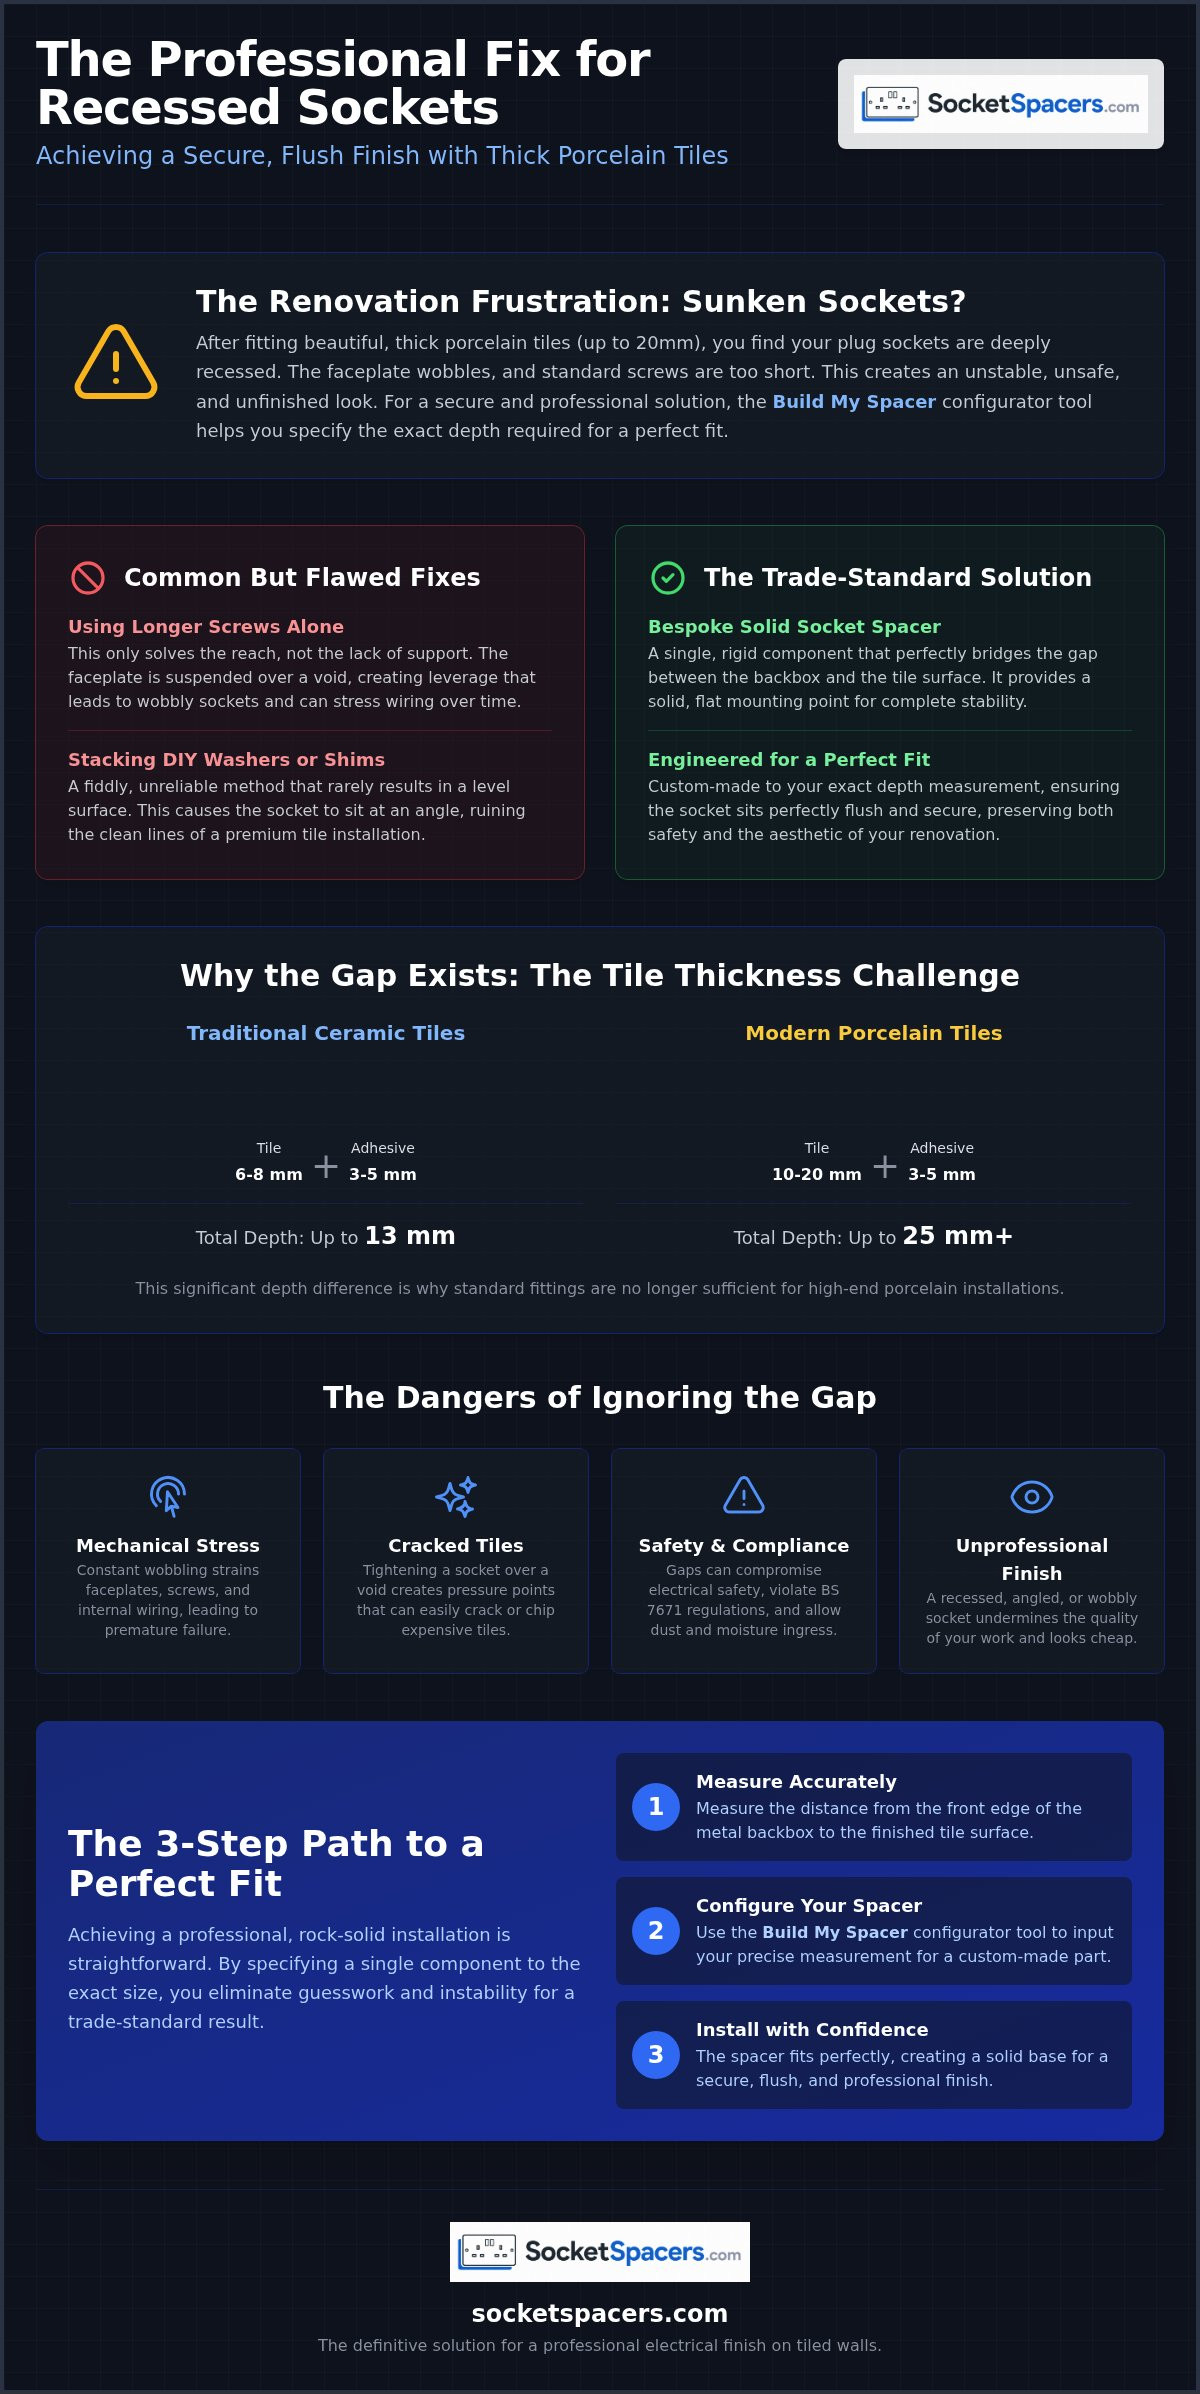
Traditional ceramic wall tiles are typically 6mm to 8mm thick. Most UK electrical backboxes are installed with this depth in mind, allowing the faceplate to sit naturally against the tile. However, porcelain tiles are frequently 10mm, 12mm, or even 20mm thick. When you account for a 3mm to 5mm bed of heavy-duty adhesive, the total wall profile can increase by 15mm or more. This cumulative effect is often compounded by the use of tile levelling systems and backer boards. Unlike grout spacers which merely manage the gap between tiles, a socket spacer for thick porcelain tiles is required to provide a solid bridge between the backbox and the socket faceplate. Without this support, the socket is effectively floating in mid-air.
The Aesthetic and Functional Impact
A socket that isn't flush is a magnet for dust, kitchen grease, and moisture. These contaminants collect in the gaps around the edge of the faceplate, making the area difficult to clean and potentially compromising the electrical components over time. There's also a significant risk of damage to your materials. If you attempt to tighten a socket faceplate without a socket spacer for thick porcelain tiles, the pressure can easily cause expensive porcelain to crack or chip around the mounting points. A flush finish signals a professional-grade installation. It ensures the faceplate sits perfectly flat against the tile surface, providing the necessary resistance for daily use and maintaining the clean lines of your interior design.
Why Standard Screws and DIY Shims Often Fail
When a backbox sits too deep behind a wall, the most common reaction is to reach for longer M3.5 extension screws. Whilst these screws solve the immediate problem of reaching the threads, they fail to address the lack of structural support. Without a socket spacer for thick porcelain tiles, the faceplate is essentially suspended by two thin metal pins over a hollow void. This creates a significant leverage point. Every time you push a plug into the socket or pull it out, you apply mechanical force to a faceplate that has nothing to push back against. This lack of resistance is exactly why sockets feel wobbly and unstable immediately after a renovation.
Generic plastic washers or improvised DIY shims are often used to try and fill this space. However, these methods are rarely successful in the long term. Stacking washers is a fiddly process that often results in an uneven surface, causing the socket to sit at a slight angle. This misalignment ruins the precision of a premium tile installation. If you want to avoid these frustrations, you can use the Build My Spacer tool to specify a single, solid component that provides a perfectly level mounting surface.
The Danger of the Unsupported Faceplate
An unsupported faceplate is a mechanical failure waiting to happen. The constant strain of plug insertion and removal causes the extension screws to vibrate and gradually loosen within the backbox lugs. Over time, this movement can pull on the internal wiring, potentially leading to arcing or loose terminations which are a primary cause of electrical fires. Safety principles reflected in the National Electrical Code emphasise that electrical enclosures must be secure and provide adequate support for the devices they house. If you attempt to over-tighten the screws to stop the wobble without a proper bridge, you risk snapping the plastic faceplate or, worse, cracking the expensive porcelain tiles you've just installed.
Why Silicone is Not a Structural Solution
Many installers attempt to use silicone or decorators' caulk to fill the gap and "glue" the socket in place. This is not a structural solution. Silicone is flexible by design; it cannot provide the rigid compression required to keep a socket stationary under pressure. Additionally, it creates a maintenance nightmare. If you ever need to replace the socket or pull it forward for decorating, you'll likely damage the paintwork or tile finish while trying to cut through the cured sealant. Using a purpose-made UK socket spacer ensures the fitting is mechanically sound and easily removable for future maintenance without the need for messy adhesives.
The Structural Importance of a Solid Electrical Spacer
A socket spacer for thick porcelain tiles serves as a rigid extension of the backbox itself. When you install premium porcelain, you effectively move the finished wall surface away from the original electrical enclosure. Without a solid bridge, this gap remains open, which violates the fundamental principle that an electrical enclosure must be continuous to contain potential faults. By using a bespoke spacer, you create a solid column of support. This allows the socket to be tightened firmly without bending the mounting screws or deforming the plastic faceplate.
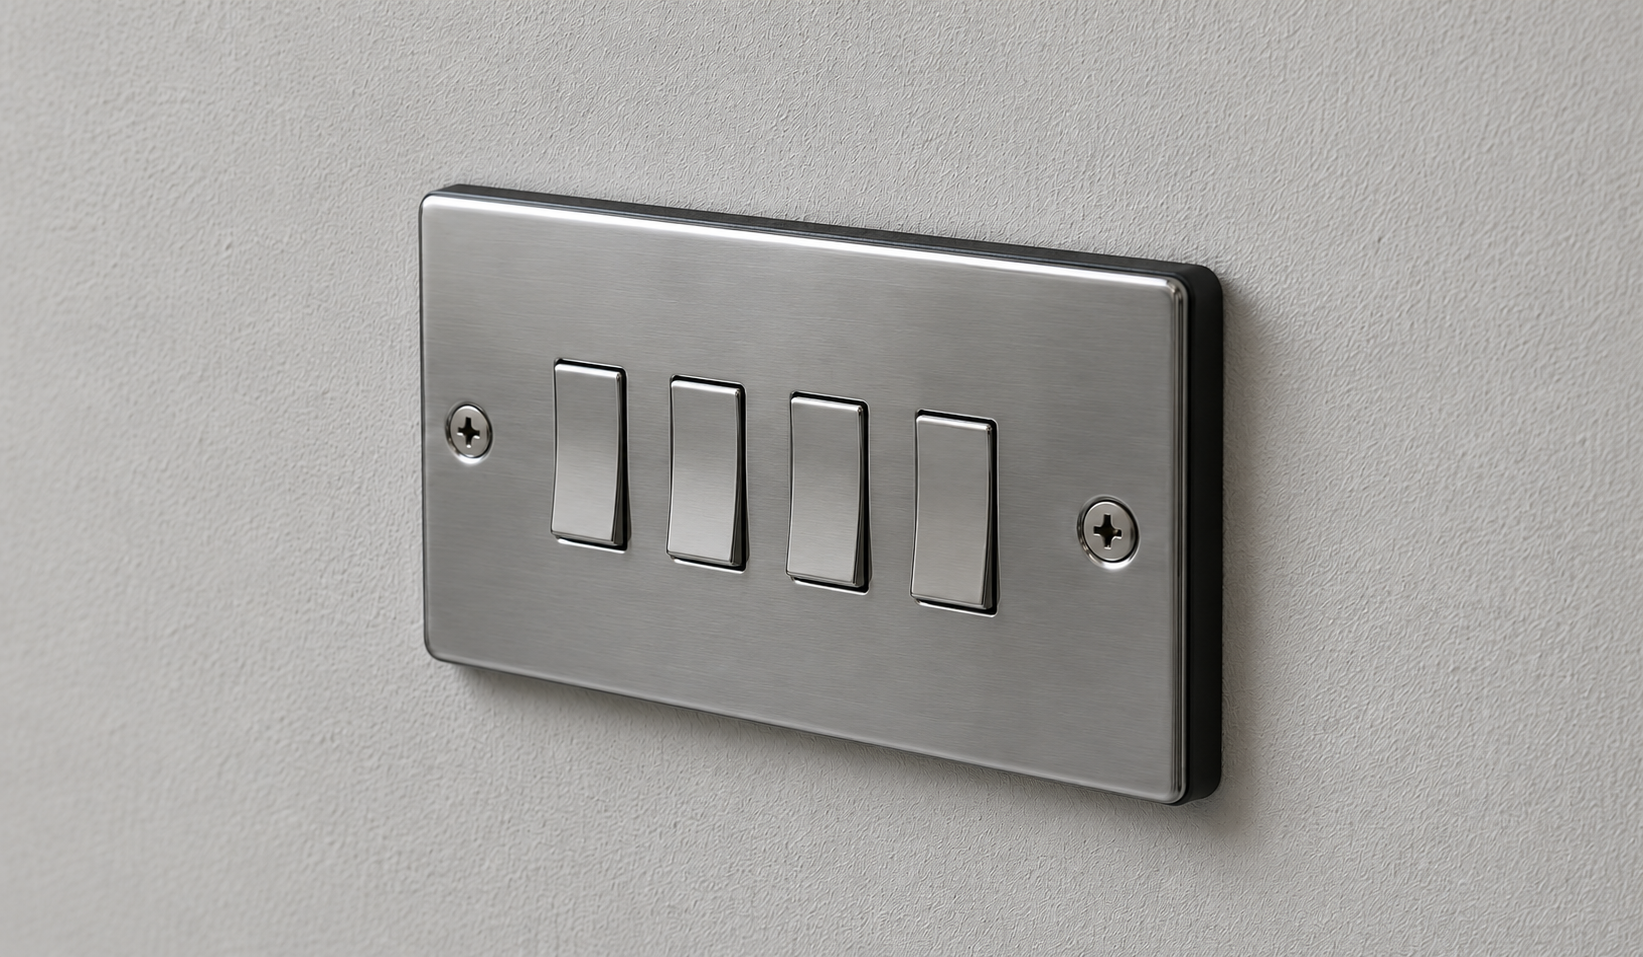
Compliance with safety standards is a primary concern for any UK installation. Whilst we adhere to BS 7671 locally, international guidelines such as the International Residential Code (IRC) Section E3906.5 highlight a universal safety requirement: electrical boxes in non-combustible surfaces should not be set back more than 6mm. Thick porcelain often exceeds this limit significantly. A bespoke spacer ensures your installation remains within safe parameters by bringing the box edge flush with the tile surface, maintaining the integrity of the fire-resistant barrier.
Maintaining the Electrical Enclosure
An open gap behind a socket is more than just a structural weakness; it's a breach in the electrical enclosure. This void allows dust, plaster debris, and kitchen grease to accumulate near live terminals over time. A solid frame acts as a physical barrier, preventing foreign objects from entering the backbox area. It also ensures that live parts cannot be accessed from the side if the faceplate is ever slightly misaligned. Using the Build My Spacer tool allows you to create a precise, non-conductive frame that seals this gap perfectly, ensuring a safe and tidy internal environment for your wiring.
Protecting Your Porcelain Investment
Porcelain is incredibly hard but can be brittle when subjected to uneven pressure. When you tighten a socket onto an unsupported void, you create "point loading" at the screw holes. This concentrated pressure is the most common cause of tiles cracking at the corners during the final fix. A solid spacer distributes this force evenly across the surface of the tile rather than focusing it on the edges of the cutout.
- It prevents the socket from being pushed into the wall cavity during daily use.
- It eliminates visible gaps that ruin the clean lines of a seamless kitchen or bathroom design.
- The use of bespoke, non-flammable materials provides a professional-grade finish that matches the quality of your expensive tile choice.
Measuring for Your Custom Porcelain Socket Spacer
Accuracy is the foundation of a professional electrical finish. Before you can order a socket spacer for thick porcelain tiles, you must establish the exact depth of the void created by your new wall covering. Safety is the absolute priority here. You must isolate the relevant circuit at the consumer unit and use a calibrated voltage tester to confirm the socket is dead before touching any internal components. Once the power is safely disconnected, you'll only need a basic ruler, a pencil, and a steady hand to gather the necessary data. Taking the time to record precise millimetres now prevents the frustration of a misaligned faceplate during the final fix.
Measurement should be taken from the backbox edge to the front of the tile. it's important to remember that adhesive thickness can vary across a wall, so don't assume every socket requires the same depth. By checking each point individually, you ensure a bespoke fit that accounts for the specific nuances of your tiling job.
Step-by-Step Depth Measurement
To begin, unscrew the socket faceplate and carefully pull it forward until it is perfectly flush with the surface of the porcelain. You'll see the gap between the backbox and the socket. Place your ruler so it rests on the front edge of the sunken backbox and read the distance to the finished tile face. It is vital to measure at multiple points, specifically at the top and bottom screw holes. Porcelain tiles are often subject to "lippage" or slight tilting during the setting process, especially when using heavy-duty adhesives. If one side of the gap is 15mm and the other is 17mm, knowing this allows you to choose the most appropriate depth to prevent the socket from sitting at an unsightly angle.
Double Gang and Multi-Gang Considerations
Measuring for double gang units requires even greater attention to detail. Because a double socket has a larger surface area, any unevenness in the tile or the adhesive bed is magnified. A wobbly double socket is particularly frustrating because the physical leverage exerted when removing a plug is much higher than with a single gang unit. Ensure your measurements account for the entire perimeter of the faceplate. If you are working with textured or split-face porcelain, find the "proudest" point of the tile. This is the point that extends furthest into the room. Measuring from this point ensures the spacer provides a continuous bridge across the entire cutout. A bespoke frame is manufactured to match the specific dimensions of UK faceplates, ensuring that no part of the internal wiring is left exposed to the wall cavity.
Order your bespoke socket spacer now
Achieving a Professional Finish with Bespoke Extension Frames
Installing a socket spacer for thick porcelain tiles is a straightforward "slide and screw" process once you have the correct depth. Unlike improvised methods, a bespoke frame is designed to fit precisely over the lugs of your backbox. You simply slide the spacer into position and thread your M3.5 screws through the faceplate and the spacer into the box. This provides a solid, continuous path for the screw, ensuring the faceplate pulls tight against a rigid surface rather than a hollow void. The result is a fitting that feels as secure as if it were mounted directly to the masonry.
The satisfaction of a kitchen finish that looks truly intentional cannot be overstated. When a socket sits perfectly flush against a 20mm porcelain splashback, it demonstrates a level of craftsmanship that generic solutions cannot replicate. This precision prevents the "sunken" look that often plagues high-end renovations where the electrical details were an afterthought. By using a single, solid component, you eliminate the fiddly task of aligning multiple washers, saving time during the final fix whilst achieving a far superior result.
The Bespoke Advantage
A single-piece custom spacer offers superior stability compared to stacking multiple generic shims or washers. When you use multiple small components, each layer introduces a potential point of movement or compression. A bespoke frame is a unified structure that remains rigid over years of use. This structural integrity is essential for maintaining the alignment of your sockets in high-traffic areas. For more technical guides on managing complex electrical layouts in tiled environments, you can explore the SocketSpacers.com Blog.
We manufacture these frames to ensure they either blend seamlessly with your tile or complement your chosen electrical faceplates. Whether you have opted for brushed steel, matt black, or classic white sockets, a well-fitted spacer ensures the transition from tile to metal is clean and professional. This attention to detail is what separates a standard DIY fix from a trade-standard installation that adds value to your home.
Final Checks for a Safe Installation
Once the spacer is fitted and the screws are tightened, you should perform a final stability test. The socket should not move or flex when you insert a heavy plug or operate a switch. Use a spirit level to ensure the faceplate is perfectly horizontal; even a few millimetres of tilt can be noticeable against the straight grout lines of a porcelain wall. Because the spacer provides a flat, even surface, achieving this level finish is much easier than with uneven DIY shims.
The final result is a flush, secure electrical fitting that meets UK safety expectations and protects your porcelain investment for the long term. By taking the time to specify a bespoke solution, you ensure your renovation functions as perfectly as it looks.
Build your custom socket spacer to finish your project.
Secure Your Professional Finish Today
Achieving a flush finish with heavy-duty porcelain requires a structural solution that bridges the gap between the sunken backbox and the tile face. We've explored why standard screws fail to provide mechanical stability and how precise measurement leads to a safer installation. A bespoke socket spacer for thick porcelain tiles ensures your fittings are rock-solid and compliant with UK safety expectations. This approach protects your expensive materials from cracking whilst maintaining the clean lines of your interior design.
Our bespoke UK manufacturing process provides a precision fit that off-the-shelf alternatives can't match. Trusted by professional electricians and tilers, our solution has earned 5-star reviews for solving the most frustrating sunken socket problems. It's the essential finishing touch for any high-end renovation. You can now finish your project with the confidence that every component is engineered for durability and safety.
Build your custom socket spacer in seconds
Take the final step to ensure your renovation is as safe as it is beautiful. With the right measurements and a custom-fit frame, you'll enjoy a professional result that stands the test of time.
Frequently Asked Questions
Is it safe to have a gap behind my electrical socket after tiling?
No, leaving an open gap behind a socket is not considered safe. UK electrical standards, specifically BS 7671, require that electrical enclosures remain continuous to contain potential faults and prevent the spread of fire. A gap allows dust, grease, and debris to accumulate near live terminals whilst removing the fire-resistant barrier. Using a socket spacer for thick porcelain tiles restores this enclosure and ensures the installation remains compliant with safety regulations.
Can I just use longer M3.5 screws if my socket is not flush with the tiles?
Whilst longer screws will physically reach the backbox, they do not provide the necessary structural support. Without a solid spacer, the faceplate is left "floating" over a void, causing it to wobble every time a plug is inserted. This lack of support puts mechanical stress on the screws and can lead to the faceplate snapping or your expensive porcelain tiles cracking. A rigid spacer is essential to bridge the gap and provide a solid mounting surface.
What is the maximum depth a bespoke socket spacer can cover?
Bespoke spacers can be manufactured to accommodate almost any depth required for your renovation. Because they are made-to-order in the UK, they can bridge voids far beyond the capacity of standard plastic washers or off-the-shelf shims. Whether you are dealing with 20mm porcelain or additional depths from backer boards and adhesive, a custom frame provides a precision fit tailored to your specific wall profile.
Do I need a qualified electrician to install a socket spacer?
It is always recommended to hire a qualified electrician for any work involving electrical circuits to ensure compliance with Part P of the Building Regulations. If you choose to inspect the gap yourself, you must isolate the power at the consumer unit and verify the circuit is dead with a tester. An electrician will ensure the spacer is fitted correctly and that all terminations remain secure and safe after the adjustment.
Will a socket spacer work with uneven or split-face porcelain tiles?
Yes, a bespoke spacer is the most effective solution for uneven surfaces like split-face porcelain. By providing a rigid, flat column of support from the backbox to the faceplate, it ensures the socket sits level regardless of the tile's texture. You should measure to the "proudest" or highest point of the tile surface to ensure the spacer provides a continuous bridge that prevents the socket from being pushed into the wall.
How do I know if I need a single or double gang spacer?
The choice depends on the size of the electrical accessory you are fitting. A single gang spacer is designed for standard square fittings, such as light switches or single plug sockets. A double gang spacer is required for the wider, rectangular faceplates used for twin plug sockets. It's important to match the spacer to the gang size to ensure the internal wiring is fully enclosed and the faceplate is supported across its entire width.
What material are these bespoke socket spacers made from?
These spacers are manufactured from professional-grade, non-conductive, and non-flammable materials designed specifically for electrical applications. This ensures they meet the latest UK fire safety requirements whilst providing the structural rigidity needed for heavy-duty porcelain. Unlike improvised wooden or plastic DIY shims, these materials will not degrade or pose a fire risk over time, ensuring a permanent and safe installation.
Can I use these spacers for light switches as well as plug sockets?
Absolutely. Light switches face the same depth challenges as plug sockets when installed against thick porcelain. A bespoke extension frame provides the same flush, professional finish for switches as it does for sockets. Using a socket spacer for thick porcelain tiles across all your electrical points ensures a consistent aesthetic throughout your kitchen or bathroom, providing a truly intentional look for your renovation project.
Electrical Safety
Always isolate the circuit and confirm it is dead before removing a socket or switch faceplate. Only carry out the work if you are competent to do so. If you find damaged wiring, signs of overheating or anything unsafe, stop and contact a qualified electrician.